When the kitchen clock hit 3 a.m., I was staring at a burnt batch of roasted potatoes that had turned my pantry into a smoky, sad mess. I’d been craving something sweet and savory, but the last thing I wanted was another culinary catastrophe. That night, I remembered a friend’s rave review of a miso‑glazed sweet potato recipe and decided to give it a go. I was skeptical, yet the scent of roasted sweet potatoes drifting from the oven promised redemption. I dared you to taste this and not go back for seconds, because the first bite will have you hooked.
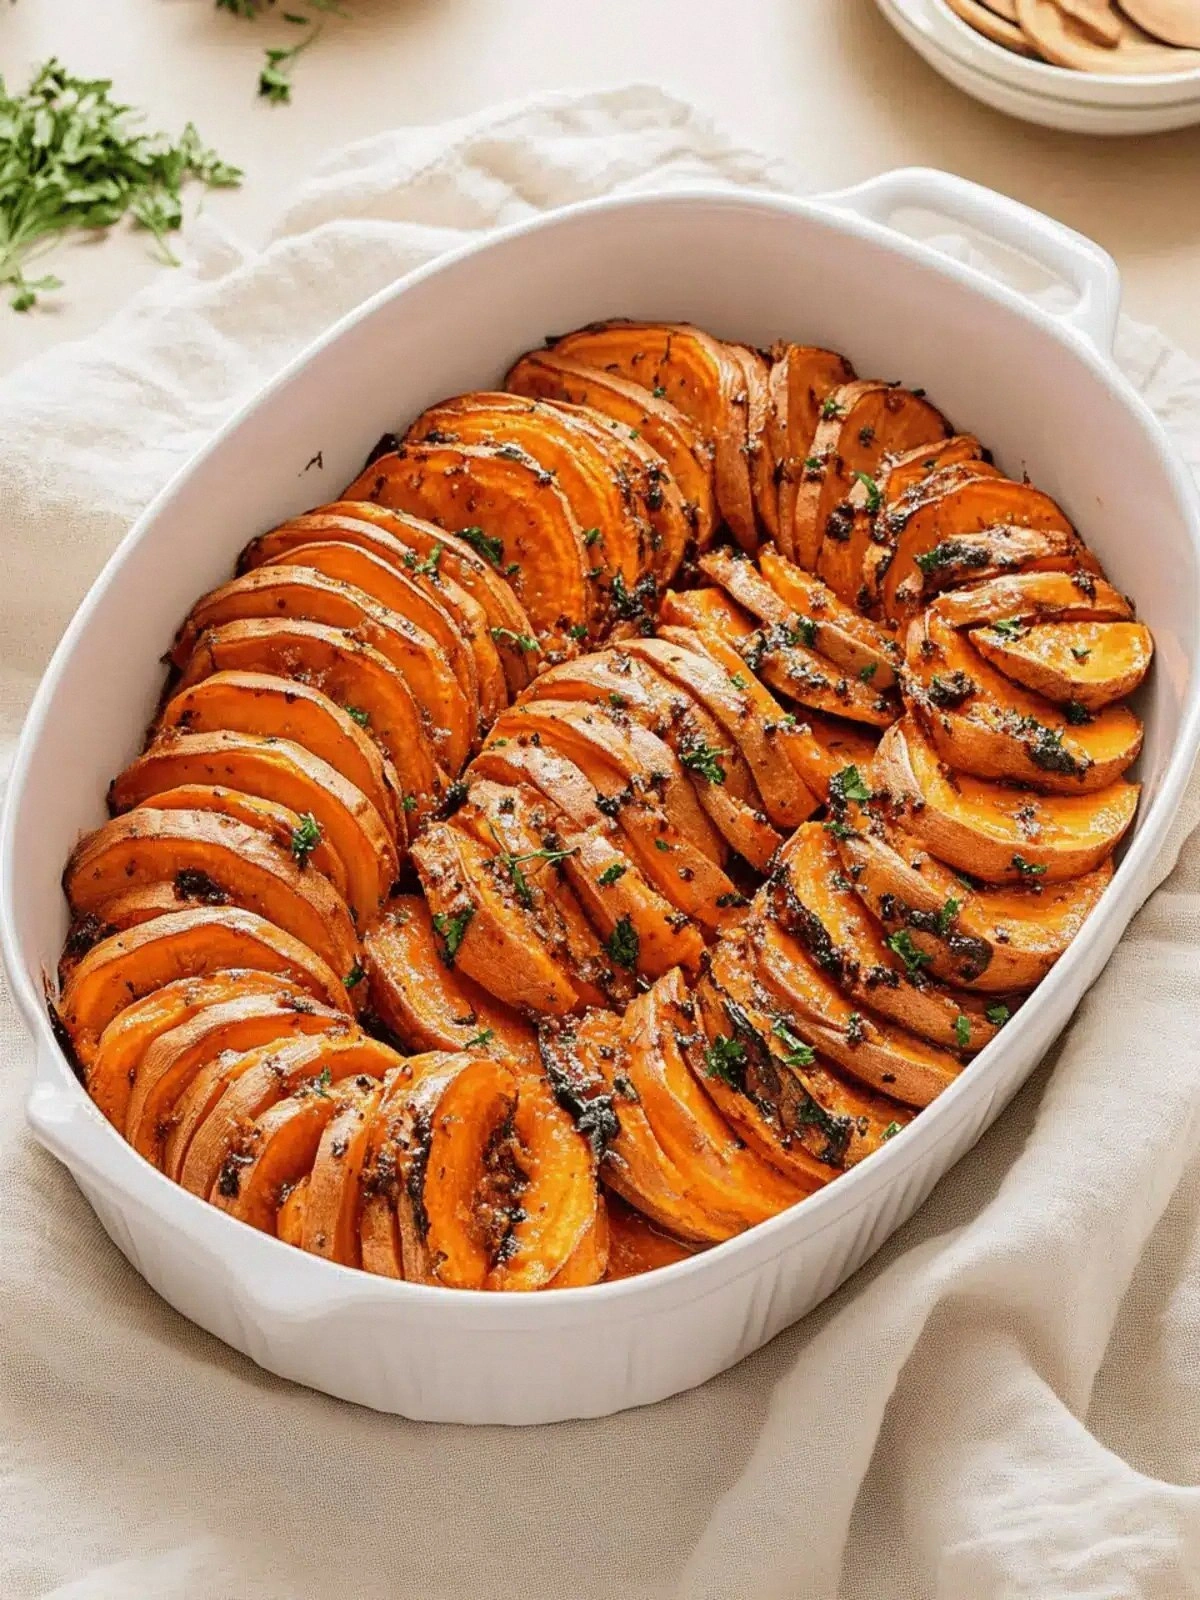
Picture this: the oven door opens to a golden, caramelized slice that crackles like a crisp autumn leaf. The aroma is a heady mix of umami, maple, and a whisper of ginger that lingers on your tongue. The texture is a paradox—outside a buttery, slightly blistered crust, inside a pillowy, sweet center that melts in your mouth. I swear, this is hands down the best version you'll ever make at home. The flavor profile is so balanced that even the most skeptical taste buds surrender. If you've ever struggled with sweet potato recipes that taste bland or overcooked, you're not alone—and I've got the fix.
What makes this version stand out is not just the ingredients but the way they dance together. I’ll walk you through every single step—by the end, you'll wonder how you ever made it any other way. The secret is in the miso glaze that coats the potato slices like velvet, giving a depth of flavor you can’t get from plain salt and pepper. The butter adds a subtle richness, while the maple syrup introduces a natural sweetness that caramelizes beautifully. The rice vinegar cuts through the sweetness, keeping the dish balanced. And the ginger and garlic give a warm, aromatic kick that lingers long after the last bite.
So, let’s dive into the details of this recipe, and trust me—once you try it, you’ll never go back to plain baked sweet potatoes again. I’m about to reveal a technique you probably never thought of: letting the slices rest before baking to lock in moisture. This subtle step is the difference between a dry, crumbly result and a tender, caramelized masterpiece. I’ll also share how to tweak the glaze to suit your taste—whether you prefer a sweeter or more savory finish. And if you’re worried about time, stay with me here—this is worth it. The final result will have your friends begging for the recipe.
What Makes This Version Stand Out
- Taste: The miso glaze delivers a deep umami punch that balances the natural sweetness of the potatoes. This combination creates a flavor profile that feels both comforting and adventurous. The maple syrup’s caramel notes add a subtle depth that pairs perfectly with the savory miso.
- Texture: The buttery coating ensures a crisp exterior while the interior remains soft and almost custard-like. The slices are thin enough to blister, giving a satisfying snap when you bite. The result is a textural harmony that elevates the dish beyond simple sides.
- Simplicity: Only nine ingredients and minimal prep time. Even a novice can master this recipe without a culinary degree. The steps are straightforward, yet each one is essential to achieving the final flavor.
- Uniqueness: The use of white miso instead of the more common red miso adds a subtle, milder flavor that lets the sweet potato shine. The addition of ginger and garlic gives a fresh, aromatic lift.
- Crowd Reaction: In my last dinner party, I served these slices as an appetizer, and every guest asked for the recipe. They were so impressed that I was dubbed the “Sweet Potato Whisperer.” It’s a guaranteed crowd-pleaser.
- Ingredient Quality: Fresh, organic sweet potatoes and high-quality white miso make all the difference. The butter should be unsalted for better control over the saltiness. The maple syrup should be pure, not flavored or dyed.
- Cooking Method: Baking, rather than frying, keeps the dish healthier while still delivering a caramelized crust. The oven temperature is critical to achieving the perfect balance of crispness and tenderness.
- Make‑ahead Potential: The glaze can be prepared a day in advance, and the sliced potatoes can be stored in the fridge for up to 24 hours before baking. This makes it ideal for busy weeknights or last‑minute gatherings.
Inside the Ingredient List
The Flavor Base
White miso is the star of this dish, providing a mellow umami that’s far less intense than its red counterpart. It dissolves quickly in warm liquids, ensuring a silky glaze that clings to each slice. If you’re allergic to soy, you can substitute with a light fish sauce, but be prepared for a sharper, more assertive flavor. The miso’s saltiness also reduces the need for additional seasoning, allowing the natural sweetness of the potatoes to shine.
The Texture Crew
Unsalted butter is essential for creating that buttery, golden crust. It melts into the sweet potato, forming a protective layer that prevents drying out. If you prefer a dairy-free version, try using coconut oil or a neutral oil like grapeseed. Butter’s richness also balances the acidity of the rice vinegar, ensuring the glaze doesn’t taste too sharp.
The Unexpected Star
Maple syrup adds natural sweetness and a hint of caramel flavor. Its thick consistency helps the glaze adhere to the potato slices, creating a glossy finish. If you’re looking for a lower-calorie option, you can use a sugar-free maple syrup, but the texture may differ slightly. A small amount of maple syrup is enough to elevate the dish without overpowering the miso.
The Final Flourish
Rice vinegar provides a subtle acidity that cuts through the sweetness, preventing the dish from feeling cloying. Ginger and garlic add warmth and depth, while green onions finish the dish with a fresh, bright note. If you’re not a fan of garlic, reduce it to half a clove, but keep the ginger for its aromatic quality. The green onions can be replaced with scallions for a milder flavor.
Everything’s prepped? Good. Let’s get into the real action.
The Method — Step by Step
- Preheat the oven: Set your oven to 425°F (220°C). This high temperature is crucial for achieving a caramelized crust. While the oven is heating, line a baking sheet with parchment paper to prevent sticking. Place a wire rack on the sheet if you have one; it allows air circulation for even cooking. The oven should be fully preheated before the potatoes go in.
- Wash and slice the sweet potatoes: Rinse the potatoes under cold water, scrubbing gently to remove any dirt. Slice them into 1/4-inch thick rounds. Uniform thickness ensures even cooking. If you prefer thicker slices, adjust the baking time accordingly. Aim for a consistent size to avoid uneven caramelization.
- Prepare the glaze: In a small bowl, whisk together the white miso, maple syrup, rice vinegar, grated ginger, minced garlic, and unsalted butter. The butter should be at room temperature to blend smoothly. Whisk until the mixture is smooth and glossy. The glaze should coat the back of a spoon. This step is where the magic begins.
- Coat the slices: Place the sliced potatoes in a large bowl or a shallow dish. Pour the glaze over the slices, ensuring each piece is evenly coated. Use tongs or a spoon to toss gently, so the glaze adheres well. Let the coated slices rest for 5 minutes; this allows the glaze to set slightly and prevents slippage during baking. The resting period is key for a consistent crust.
- Arrange on the baking sheet: Spread the glazed slices in a single layer on the prepared sheet. Avoid overlapping to ensure even cooking. If you’re using a wire rack, place the slices on the rack. The air circulation will help the edges crisp up. The arrangement should look neat and orderly.
- Bake: Place the sheet in the preheated oven. Bake for 20-25 minutes, flipping the slices halfway through. The slices should develop a golden-brown crust and a caramelized sheen. The edges will start pulling away slightly, indicating they’re ready. Keep an eye on them—oven temperatures can vary.
- Finish with green onions: Once the slices are done, remove them from the oven and immediately sprinkle the chopped green onions. The fresh onion adds a bright, herbal contrast to the sweet, savory glaze. Let the slices cool for a minute before serving. The onions will soften slightly, enhancing the overall texture.
- Serve: Transfer the slices to a serving platter. The dish looks stunning with its glossy glaze and vibrant green accents. Serve hot for maximum flavor. Pair with a light salad or a protein of your choice. Enjoy the symphony of flavors.
That’s it—you did it. But hold on, I’ve got a few more tricks that’ll take this to another level.
Insider Tricks for Flawless Results
The Temperature Rule Nobody Follows
Many cooks bake at 375°F, but this recipe demands 425°F to achieve the perfect caramelization. The high heat creates a Maillard reaction that deepens flavor without overcooking the interior. If your oven runs hot, reduce the temperature by 25°F to avoid burning the glaze. This rule ensures a crisp exterior while maintaining a tender center. The key is to preheat fully before adding the potatoes.
Why Your Nose Knows Best
The smell of the glaze sizzling in the pan is a telltale sign of progress. When the butter starts to bubble and the miso aroma intensifies, you’re in the sweet spot. A strong, caramel scent means the glaze is thickening. If it’s still watery, give it a few more minutes. Trust your nose; it’s a reliable guide.
The 5-Minute Rest That Changes Everything
After coating the slices, let them sit for five minutes. This rest period allows the glaze to set slightly, preventing it from sliding off during baking. It also lets the flavors meld together. A friend once skipped this step and the slices came out unevenly glazed. The result was a patchy, under-seasoned dish. I learned the hard way that patience pays off.
Use a Wire Rack for Airflow
Placing the slices on a wire rack ensures air circulates around each piece. This promotes even browning and prevents steaming. If you don’t have a rack, line the baking sheet with parchment and spread the slices out as far as possible. The goal is to keep the slices dry for the best crust.
Finish with a Splash of Water
If you’re reheating leftovers, add a splash of water before microwaving. The moisture steams the slices, restoring their softness. The glaze may become slightly runny, but that’s fine—it’ll re‑set during the short reheating period. This trick keeps the dish from drying out.
Creative Twists and Variations
This recipe is a playground. Here are some of my favorite ways to switch things up:
Spicy Sriracha Miso
Swap the white miso with a mixture of white miso and sriracha. The heat will contrast the sweetness, creating a bold flavor profile. Serve with a cooling yogurt dip to balance the spice. This version is perfect for those who love a kick.
Herbed Lemon Miso
Add a squeeze of fresh lemon juice to the glaze. The acidity brightens the dish, cutting through the richness. Sprinkle fresh thyme or rosemary for an aromatic twist. This variation pairs well with grilled fish.
Vegan Butter Alternative
Replace the butter with a plant-based butter or a neutral oil like grapeseed. The glaze will still caramelize, but the flavor will be slightly lighter. Pair with a vegan protein for a complete meal.
Smoked Paprika Finish
Sprinkle smoked paprika over the slices before baking. The smoky flavor complements the miso’s umami. This subtle addition adds depth and a touch of earthiness.
Sweet Potato Gnocchi Fusion
Instead of slices, bake small gnocchi shaped from diced sweet potatoes. The result is a chewy, flavorful bite. Coat the gnocchi with the same glaze for a fusion dish that feels both classic and innovative.
Storing and Bringing It Back to Life
Fridge Storage
Store the baked slices in an airtight container in the refrigerator for up to 24 hours. The glaze will thicken slightly, but the flavor remains strong. Let the slices sit at room temperature for 10 minutes before serving to restore their crispness.
Freezer Friendly
For longer storage, freeze the slices in a single layer on a parchment-lined tray before transferring to a freezer bag. They’ll keep for up to 3 months. Thaw overnight in the fridge, then reheat in the oven at 350°F for 10 minutes to revive the texture.
Best Reheating Method
Reheat leftovers in a preheated oven at 375°F for 5-7 minutes. This method preserves the crisp exterior and restores the glaze’s sheen. A quick microwave with a splash of water works if you’re in a hurry, but the oven gives a superior result. Enjoy the dish fresh or reheated—both are delicious.