Picture this: it’s a rainy Saturday afternoon, the kind that makes you want to curl up with a blanket, a good movie, and something that smells like a carnival in your own kitchen. I was halfway through a marathon of sitcom reruns when a sudden craving for pretzels hit me like a bolt of lightning. I tried the “quick” microwave version from a box, and it turned out about as satisfying as a soggy sock. That disaster sparked a quest, a culinary dare: I was going to create a pretzel so perfectly soft, salty, and addictive that even a seasoned baker would bow down in reverence.
I started experimenting with doughs that were too dry, batters that were too wet, and a whole lot of over‑kneading that left my arms trembling. The kitchen was a symphony of clanking bowls, the hiss of boiling water, and the occasional sigh of frustration when the dough wouldn’t rise. Then, after a few failed batches and a lot of laughs (and a tiny tear from the sheer frustration of a collapsed pretzel), I discovered the secret: a precise balance of hydration, a brief rest, and that magical alkaline bath that gives pretzels their iconic chew and glossy crust. The moment the dough hit the baking soda bath, it puffed up like a tiny hot air balloon, and the aroma that filled the kitchen was nothing short of intoxicating.
What makes this version stand out is the combination of a buttery, slightly sweet interior with a salty, crisp exterior that cracks just enough to let the buttery goodness spill out with each bite. It’s not just a snack; it’s an experience that makes you feel like you’ve unlocked a hidden level of comfort food. I’ll be honest — I ate half the batch before anyone else got a chance to try it, and that’s a confession you didn’t see coming. If you’ve ever struggled with pretzels that turn out tough or bland, you’re not alone — I’ve been there, and I’ve got the fix.
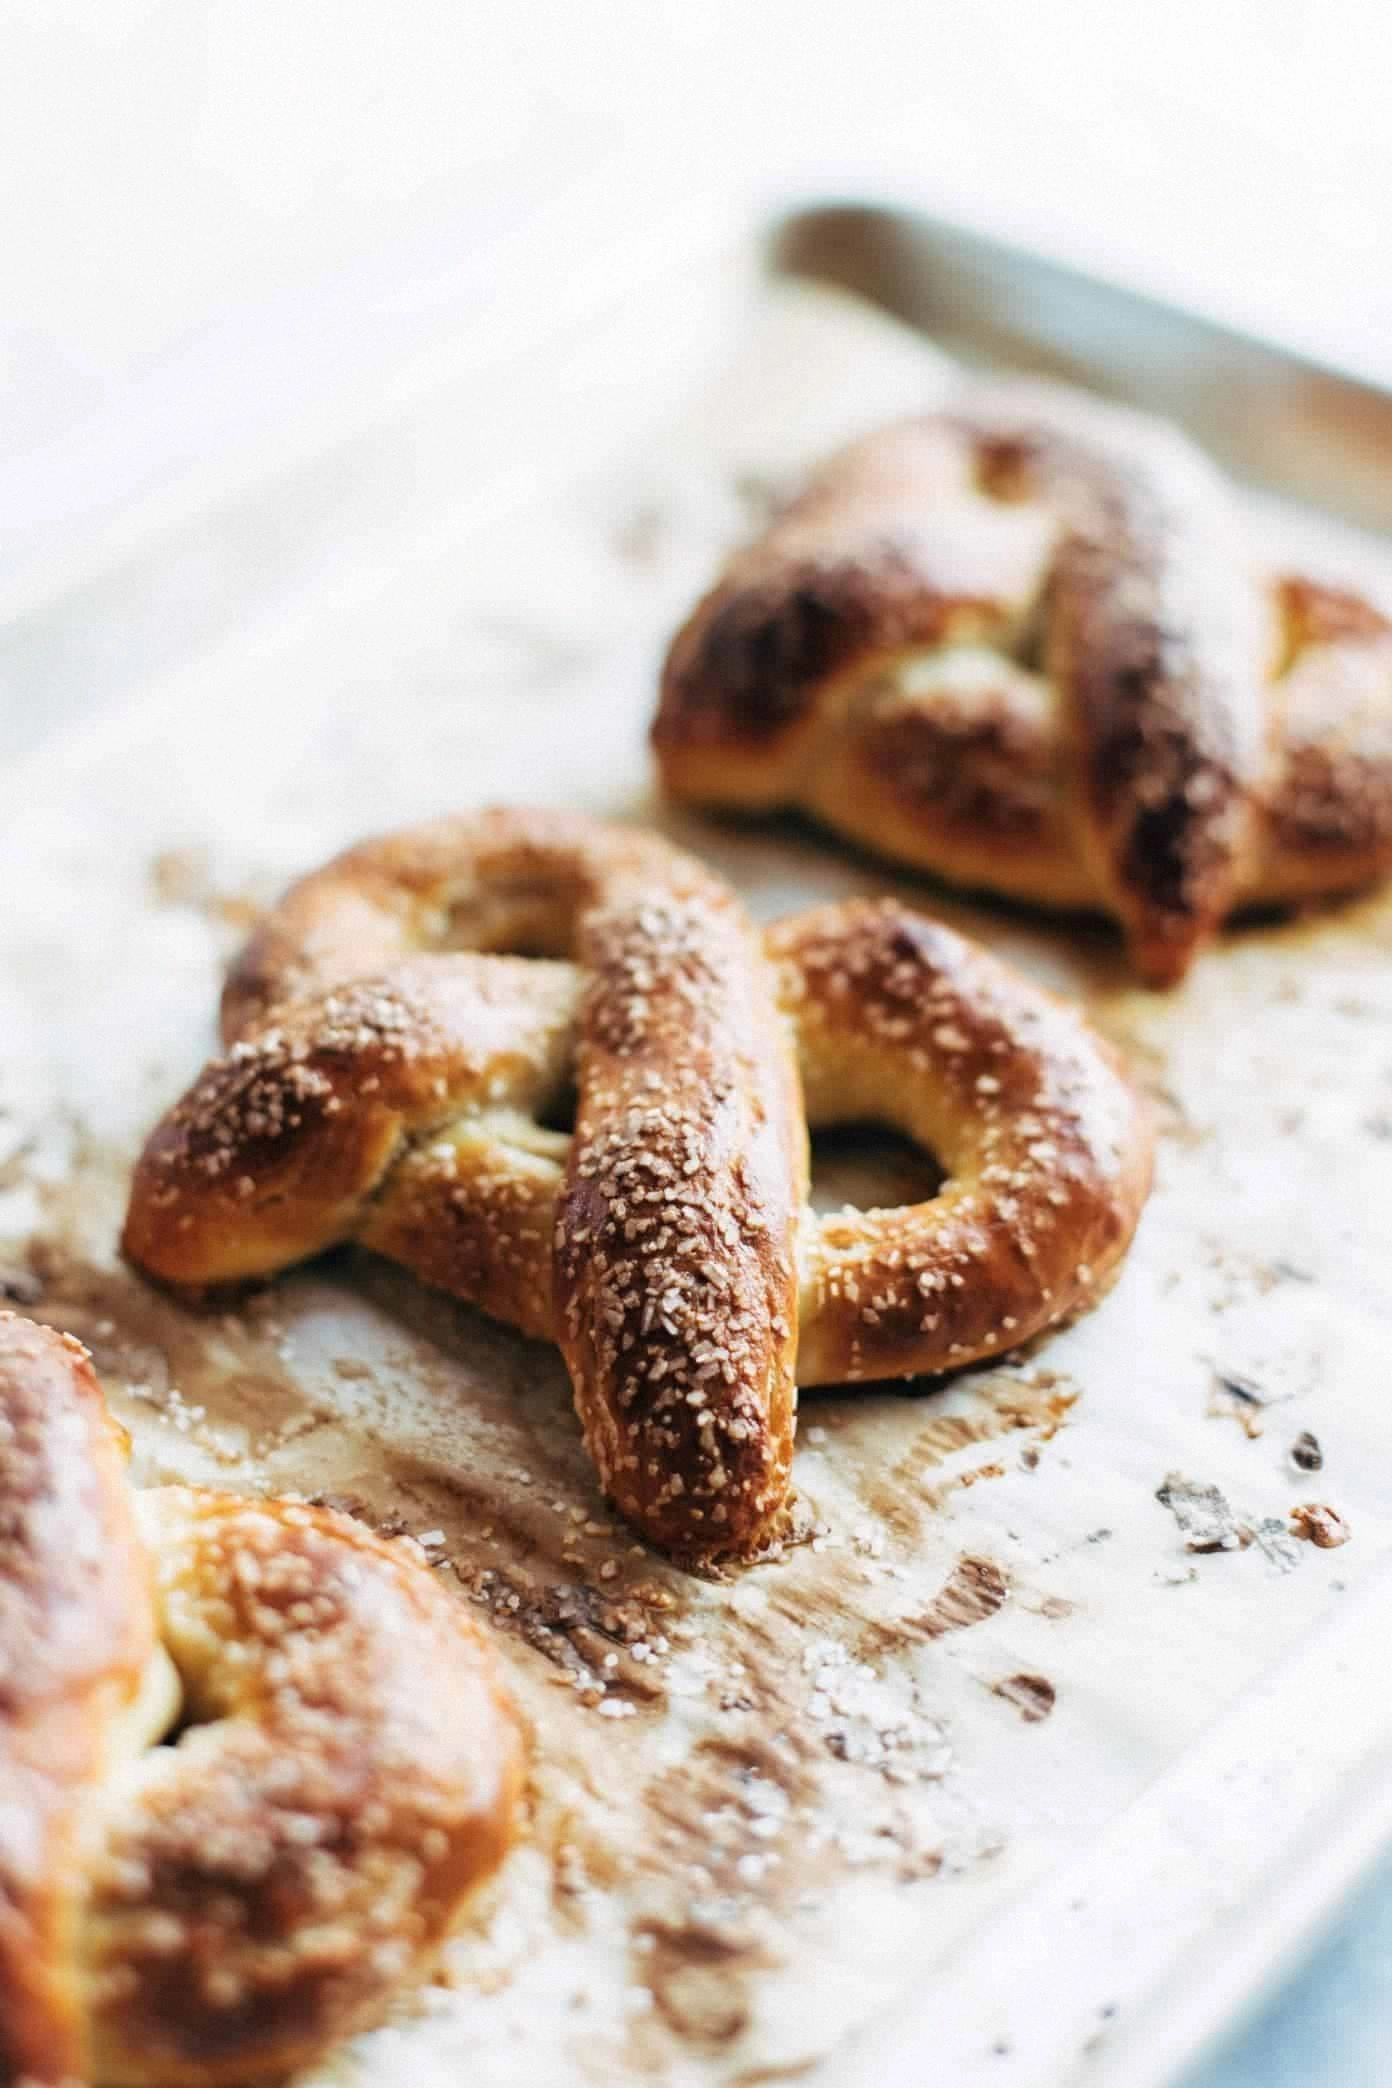
Okay, ready for the game‑changer? I’m about to walk you through every single step — from measuring the flour with the precision of a chemist to that final sprinkle of coarse salt that makes the pretzel pop in your mouth. By the end, you’ll wonder how you ever settled for anything less. Picture yourself pulling these golden twists out of the oven, the whole kitchen smelling incredible, the steam curling around your fingers as you brush on that glossy egg wash. Let’s dive in and make the best soft pretzels you’ll ever taste.
What Makes This Version Stand Out
- Flavor Depth: The subtle hint of sugar in the dough balances the salty crust, creating a taste that dances on the palate like a well‑choreographed waltz.
- Chewy Texture: A 30‑minute rise and a quick dip in a baking soda bath give the interior that coveted chew that stretches like a fresh piece of taffy.
- Simplicity: Only nine pantry staples are needed, and the steps are straightforward enough that even a kitchen rookie can nail it.
- Unique Shine: The egg wash not only adds a beautiful golden hue but also creates a crisp, glossy finish that catches the eye and the taste buds.
- Crowd‑Pleaser: Whether you’re serving a game‑day crowd or a brunch gathering, these pretzels disappear faster than free Wi‑Fi at a coffee shop.
- Ingredient Quality: Using high‑protein bread flour ensures the gluten network is strong enough to hold the shape while staying tender.
- Cooking Method: The alkaline bath is the secret weapon that gives pretzels their signature crust without needing a fancy oven steam tray.
- Make‑Ahead Potential: You can freeze the shaped dough for up to a month and bake them fresh later, saving you time on busy days.
Inside the Ingredient List
The Flavor Base
Flour is the backbone of any pretzel, and I’m using all‑purpose flour for its balance of protein and tenderness. It creates a sturdy gluten network that can stretch without tearing, which is essential for that iconic pretzel shape. If you substitute whole‑wheat flour, expect a denser crumb and a nuttier flavor, but you might lose some of that airy chew. For the best results, sift the flour before measuring to avoid any lumps.
Warm water (about 110°F) awakens the yeast and helps the dough come together smoothly. Too hot and you’ll kill the yeast; too cold and the rise will be sluggish. I recommend using a kitchen thermometer to get it just right. If you don’t have one, test the water by dipping a finger — it should feel pleasantly warm, not scalding.
Sugar isn’t there to make the pretzel sweet; it feeds the yeast, giving it a boost during the rise. A tablespoon is enough to coax the yeast into action without making the dough overly sweet. You can swap honey for a subtle floral note, but remember to reduce the amount of liquid slightly.
The Texture Crew
Yeast: Instant yeast works wonders because it doesn’t need proofing, saving you precious time. It’s the catalyst that turns a simple dough into a fluffy, airy masterpiece. If you’re using active dry yeast, dissolve it in the warm water first and give it a minute to foam.
Salt: A teaspoon of salt enhances flavor and strengthens the gluten network, giving the pretzel its characteristic bite. Skipping this will result in a bland, flat‑tasting pretzel that feels more like a plain biscuit. For a twist, try flaky sea salt on top for a burst of crunch.
Butter: Melted butter adds richness and a subtle tenderness to the interior. It also contributes to a slightly golden hue once baked. If you’re dairy‑free, replace it with olive oil, though the flavor profile will shift toward a more savory note.
The Unexpected Star
Baking Soda Bath: This is the secret sauce that gives pretzels their distinctive crust. The alkaline environment causes the dough’s surface to gelatinize, creating that deep brown, glossy finish. Without it, you’ll end up with a plain, pale roll. Remember to dissolve the baking soda fully in hot water — the solution should fizz like a tiny volcano.
Egg Wash: Brushing the pretzels with a beaten egg (or egg white mixed with a splash of water) adds shine and helps the coarse sea salt adhere. It also creates a delicate crispness that snaps under your teeth. If you’re avoiding raw egg, a light brush of milk works as a decent alternative, though you’ll miss some of that glossy sheen.
The Final Flourish
Coarse sea salt is the finishing touch that delivers that satisfying crunch with each bite. It’s best to sprinkle it right after the egg wash while the pretzels are still wet, ensuring the crystals stick. If you prefer a milder flavor, use fine kosher salt, but you’ll lose that delightful pop.
All these ingredients work together like members of a well‑rehearsed band — each one has its solo, but the harmony is what makes the performance unforgettable. Everything's prepped? Good. Let’s get into the real action…
The Method — Step by Step
- Activate the dough: In a large mixing bowl, combine 2 cups of flour, 1 tbsp sugar, 1 tsp salt, and 1 tsp instant yeast. Make a well in the center and pour in 1 cup warm water and 2 tbsp melted butter. Stir with a wooden spoon until a shaggy dough forms. It should feel slightly sticky but manageable. This is the moment where the dough starts to come alive, and you’ll notice a faint sweet aroma as the yeast wakes up.
- Knead to perfection: Turn the dough onto a lightly floured surface and knead for 7‑8 minutes, or until it becomes smooth and elastic. The dough should spring back when you press it with a fingertip. If it feels too stiff, splash a little water; if overly sticky, dust with a pinch more flour.Kitchen Hack: Use the “bench press” method — push the dough away with the heel of your hand, fold it back, and repeat. It builds gluten faster than the traditional roll‑and‑push.
- First rise: Place the kneaded dough in a lightly oiled bowl, cover with a damp towel, and let it rise in a warm spot for 45 minutes, or until doubled in size. Picture a balloon inflating slowly. This is where the magic happens — the yeast ferments, producing carbon dioxide that creates those airy pockets inside the pretzel.
- Divide and shape: Punch down the risen dough and turn it onto a clean surface. Divide it into 8 equal pieces (each about the size of a tennis ball). Roll each piece into a long rope, roughly 18‑20 inches, then form the classic pretzel shape by forming a U, crossing the ends, and pressing them onto the bottom of the U. Watch Out: If the dough snaps while shaping, let it rest for 5 minutes; the gluten will relax and become easier to work with.
- Prepare the baking soda bath: In a large pot, bring 10 cups of water to a rolling boil. Carefully whisk in 2/3 cup baking soda (it will bubble vigorously). Reduce the heat to a gentle simmer. This alkaline solution is the secret to that iconic pretzel crust.
- Boil the pretzels: Using a slotted spoon, gently lower each pretzel into the simmering bath for 30 seconds. They should puff up slightly and develop a glossy sheen. Transfer them to a parchment‑lined baking sheet, letting excess water drip off. That sizzle when it hits the water? Absolute perfection.
- Egg wash and salt: Beat 1 egg with 1 tbsp water. Brush each pretzel generously with the egg wash, then sprinkle coarse sea salt over the top while the wash is still wet. This step creates the signature golden crust and that addictive salty crunch.
- Bake to golden glory: Preheat your oven to 425°F (220°C). Slide the baking sheet into the oven and bake for 12‑15 minutes, or until the pretzels turn a deep, amber brown and the edges start to pull away from the parchment. They should smell toasty, like a fresh bakery on a Sunday morning. Let them cool on a wire rack for a few minutes before serving.
That's it — you did it. But hold on, I've got a few more tricks that'll take this to another level. From flavor‑infused dips to a secret glaze that adds a hint of caramel, the journey doesn't end at the oven door. Stay with me here — this is worth it.
Insider Tricks for Flawless Results
The Temperature Rule Nobody Follows
Never, ever let your dough sit in a drafty kitchen. A consistent warm environment (around 75°F) ensures the yeast works evenly, giving you that perfect rise. I once tried shaping pretzels in a chilly garage and ended up with a dense, gummy texture that reminded me of overcooked rice. Keep the dough covered with a damp towel and, if needed, pop it in a turned‑off oven with the light on — the gentle heat does wonders.
Why Your Nose Knows Best
When the pretzels are in the oven, trust your sense of smell more than the timer. The moment you detect a nutty, caramelized aroma, you’re close to perfect. Over‑baking turns that beautiful gold into a bitter, chalky crust. So, keep the door open just a crack (safely) and let your nose be the final judge.
The 5‑Minute Rest That Changes Everything
After shaping, give the pretzels a brief 5‑minute rest before the baking soda bath. This short pause relaxes the gluten, making the dough more pliable and less likely to tear. I once skipped this rest and ended up with pretzels that split at the twist, looking more like broken breadsticks than elegant knots. A quick pause is the secret handshake between dough and perfection.
Egg Wash Secrets
For an extra glossy finish, add a pinch of sugar to the egg wash. The sugar caramelizes during baking, giving the crust a subtle sweetness that balances the salty topping. If you’re aiming for a truly deep brown, use a mixture of 1 egg yolk and 1 tbsp milk — the yolk adds richness, while the milk prevents the crust from becoming too hard.
Steam Power
Place a shallow pan of water on the bottom rack of the oven while baking. The steam prevents the crust from forming too quickly, allowing the interior to stay soft and chewy. This is the same trick bakers use for artisan breads, and it works wonders for pretzels too. Just be careful not to open the oven too often, or you’ll lose that valuable steam.
Creative Twists and Variations
This recipe is a playground. Here are some of my favorite ways to switch things up:
Cheddar‑Streusel Pretzels
Mix ½ cup shredded sharp cheddar into the dough before the first rise, and sprinkle a cheddar‑bread crumb mixture on top after the egg wash. The cheese melts into pockets of gooey goodness, perfect for cheese‑loving crowds.
Cinnamon‑Sugar Delight
Swap the coarse sea salt for a blend of cinnamon and granulated sugar. Brush the pretzels with melted butter instead of egg wash for a softer, sweeter crust. These are a hit at brunch or as a dessert snack.
Garlic‑Herb Pretzels
Add 1 tsp garlic powder and 1 tbsp dried oregano to the dough. After boiling, brush with olive oil and sprinkle with additional herbs before baking. The result is an aromatic, savory bite that pairs beautifully with hummus.
Chocolate‑Drizzle Pretzels
Once the pretzels have cooled, drizzle melted dark chocolate over them and let it set. The contrast of salty pretzel and bitter chocolate is unexpectedly addictive — a perfect after‑dinner treat.
Everything Bagel Pretzels
Combine poppy seeds, sesame seeds, dried onion flakes, and dried garlic flakes in a bowl. After the egg wash, coat each pretzel with this “everything” blend. It’s the ultimate snack for bagel fans who crave that extra crunch.
Storing and Bringing It Back to Life
Fridge Storage
Place cooled pretzels in an airtight container or zip‑top bag and store in the refrigerator for up to 3 days. To revive, preheat the oven to 350°F and bake for 5‑7 minutes. The gentle heat restores the chewy interior while re‑crisping the crust.
Freezer Friendly
Freeze uncooked, shaped pretzels on a parchment sheet before transferring them to a freezer bag. They’ll keep for up to 2 months. When you’re ready, bake them straight from the freezer at 425°F for 15‑18 minutes; they’ll puff up perfectly without thawing first.
Best Reheating Method
For the ultimate reheating, place pretzels on a baking sheet, spritz lightly with water, and cover loosely with foil. Bake at 350°F for 8‑10 minutes. The splash of water creates steam, reviving the soft interior while the foil protects the crust from over‑drying. Add a tiny splash of water before reheating — it steams back to perfection.