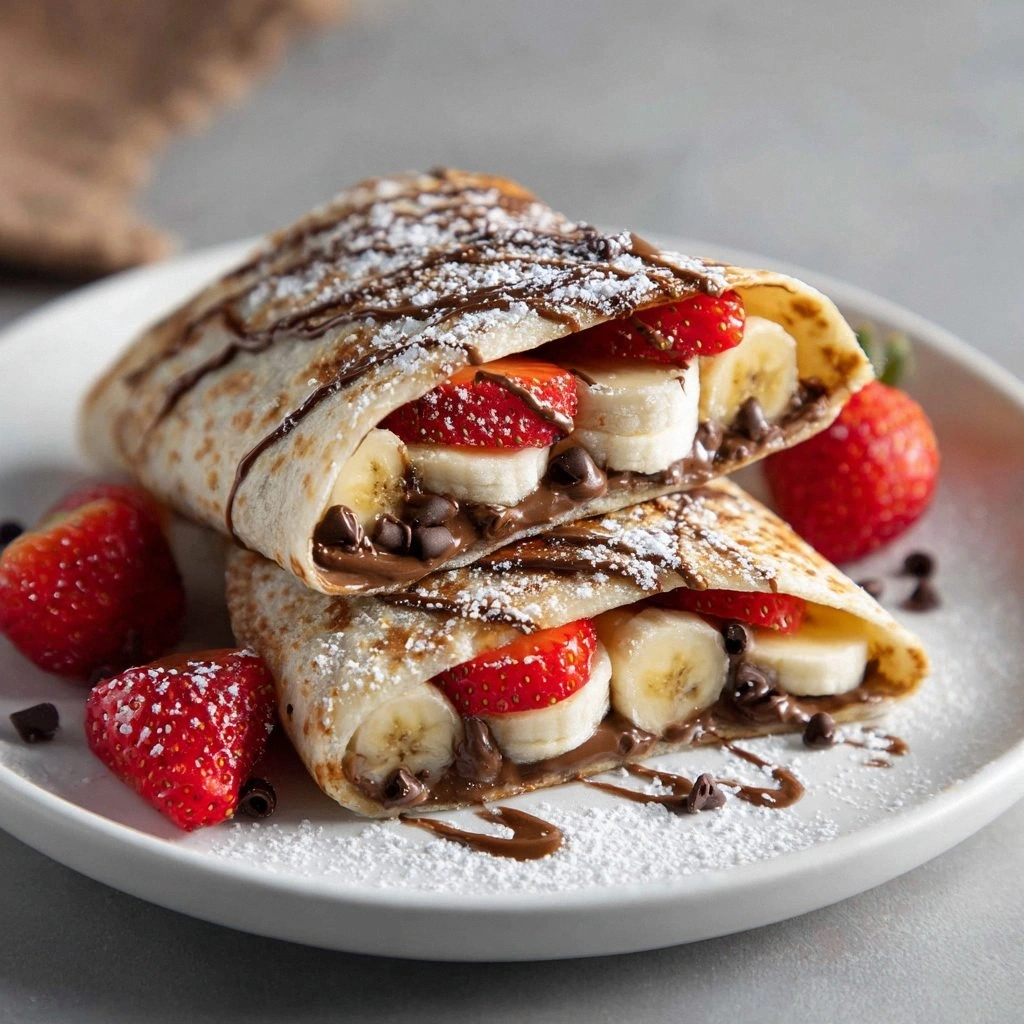
I remember the night I first stumbled upon these Chocolate & Fruit Folded Wraps. I was in a panic, the oven had just betrayed me, and I needed a dessert that would impress my friends before they even noticed the kitchen mess. I grabbed a handful of flour, a splash of cocoa, and a bag of berries, and I thought, “If I can make a wrap that tastes like a chocolate dream and looks like a work of art, this will be a hit.” The result was a golden, flaky pastry that melted in your mouth, leaving a sweet, fruity afterglow that made everyone beg for seconds.
Picture this: the kitchen is buzzing with the clink of pans, the aroma of melted butter and chocolate dancing through the air, and the sound of a timer ticking down. The visual feast begins with a glossy, chocolatey batter that glistens under the kitchen lights. As the wraps bake, they rise to a perfect golden crust, the edges crisping to a satisfying snap that shatters like thin ice. The scent of fresh berries mingles with the rich cocoa, creating a heady perfume that lures even the most skeptical palate.
What makes these wraps stand out from every other dessert out there? It’s the blend of textures—soft, airy inside, with a crackly, caramelized crust that gives way to a burst of juicy fruit. The chocolate isn’t just a flavor; it’s a silky coating that envelops the berries, creating a harmonious marriage of sweet and tart. The recipe’s simplicity allows you to focus on the quality of the ingredients, while the folding technique gives each wrap a delicate, almost ceremonial presentation. I dare you to taste this and not go back for seconds—your taste buds will thank you.
I’ll be honest—when I first baked these, I ate half the batch before anyone else got a chance. The moment the first bite hit your tongue, the chocolate’s velvety coating melts, releasing a burst of berries that dance on your palate. That sizzle when the batter hits the pan? Absolute perfection. The best part? It’s a recipe that feels like a celebration, no matter the occasion. Picture yourself pulling these out of the oven, the whole kitchen smelling incredible, and your friends’ eyes widening in anticipation.
If you’ve ever struggled with desserts that fall flat or taste like they were made by a robot, you’re not alone—and I’ve got the fix. This is hands down the best version you’ll ever make at home. By the end of this article, you’ll wonder how you ever made anything else. Let me walk you through every single step—by the end, you’ll wonder how you ever made it any other way.
What Makes This Version Stand Out
- Flavor: The chocolate batter is a deep, almost bittersweet foundation that pairs beautifully with the bright, acidic notes of fresh berries. It’s not just sweet; it’s a balanced symphony that keeps you coming back for more.
- Texture: The folds create micro‑cavities that trap steam, turning each wrap into a pillowy cloud that bursts with fruit juice when you bite. The edges crisp to a golden crunch that shatters like thin ice.
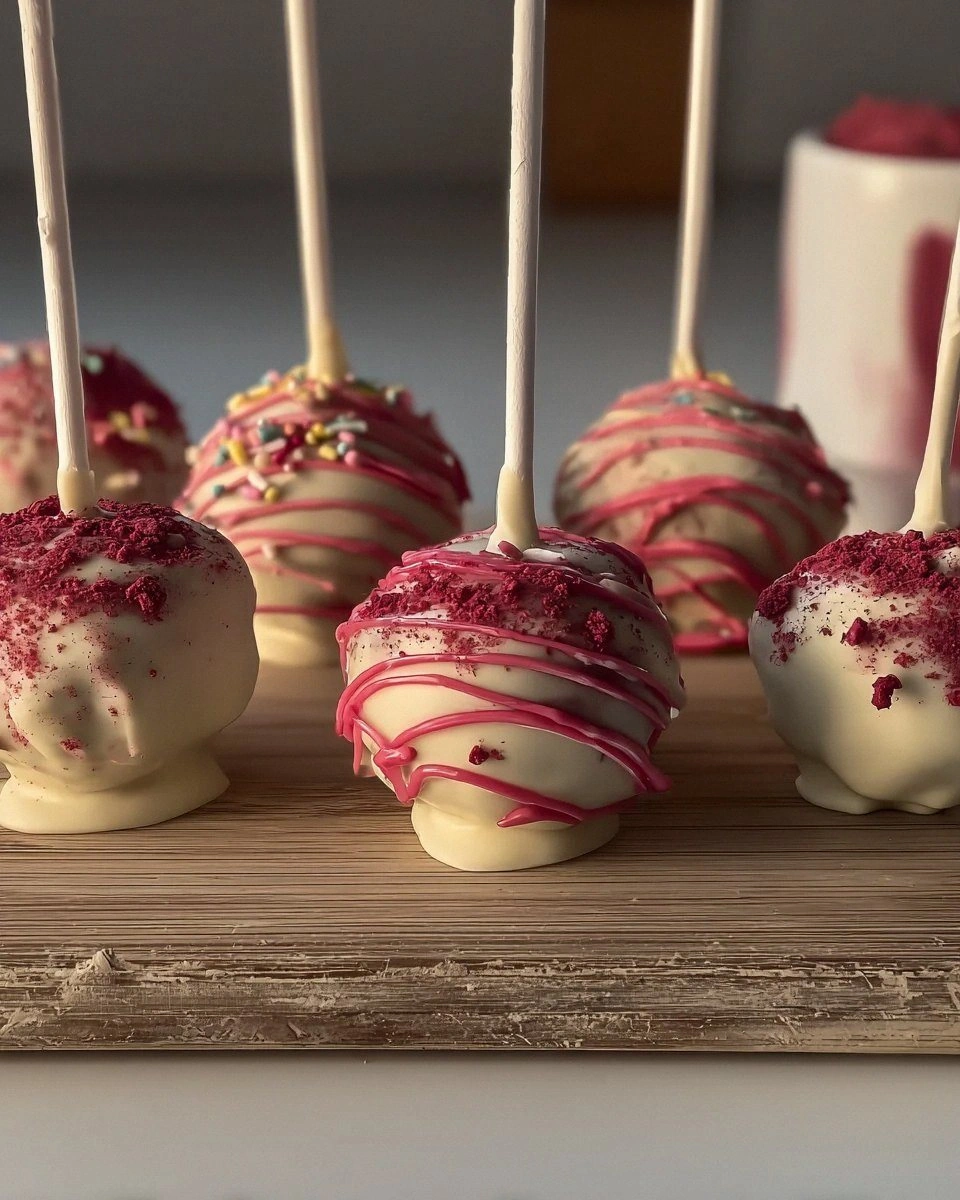
- Visual Appeal: The glossy, chocolate‑coated surface reflects light, making each wrap look like a miniature, edible masterpiece. The contrast of dark chocolate and bright fruit pops on any plate.
- Make‑ahead Friendly: You can assemble the wraps a day ahead, refrigerate them, and bake right before serving. The flavors deepen, and the batter stays moist, giving you a stress‑free dinner party.
- Ingredient Quality: Using high‑quality dark chocolate chips and fresh, seasonal berries elevates the entire dish. The recipe thrives on the authenticity of each component.
- Crowd Reaction: Friends and family swear that the first bite feels like a chocolate‑berry explosion. The reaction is instant—no one can resist reaching for another.
- Versatility: Whether you’re serving them as a sweet snack, a dessert, or a breakfast treat, these wraps adapt effortlessly. Swap berries for mango or pineapple for a tropical twist.
Inside the Ingredient List
The Flavor Base
The core of these wraps begins with the dry mix—flour, cocoa, sugar, baking powder, baking soda, and salt. Each component plays a distinct role: flour provides structure, cocoa adds depth, sugar sweetens, leavening agents create lift, and salt balances the flavors. Skipping any of these will compromise the final texture, leaving the wraps dense or flat. For a lighter bite, reduce the flour to 1.5 cups, but the result will be less sturdy.
The Texture Crew
Butter, milk, and eggs are the wet ingredients that bind everything together. Butter brings richness and a tender crumb, while milk hydrates the flour for a cohesive batter. Eggs act as emulsifiers, holding the mixture together and adding a subtle lift. If you’re lactose intolerant, replace the butter with coconut oil and the milk with oat milk; the outcome remains surprisingly similar.
The Unexpected Star
Dark chocolate chips are the unsung hero that transforms a simple batter into a decadent treat. Their slightly bitter profile counterbalances the sweetness of sugar and berries, creating a complex flavor profile. If you prefer a smoother chocolate experience, choose semi‑sweet chips; if you love intense cocoa, go for 70% or higher. The chips also add a textural contrast—soft chocolate against crisp edges.
The Final Flourish
Fresh berries are the pièce de résistance, offering bursts of juiciness and a vibrant color palette. The berries’ natural sugars complement the chocolate, while their acidity cuts through the richness, leaving a clean finish. If berries are out of season, frozen berries work well—just thaw them and pat dry to avoid excess moisture.
Everything’s prepped? Good. Let’s get into the real action.
The Method — Step by Step
- In a large bowl, whisk together flour, cocoa, sugar, baking powder, baking soda, and salt until well combined. This dry mix is the foundation of our texture; a uniform blend ensures even browning and consistent rise.
- In a separate bowl, whisk the melted butter, whole milk, eggs, and vanilla until the mixture is glossy and slightly thickened. The wet ingredients should be smooth—any lumps will translate to uneven batter.
- Pour the wet mixture into the dry ingredients and stir with a wooden spoon until just combined. Overmixing turns the batter tough; stop as soon as the flour disappears. The batter should be thick yet pourable.
- Fold in the dark chocolate chips gently, ensuring an even distribution. The chips should be scattered like tiny moons across the batter, adding pockets of molten chocolate.
- Divide the batter into 8 equal portions (about 1/2 cup each). This portioning allows for consistent size and ensures each wrap has the same amount of chocolate and fruit.
- Heat a non‑stick skillet over medium heat and lightly grease with butter or oil. Place a portion of batter in the center and spread it into a thin circle using the back of a spoon. The skillet should be hot enough that the batter starts to bubble within 30 seconds.
- Scatter a handful of berries over the batter, then fold the edges over to create a semi‑circular wrap. The berries should be evenly distributed; they’ll create pockets of flavor throughout.
- Cook for 3–4 minutes on one side until the bottom is golden and the edges lift. Flip gently and cook for another 2 minutes on the other side. The wrap should be firm but still soft inside.
- Transfer the cooked wrap to a parchment‑lined tray and repeat with the remaining batter. Once all wraps are cooked, allow them to rest for 2 minutes before serving.
That’s it—you did it. But hold on, I’ve got a few more tricks that’ll take this to another level.
Insider Tricks for Flawless Results
The Temperature Rule Nobody Follows
Many people bake these wraps at a high temperature, which can cause the edges to burn before the center cooks. Set your skillet to medium (around 350°F) and let the batter settle. This slow, steady heat ensures a golden crust and a moist interior.
Why Your Nose Knows Best
Smell the batter as it cooks—if it starts to smell like toasted sugar, it’s ready to flip. Your nose is a reliable indicator; don’t rely solely on the timer.
The 5‑Minute Rest That Changes Everything
After cooking, let the wraps rest on a rack for 5 minutes. This step allows the steam to redistribute, keeping the interior tender and the crust crisp.
Butter vs. Oil: The Great Debate
Butter gives a richer flavor but can scorch easily. Lightly greasing with a neutral oil, like canola, provides a cleaner bake and a longer shelf life.
Keep the Berries Fresh
If you’re using frozen berries, thaw them in a colander and pat dry before folding. Excess moisture will steam the batter, making the wrap soggy.
Creative Twists and Variations
This recipe is a playground. Here are some of my favorite ways to switch things up:
Maple‑Infused Wraps
Replace the vanilla extract with maple syrup and add a splash of maple‑infused butter. The result is a caramel‑like depth that pairs beautifully with the berries.
Nutty Crunch
Toss chopped walnuts or pecans into the batter before folding. The nuts add a satisfying crunch and a nutty undertone that complements the chocolate.
Spiced Citrus
Add a pinch of ground cinnamon and a zest of orange to the dry mix. The citrus brightens the chocolate, creating a vibrant, aromatic flavor profile.
Mango Madness
Swap the berries for diced mango and reduce the sugar by 1 tablespoon. The tropical sweetness will give the wraps a refreshing twist, perfect for summer.
Vegan Version
Use plant‑based milk, flax eggs (1 tablespoon ground flaxseed + 3 tablespoons water), and vegan chocolate chips. The result is a cruelty‑free, dairy‑free treat that doesn’t compromise on flavor.
Mini Wraps for Parties
Cut the batter into 16 smaller portions and cook them as bite‑size wraps. Serve them on a platter for a whimsical, Instagram‑ready dessert.
Storing and Bringing It Back to Life
Fridge Storage
Store the cooked wraps in an airtight container at room temperature for up to 3 days. They stay fresh because the chocolate acts as a natural preservative, sealing in moisture.
Freezer Friendly
Wrap each portion individually in parchment paper and place them in a freezer bag. They keep well for up to 2 months. When ready to serve, thaw at room temperature for 30 minutes.
Best Reheating Method
Reheat in a preheated oven at 300°F for 5–7 minutes or in a microwave on low for 30 seconds. Add a tiny splash of water before reheating to create steam, which restores the wraps’ original softness.