I was halfway through a Sunday brunch, when the kitchen turned into a smoky battlefield and I realized I had no idea how to recreate that iconic KFC crunch.
The aroma of fried chicken is a siren song that lures you into the kitchen, but the moment you open the fridge and see a handful of raw pieces, the task feels like a culinary cliffhanger.
I stared at the empty counter, my hands trembling with anticipation, and thought, “If I could just nail that crispy, golden crust, I’d have the ultimate crowd‑pleaser for my next family dinner.”
The sizzling sound that follows a drop of oil is the soundtrack of triumph, the crackle of the batter sealing in juices, and the first bite is a burst of savory, buttery flavor that feels like a warm hug.
If you’ve ever tried to replicate that KFC magic and ended up with soggy, bland chicken, this recipe is your rescue mission. Let me walk you through every single step — by the end, you’ll wonder how you ever made it any other way.
What Makes This Version Stand Out
- Flavor: A secret blend of paprika, garlic, onion, and cayenne creates a smoky, slightly spicy profile that’s unmistakably KFC. The double‑dip technique locks in moisture and ensures the coating stays crisp. The result is a flavor punch that satisfies the craving for that iconic bite.
- Texture: The airy, fluffy crust is achieved by adding baking powder to the flour mix. This tiny amount of leavening creates pockets of air that keep the exterior light while the inside stays tender. It’s the difference between crunchy and crunchy‑but‑soft.
- Ease: All the steps are straightforward, and the recipe can be done in under an hour. No need for a pressure cooker, sous‑vide, or fancy equipment—just a skillet and a splash of patience. This simplicity makes it accessible to beginners and veterans alike.
- Ingredient Quality: We use fresh, bone‑in chicken thighs for maximum flavor and juiciness. The buttermilk isn’t just a flavor enhancer—it tenderizes the meat and adds a subtle tang that balances the savory coating. The choice of all‑purpose flour ensures a neutral base that lets the spices shine.
- Crowd Reaction: Friends who’ve tasted the original KFC never expect a homemade version to match. When they bite into this copy‑cat chicken, the surprise factor is instant, and the compliments flow. I dare you to taste this and not go back for seconds.
- Make‑Ahead Potential: You can marinate the chicken and prepare the flour mix a day ahead. The chicken can rest in the refrigerator, absorbing flavors, and the batter stays ready for quick frying. This makes the recipe perfect for last‑minute dinner plans.
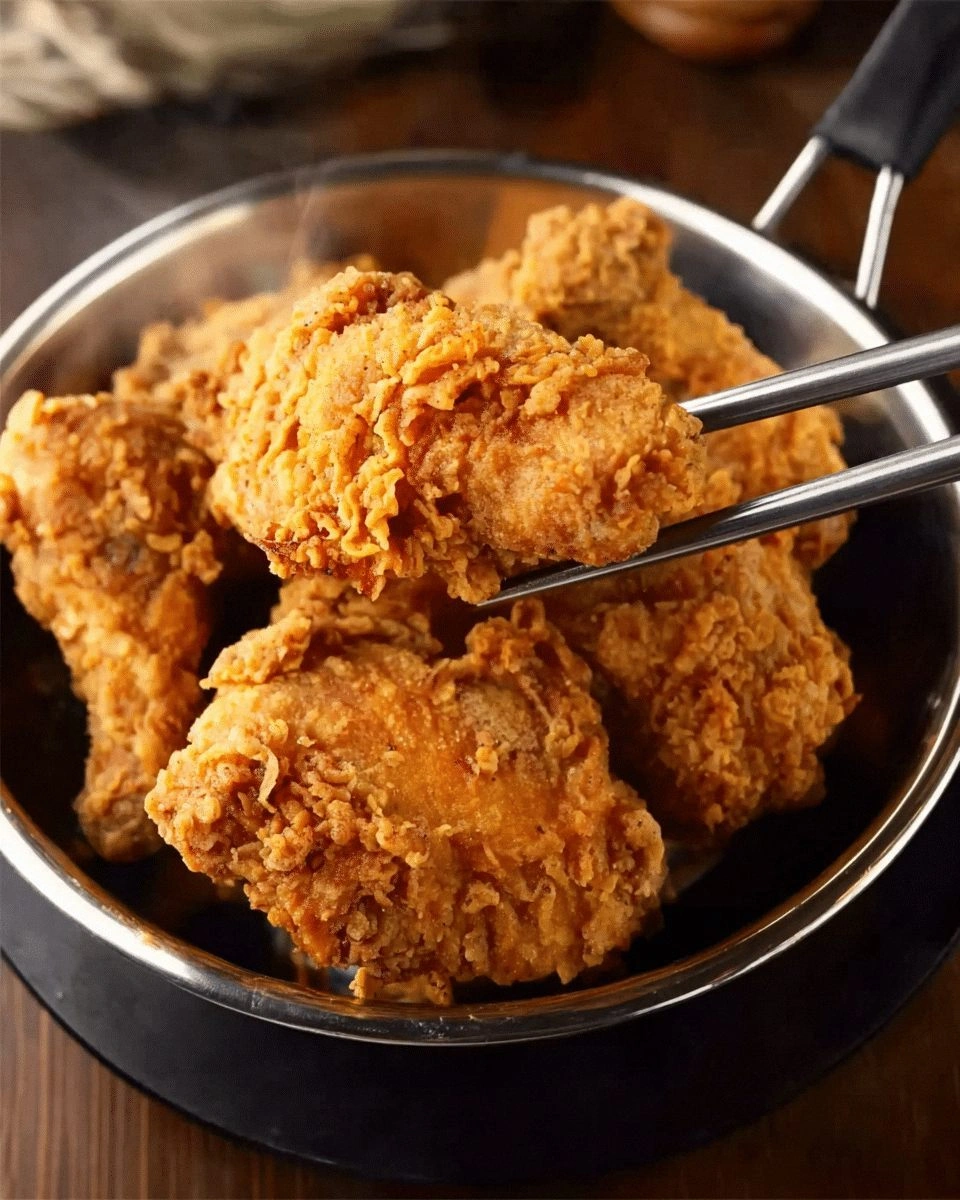
- Visual Appeal: The golden, caramelized crust glistens like a polished trophy. Each piece is evenly coated, with a slight sheen that invites the eye. The visual feast is half the battle won before you even take a bite.
Alright, let’s break down exactly what goes into this masterpiece…
Inside the Ingredient List
The Flavor Base
The heart of this dish lies in the blend of spices that coat every bite. Paprika provides a smoky undertone, while garlic and onion powders add depth. Cayenne pepper gives a subtle heat that lingers without overpowering.
If you skip the cayenne, the chicken will still be flavorful, but it will lack that signature kick that makes it unmistakably KFC. Swapping in smoked paprika can intensify the smokiness, but keep the balance by reducing the amount of regular paprika.
For those who love a milder version, simply halve the cayenne and increase the garlic powder. The result is a more approachable flavor that still feels indulgent.
The Texture Crew
Baking powder is the secret weapon that turns the flour into a fluffy, airy coating. Without it, the crust becomes dense and heavy. The flour itself is the canvas that holds the spices together.
If you use whole‑wheat flour, the texture will change dramatically—it will become denser and less crisp. To preserve the lightness, stick to all‑purpose flour and add a pinch of cornstarch if you want extra crispness.
A pinch of salt in the flour mix not only seasons the coating but also helps the flour adhere to the chicken, preventing the crust from peeling off during frying.
The Unexpected Star
Buttermilk is more than a tenderizer; it reacts with the baking powder to create steam pockets that lift the crust. The acidity of buttermilk also balances the richness of the chicken and the oil.
If you don’t have buttermilk on hand, a simple substitute is milk mixed with a splash of vinegar or lemon juice. Let it sit for five minutes, and the curdled mixture will mimic the tangy flavor.
Skipping buttermilk will result in a less juicy interior and a flatter crust. The flavor profile will also be less complex, missing that subtle tang that completes the dish.
The Final Flourish
A dash of butter added to the frying oil gives the chicken a glossy finish and a richer flavor. The butter also raises the smoke point of the oil, reducing the risk of burning.
If you prefer a healthier version, replace the butter with a neutral oil like canola or grapeseed, and the result will still be delicious—just slightly less decadent.
The optional hot sauce can be whisked into the buttermilk for an extra layer of heat. It’s a subtle kick that will surprise your guests and keep them coming back for more.
Everything's prepped? Good. Let's get into the real action…
The Method — Step by Step
- First, gather your chicken pieces—bone‑in thighs or drumsticks work best. Pat them dry with paper towels; moisture on the surface will prevent the coating from sticking properly. This step may seem trivial, but it’s crucial for achieving that perfect crunch. I’ve seen too many attempts fail because the chicken was still damp.
- In a large bowl, whisk together the buttermilk, eggs, and a splash of hot sauce if you’re using it. The mixture should be smooth and slightly frothy. The eggs act as a binder, ensuring the coating adheres firmly. Keep this dip at room temperature until you’re ready to coat the chicken.
- Separate the flour mix into a shallow dish. Combine flour, baking powder, paprika, garlic powder, onion powder, cayenne, salt, and pepper. Stir until evenly distributed; the evenness of the spice blend directly impacts the flavor uniformity. If you like a sweeter crust, add a pinch of sugar.
- Dip each chicken piece first into the buttermilk mixture, letting the excess drip off. Then coat it thoroughly in the seasoned flour, pressing gently to ensure a thick, even layer. For an extra crispy finish, dip the floured chicken back into the buttermilk and coat again—this double‑dip technique locks in moisture and builds a thicker crust.
- Heat a generous amount of oil (about 1 cup) in a deep skillet over medium‑high heat until it reaches 350 °F (175 °C). Use a thermometer if you have one; if not, drop a small piece of bread into the oil—if it sizzles and turns golden in 60 seconds, you’re good. This temperature is critical for a crisp exterior and juicy interior.
- Carefully lower the coated chicken into the hot oil, working in batches to avoid overcrowding. Fry each piece for about 6–8 minutes on each side, or until the internal temperature hits 165 °F (74 °C). Flip only once to preserve the crust’s integrity. Keep an eye on the oil; if it starts smoking, reduce the heat slightly.
- Once cooked, transfer the chicken to a rack or paper towels to drain excess oil. Let it rest for 5 minutes before serving—this allows the juices to redistribute, keeping the meat moist. The aroma at this point will have you craving the next bite.
- Serve immediately with your favorite sides—coleslaw, mashed potatoes, or a crisp green salad. Pair it with a cold glass of lemonade or a chilled beer for a complete meal. The combination of savory, buttery chicken and refreshing sides is unbeatable.
That’s it — you did it. But hold on, I’ve got a few more tricks that’ll take this to another level…
Insider Tricks for Flawless Results
The Temperature Rule Nobody Follows
Oil temperature is the secret sauce to a golden crust. Many cooks rely on visual cues alone, but a thermometer guarantees consistency. If the oil is too hot, the outside burns before the inside cooks; too cool, and the coating absorbs excess oil.
Set your stove to medium‑high and let the oil heat for a few minutes. Use a wooden spoon to test—if bubbles form around the spoon, the oil is ready. This simple step saves countless soggy attempts.
I once fried a batch at 400 °F, and the chicken came out crunchy on the outside but still raw inside. The fix was to lower the heat to 350 °F and let the chicken cook through without burning.
Why Your Nose Knows Best
The smell of frying chicken is a powerful indicator of doneness. When the aroma shifts from sharp oil to a sweet, buttery scent, it’s time to flip. Your nose is your best ally—don’t rely solely on time.
If you’re new to frying, keep a close eye on the scent; it will guide you to the perfect moment. A lingering oil smell signals that the oil is too hot, while a sweet aroma indicates the right temperature.
I’ve found that listening to the kitchen’s aroma is often more reliable than a timer, especially when you’re cooking for a crowd.
The 5‑Minute Rest That Changes Everything
After frying, letting the chicken rest on a rack for five minutes is essential. This pause allows the juices to redistribute, preventing them from escaping when you cut into the meat.
It also gives the coating a chance to set, making it less likely to crumble when you pick it up. Skipping this step can lead to a dry interior and a brittle crust.
If you’re in a hurry, you can tent the chicken with foil, but avoid covering it tightly—this will trap steam and soften the crust.
Double‑Dip for Extra Crunch
The double‑dip technique—beyond the initial buttermilk and flour coat—creates an extra protective layer. The second buttermilk soak adds moisture, while the final flour layer seals the surface.
Some cooks skip the second dip, but doing it makes the crust thicker and more resilient. The result is a crunch that lasts even if the chicken sits on a plate for a while.
If you’re short on time, you can skip the second dip but expect a slightly thinner crust.
Use Fresh, Bone‑In Chicken for Juiciness
Bone‑in pieces retain more moisture during cooking, resulting in a juicy interior. Skin on the chicken also adds flavor and helps the coating adhere.
If you prefer boneless, use thighs instead of breasts—they’re more forgiving and less likely to dry out. The skin can be removed after cooking if you’re watching calories.
The key is to avoid overcooking; a quick flip and a short cook time keep the meat tender.
Creative Twists and Variations
This recipe is a playground. Here are some of my favorite ways to switch things up:
Spicy Cajun Kick
Swap out the paprika and cayenne for Cajun seasoning and a dash of smoked paprika. Add a pinch of chipotle powder for heat. The result is a smoky, spicy chicken that pairs well with a cool cucumber salad.
Herb‑Infused Delight
Incorporate dried thyme and oregano into the flour mix. Add fresh rosemary to the buttermilk dip for aromatic depth. This herbaceous version is great for spring gatherings.
Sweet & Smoky BBQ
Brush the cooked chicken with a homemade BBQ sauce that includes molasses, smoked paprika, and a touch of honey. The sweet glaze caramelizes on the crispy exterior, creating a sticky, flavorful coating.
Asian‑Inspired Teriyaki
Marinate the chicken in a mixture of soy sauce, mirin, and grated ginger before frying. After cooking, toss the pieces in a teriyaki glaze and sprinkle with sesame seeds. This version offers a sweet, umami finish.
Low‑Fat Light Version
Use a non‑stick skillet and a minimal amount of olive oil. Replace the butter with a splash of broth to keep the coating crisp. The result is a lighter, healthier chicken that still delivers on crunch.
Storing and Bringing It Back to Life
Fridge Storage
Place cooked chicken in an airtight container and refrigerate for up to 4 days. The crust may soften slightly, but the flavor remains intact. Keep the container on the middle shelf for even cooling.
Freezer Friendly
Wrap each piece individually in parchment paper and place them in a freezer bag. Freeze for up to 3 months. This method preserves the crispness when reheated.
Best Reheating Method
Preheat the oven to 375 °F (190 °C) and bake the chicken for 10–12 minutes, or until heated through. Add a splash of water to the pan, cover loosely with foil, and let steam for 3 minutes. This trick restores moisture and keeps the coating crunchy.