Picture this: I was halfway through a Sunday roast, the kitchen smelling like a mix of garlic and fried onions, when my phone buzzed with a frantic text from a friend: “I’m craving something crunchy, but I only have dill pickles left.” I stared at the jar, then at the chicken in the fridge, and a spark lit up. I thought, “What if the tang of dill pickle could marry the richness of Parmesan and the crisp of Panko?” The result? A dish that feels like a crunchy, savory hug from the inside out. I’ve tried countless chicken recipes, but none have captured that bright, briny zing paired with a buttery Parmesan crunch. The moment the first bite hits, the dill pickle juice’s acidity lifts the flavors, and the Parmesan gives a savory depth that’s almost cinematic. I dare you to taste this and not go back for seconds.
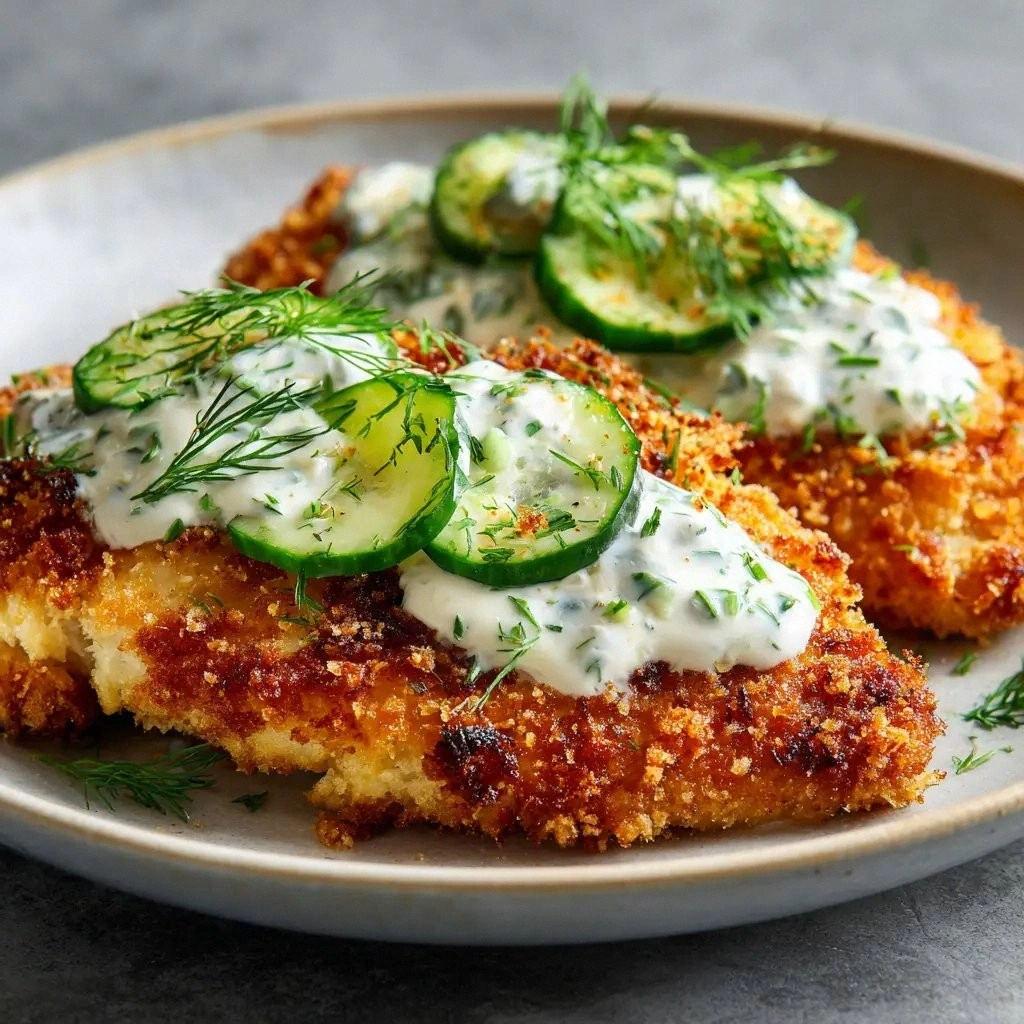
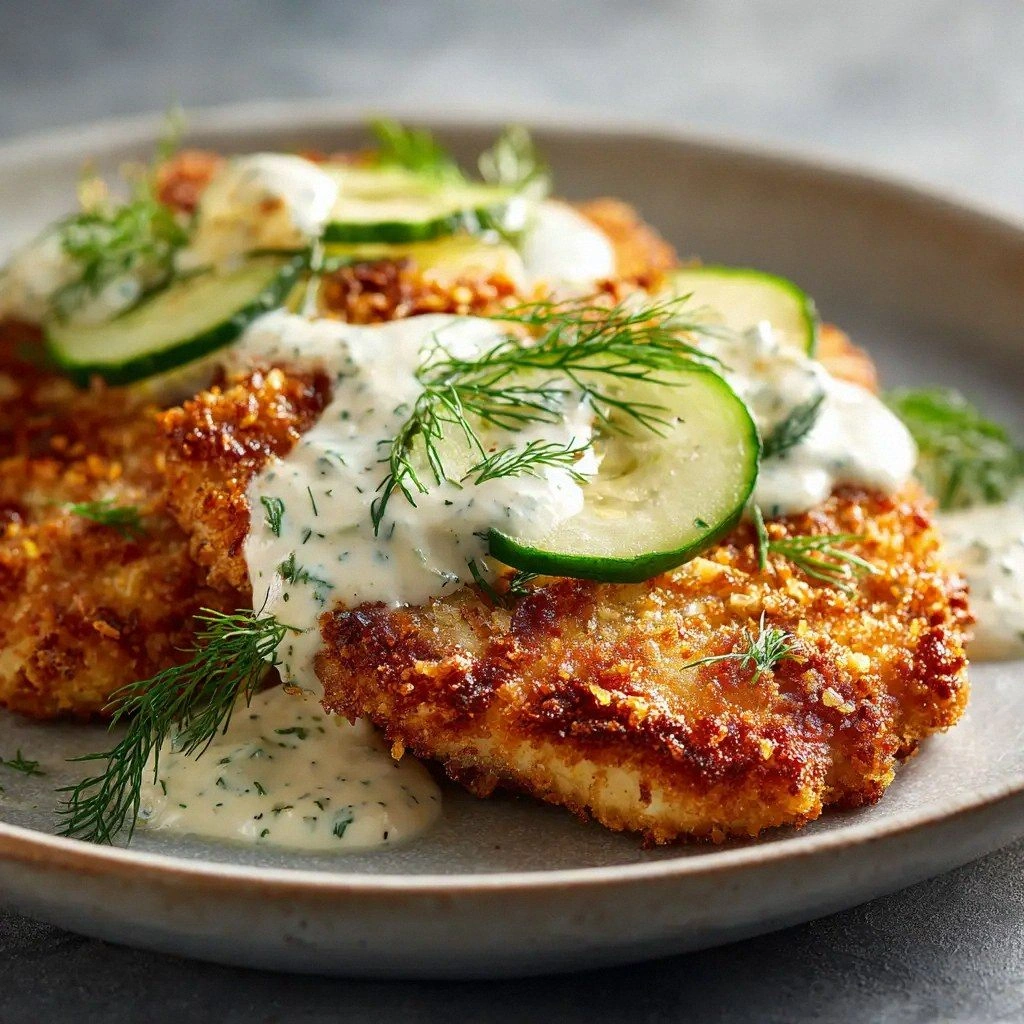
The first time I plated the chicken, the kitchen filled with a golden, crackling aroma that made my neighbors pause. The sizzling sound was like a tiny applause, the heat rising in a comforting wave. The sight of the crispy coating, the color of toasted Panko with a dusting of Parmesan, was a visual promise of flavor. I could already taste the contrast: a tangy, salty bite that melts into a savory, cheesy finish. That’s the moment you realize you’re about to discover the best version of this dish you’ll ever make at home.
If you’ve ever felt your chicken ends up soggy or bland, you’re not alone. The trick is in the brine and the coating. Dill pickle juice is not just a flavor enhancer; it tenderizes the meat, giving it a juicy interior that pairs perfectly with the crisp exterior. The Parmesan isn’t just a garnish; it melts into the crumbs, creating a buttery, umami layer that keeps the coating from drying out. The combination of Panko and flour creates a two‑layered crunch: the Panko provides the light, airy bite, while the flour adds structure and a subtle heft. Together, these elements form a symphony of textures that dance on the palate. And the best part? The recipe is simple enough to make on a weekday yet impressive enough to wow guests at a dinner party.
Picture yourself pulling this out of the oven, the whole kitchen smelling incredible, and the first bite being a burst of tangy, cheesy crunch that makes you go, “Wow.” That’s the power of this recipe. Let me walk you through every single step — by the end, you’ll wonder how you ever made it any other way.
What Makes This Version Stand Out
- Brine: Dill pickle juice not only tenderizes but also infuses a bright, zesty flavor that cuts through the richness of Parmesan.
- Dual Coating: The combination of flour and Panko creates a two‑layered crunch that shatters like thin ice when you bite.
- Umami Boost: Parmesan cheese melts into the crumbs, delivering a savory depth that elevates the entire dish.
- Texture: The coating stays crisp even after reheating, thanks to the dry Panko and the oil’s protective layer.
- Time‑Efficient: The brine step is quick—just 10 minutes—yet it delivers a dramatic flavor difference.
- Make‑Ahead Friendly: You can marinate and coat the chicken ahead of time, then bake when you’re ready, making it ideal for busy evenings.
- Versatile Serving: Works as a main dish, a side, or an appetizer—perfect for any occasion.
- Crowd‑Pleaser: The crunchy, tangy bite is guaranteed to get compliments at dinner parties.
Inside the Ingredient List
The Flavor Base
Dill pickle juice is the heart of this dish. It brings a sharp, acidic bite that brightens the savory flavors. If you skip it, the chicken will taste flat and the coating may not adhere as well. A good quality pickle juice—preferably one with real dill and no artificial sweeteners—makes a noticeable difference. You can also use a splash of apple cider vinegar with a pinch of dill for a homemade version, but the classic jar is unbeatable.
The Texture Crew
Panko breadcrumbs give that light, airy crunch that feels almost like a cloud in your mouth. All-purpose flour, on the other hand, provides structure and a subtle heft that keeps the coating from falling apart. Together, they create a two‑layered crust that shatters with a satisfying crack. If you’re gluten‑free, swap Panko for gluten‑free breadcrumbs and use a gluten‑free flour blend. The texture will still be crisp, just a bit different.
The Unexpected Star
Parmesan cheese is more than a garnish. It melts into the crumbs, adding a buttery, umami richness that balances the acidity of the pickle. Aged Parmesan gives a sharper flavor; a fresher one will be milder. If you’re vegan, try nutritional yeast or a vegan Parmesan substitute, but be aware the flavor profile will shift slightly. The key is to grate it finely so it blends seamlessly into the coating.
The Final Flourish
Seasoning is simple but essential. Garlic powder, onion powder, and paprika provide depth and warmth without overpowering the bright dill. Salt and black pepper are added to taste, ensuring each bite is balanced. If you prefer a smoky flavor, a pinch of smoked paprika works wonders. Remember, the seasoning is part of the coating, so it should be evenly distributed before you dip the chicken in the egg wash.
Everything’s prepped? Good. Let’s get into the real action.
The Method — Step by Step
- Start by cutting the chicken breasts into 1-inch thick strips or bite‑size cubes, depending on your preference. Pat them dry with paper towels to remove excess moisture; this step is crucial for a crisp coating. Once dry, place the chicken in a bowl and pour the dill pickle juice over it. Let the chicken marinate for 10 minutes—this quick brine tenderizes the meat and infuses it with bright, acidic flavor.
- While the chicken is marinating, set up your dredging station. In a shallow dish, combine the flour, garlic powder, onion powder, paprika, and a pinch of salt and pepper. This dry mix will form the base of your coating. In a second dish, whisk the eggs until frothy; this will act as the adhesive that binds the crumbs to the chicken.
- Remove the chicken from the pickle juice and shake off any excess liquid—don’t rinse it, as that would wash away the flavor. Coat each piece first in the flour mixture, ensuring a light dusting. Then dip it into the beaten eggs, letting any excess drip off. Finally, roll the chicken in the Panko–Parmesan blend, pressing gently to adhere. The coating should feel firm but not packed.
- Preheat your oven to 425°F (220°C) and line a baking sheet with parchment paper or a silicone mat. Place the coated chicken pieces on the sheet, leaving a little space between each. Drizzle or lightly brush the top with olive oil or avocado oil—this not only adds flavor but also helps the coating brown beautifully.
- Bake for 12–15 minutes, flipping halfway through. The chicken should reach an internal temperature of 165°F (74°C). The edges will start pulling away from the pan, and the coating will be a deep golden brown. The aroma that fills the kitchen at this point is the hallmark of a job well done.
- Once baked, let the chicken rest for 3–4 minutes. This short rest allows the juices to redistribute, keeping the meat moist. During this time, the coating will firm up slightly, making it even easier to cut into bite‑sized pieces.
- Serve immediately with a side of fresh salad, roasted veggies, or even a light pasta. The crunch and tang of the chicken pair beautifully with creamy dressings or a simple lemon‑garlic sauce. If you’re feeling adventurous, top with a drizzle of honey mustard for a sweet‑savory twist.
- Remember, the magic of this dish lies in the balance of flavors and textures. The dill pickle’s acidity cuts through the richness of Parmesan, while the Panko’s airy crunch keeps each bite exciting. Enjoy the symphony of tastes that dance across your palate.
That’s it — you did it. But hold on, I’ve got a few more tricks that will take this to another level.
Insider Tricks for Flawless Results
The Temperature Rule Nobody Follows
Many people bake at 400°F, but this recipe calls for 425°F to achieve that perfect golden crust. The higher temperature ensures the coating crisps up quickly while the inside stays juicy. If you’re using a convection oven, lower the temperature by 25°F to avoid over‑browning. A simple thermometer is your best ally; check the internal temperature at the thickest part of the chicken for perfect doneness.
Why Your Nose Knows Best
During the baking step, trust your nose more than your eyes. The aroma of the dill pickle and Parmesan will tell you when the coating is ready. A strong, toasty scent means the crust is crisp, while a faint or sour smell indicates you need more time. If you’re uncertain, give the chicken a gentle press; the coating should feel firm and slightly springy.
The 5-Minute Rest That Changes Everything
Resting the chicken for a few minutes after baking may seem trivial, but it’s essential. The juices redistribute, preventing the meat from drying out. It also allows the coating to set, making it less likely to crumble when you cut into it. I’ve seen people skip this step, only to find the chicken feels dry and the crust flakes off. Trust me, the extra five minutes make all the difference.
Double‑Dipping for Extra Crunch
If you’re a crunch enthusiast, try double‑dipping the chicken. After the first coat of flour and egg, dip the chicken back into the egg wash before the final Panko layer. This double‑coating traps an extra layer of crispness that stays golden even after reheating. It’s a small tweak that delivers a big payoff.
The Secret to a Moist Interior
The dill pickle juice does more than flavor; it tenderizes the meat. If you’re short on time, add a tablespoon of pickle juice to the flour mixture before coating. This will help keep the chicken juicy even if you skip the marination. The result is a tender, flavorful interior that pairs perfectly with the crispy exterior.
Creative Twists and Variations
This recipe is a playground. Here are some of my favorite ways to switch things up:
Spicy Dill Pickle Crunch
Add a pinch of cayenne pepper to the flour mixture for a fiery kick. The heat pairs wonderfully with the dill’s brightness, creating a complex flavor profile that’s perfect for a bold dinner.
Herb‑Infused Parmesan
Mix in dried oregano or basil into the Parmesan layer. The herbs give the coating an aromatic depth that complements the dill pickle’s sharpness, turning the dish into a Mediterranean‑inspired delight.
Citrus Zest Surprise
Grate a lemon or orange zest into the Panko–Parmesan blend. The citrus adds a bright, floral note that balances the savory and tangy elements, making the dish feel lighter.
Gluten‑Free Version
Swap the all‑purpose flour for a gluten‑free flour blend and use gluten‑free breadcrumbs. The texture stays crisp, and the flavor remains unchanged, so you can enjoy the dish without compromising on taste.
Vegan Parmesan Alternative
Replace the Parmesan with nutritional yeast or a vegan Parmesan substitute. The nutty, cheesy flavor will still satisfy, though the coating will be slightly less rich.
Pairing with a Sweet Glaze
Brush the baked chicken with a honey‑mustard glaze in the last 2 minutes of baking. The glaze caramelizes, giving the coating a glossy finish and a sweet‑savory finish that pairs wonderfully with the dill.
Storing and Bringing It Back to Life
Fridge Storage
Store leftover chicken in an airtight container in the refrigerator for up to 3 days. The coating may soften slightly, but it will regain crispness when reheated in a skillet or oven.
Freezer Friendly
Freeze the baked chicken in a single layer on a baking sheet before transferring to a freezer bag. This prevents clumping and allows you to thaw and reheat portions individually. Store for up to 3 months.
Best Reheating Method
Reheat in a preheated oven at 350°F (175°C) for 10 minutes, or in a skillet over medium heat until the coating is crisp again. Add a splash of water to the pan to create steam, which keeps the chicken from drying out. Finish with a quick drizzle of olive oil to restore shine.