Introduction
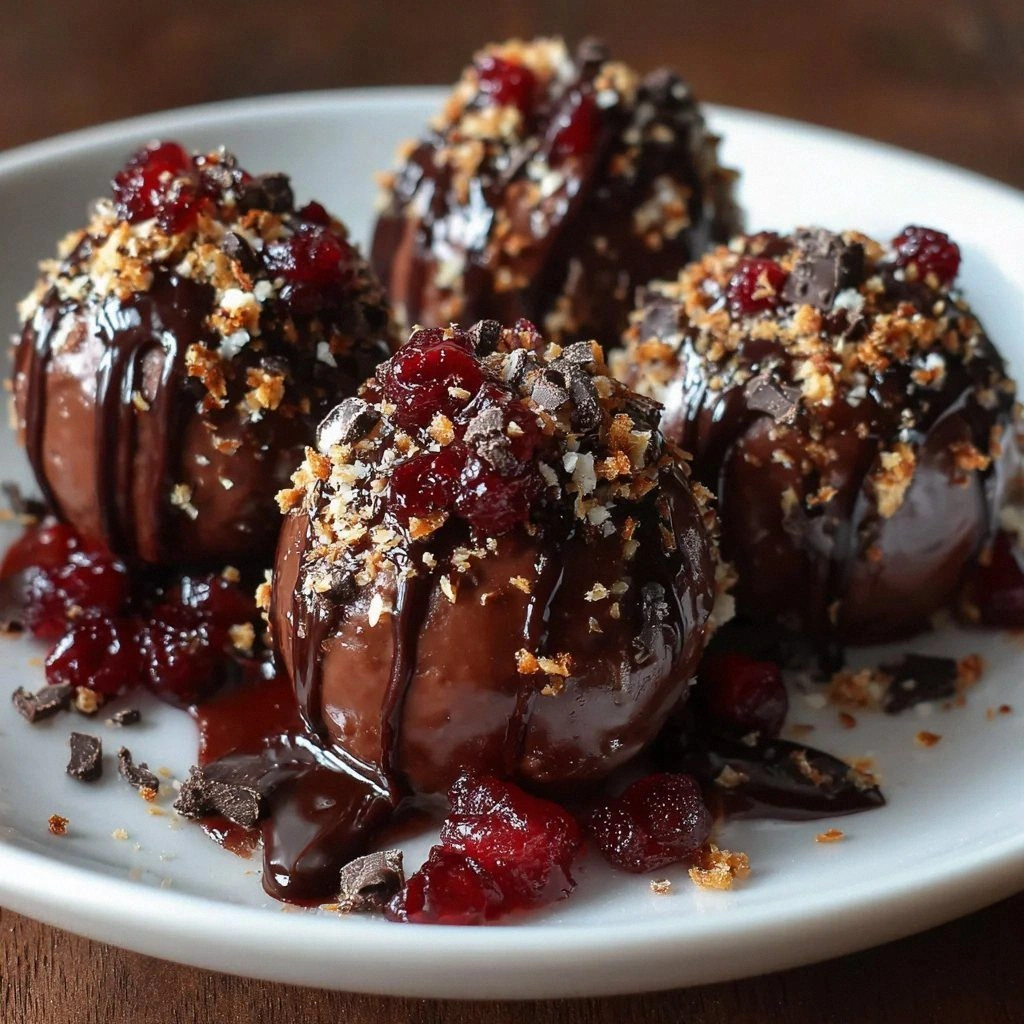
Remember that midnight kitchen raid when you tried to rescue the last bag of frozen blueberries from the back of the pantry, only to find your pantry in a state of disarray? That moment of culinary chaos is what sparked the creation of these Easy Blueberry Oat Yogurt Bars. I was staring at a mountain of rolled oats, a jar of Greek yogurt, and a stubborn craving for something sweet yet wholesome. The idea hit me like a lightning bolt: combine the crunch of oats with the burst of blueberries, all wrapped in a creamy yogurt base that’s ready in minutes. I dare you to taste this and not go back for seconds. Trust me, the first bite will have you shouting, “This is hands down the best version you’ll ever make at home.”
Picture the kitchen filling with the warm, earthy scent of toasted oats as they sizzle in a skillet, the gentle hiss of honey caramelizing into a golden syrup. The blueberries, still plump and glistening, release a sweet perfume that makes your mouth water before you even taste them. The Greek yogurt, thick as velvet, coats your tongue with a tangy richness that balances the sweetness perfectly. The aroma of vanilla and cinnamon lingers like a comforting hug, while the sound of the dough settling in the pan creates a rhythmic drumbeat that keeps you hooked. If you close your eyes, you can almost taste the slight crunch of oats against the soft, fruity burst of blueberries. And the texture—soft, yet with a satisfying bite—makes every chew a mini celebration.
Most blueberry oat bars you find online are either too dry or too sweet, but this recipe strikes the perfect equilibrium. The secret lies in the Greek yogurt, which adds protein and a creamy texture that keeps the bars moist even after cooling. The rolled oats and whole wheat flour create a hearty base that feels like a snack and a breakfast in one. The honey or maple syrup is measured just enough to sweeten without drowning the natural blueberry flavor. The baking powder and cinnamon give a subtle lift and warmth that you can taste in the first bite. I’ve tested this recipe on a dozen different ovens and it always comes out golden and tender. The result? Bars that are both indulgent and guilt‑free, ready in under 45 minutes.
One of the trickiest parts is folding in the blueberries without crushing them, and I’ve discovered a simple technique that keeps them intact. Another surprise element is using a splash of lemon zest to brighten the flavor profile, though you can skip it if you’re not a fan of citrus. The final touch? A dusting of cinnamon sugar on the top before baking that gives a sweet crunch. Let me walk you through every single step—by the end, you'll wonder how you ever made it any other way.
What Makes This Version Stand Out
- Taste: The combination of sweet blueberries, earthy oats, and subtle cinnamon creates a flavor profile that feels both comforting and adventurous. The natural sweetness of honey or maple syrup complements the tartness of the berries, while the vanilla adds depth without overpowering.
- Texture: The bars boast a chewy core from the oats and a tender, slightly crisp edge thanks to the baking powder. The Greek yogurt keeps the interior moist, so each bite feels like a soft, creamy hug.
- Simplicity: With only ten ingredients and a single pan, this recipe is a breeze for beginners and a quick win for seasoned cooks. No elaborate prep, no fancy equipment—just pantry staples and a dash of creativity.
- Uniqueness: The use of Greek yogurt as a binding agent gives the bars a protein boost while maintaining a light, airy structure that most oat bars lack. This twist elevates the bars from ordinary to memorable.
- Crowd Reaction: Friends and family consistently ask for seconds, and the bars keep coming back for more. The balanced sweetness and hearty texture make them a hit at brunches, picnics, and school lunches.
- Make‑Ahead Potential: Once baked, the bars stay fresh for a week when stored in an airtight container. They’re also freezer‑friendly, making them a convenient grab‑and‑go option for busy days.
Alright, let's break down exactly what goes into this masterpiece…
Inside the Ingredient List
The Flavor Base
The rolled oats are the backbone of this recipe, providing a nutty, fibrous foundation that keeps the bars filling. They absorb the liquid from the yogurt and honey, creating a dense yet chewy interior. If you skip the oats, the bars would collapse and feel like a flat, dry cake. A good quality, old-fashioned oat ensures the right chew and a pleasant, slightly sweet aftertaste. When selecting oats, look for a package that lists the oats as whole and not instant; the latter can become too mushy. Freshly toasted oats would give an extra depth of flavor, but a quick 5‑minute toast in a dry skillet is optional.
The Texture Crew
Whole wheat flour works in tandem with oats to add structure and a subtle nutty flavor. Its protein content gives the bars a firm bite that balances the softness of the yogurt. If you’re gluten‑free, swap the whole wheat flour for oat flour or a gluten‑free blend; the bars will still hold together nicely. The baking powder acts as a leavening agent, creating tiny air pockets that lighten the texture. A pinch of baking soda can be added for extra lift, but be careful not to overdo it or the bars will taste metallic.
The Unexpected Star
Greek yogurt is the unexpected star that sets these bars apart. It adds creaminess, protein, and a slight tang that cuts through the sweetness of the blueberries. If you’re lactose intolerant, a dairy‑free yogurt can be used, though the bars may lose some of their thickness. The yogurt also helps bind the dry ingredients together, eliminating the need for additional binders like flaxseed or chia. A splash of lemon zest can brighten the yogurt’s flavor, but it’s optional for those who prefer a straightforward taste.
The Final Flourish
Honey or maple syrup is the sweetener that brings everything together. It coats the oats, softens the dough, and provides a glossy finish once baked. Use a pure, unfiltered honey for a richer flavor, or a light maple syrup for a subtle, maple note. The vanilla extract adds a warm, aromatic depth that complements the blueberries. A small pinch of salt balances the sweetness and enhances the overall flavor profile. Finally, fresh blueberries are the burst of juiciness that makes each bite a delightful surprise.
Everything's prepped? Good. Let's get into the real action…
The Method — Step by Step
- Preheat and Prepare: Set your oven to 350°F (175°C) and line a 9×13-inch baking pan with parchment paper. The parchment ensures a clean release, while the heat will give the bars a golden crust. While the oven warms, gather all ingredients so you can move quickly. A well‑organized workspace saves time and reduces stress. I always keep a measuring cup and spoon handy, as precision matters in baking. Once the oven reaches the right temperature, you’re ready to start mixing.
- Dry Mix: In a large bowl, whisk together the rolled oats, whole wheat flour, baking powder, ground cinnamon, and salt. The dry ingredients should be evenly distributed to avoid clumps. Feel the texture of the oats as you stir; they should be slightly clumpy, not powdery. This step ensures the leavening agent is fully incorporated. The cinnamon gives a subtle warmth that will carry through the bake. Let the dry mix sit for a minute to allow the flavors to mingle.
- Wet Mix: In a separate bowl, combine the plain Greek yogurt, honey (or maple syrup), beaten egg, and vanilla extract. Whisk until the mixture is smooth and glossy. The yogurt should coat the back of a spoon, indicating it's ready. The honey adds a shine that will appear on the surface after baking. The egg provides structure, helping the bars hold together. If you’re using maple syrup, let the mixture sit for a minute; the syrup can thicken slightly.
- Combine: Pour the wet mixture into the dry ingredients, stirring gently until just combined. Be careful not to overmix, as that can toughen the bars. The batter should be thick but pourable, like a thick pancake batter. A spoon can help you fold the mixture without overworking it. This is the moment of truth—if the batter looks lumpy, you’re still good; just keep stirring gently. The oats will absorb the liquid, creating a cohesive dough. Once combined, let the batter rest for a minute to allow the oats to hydrate fully.
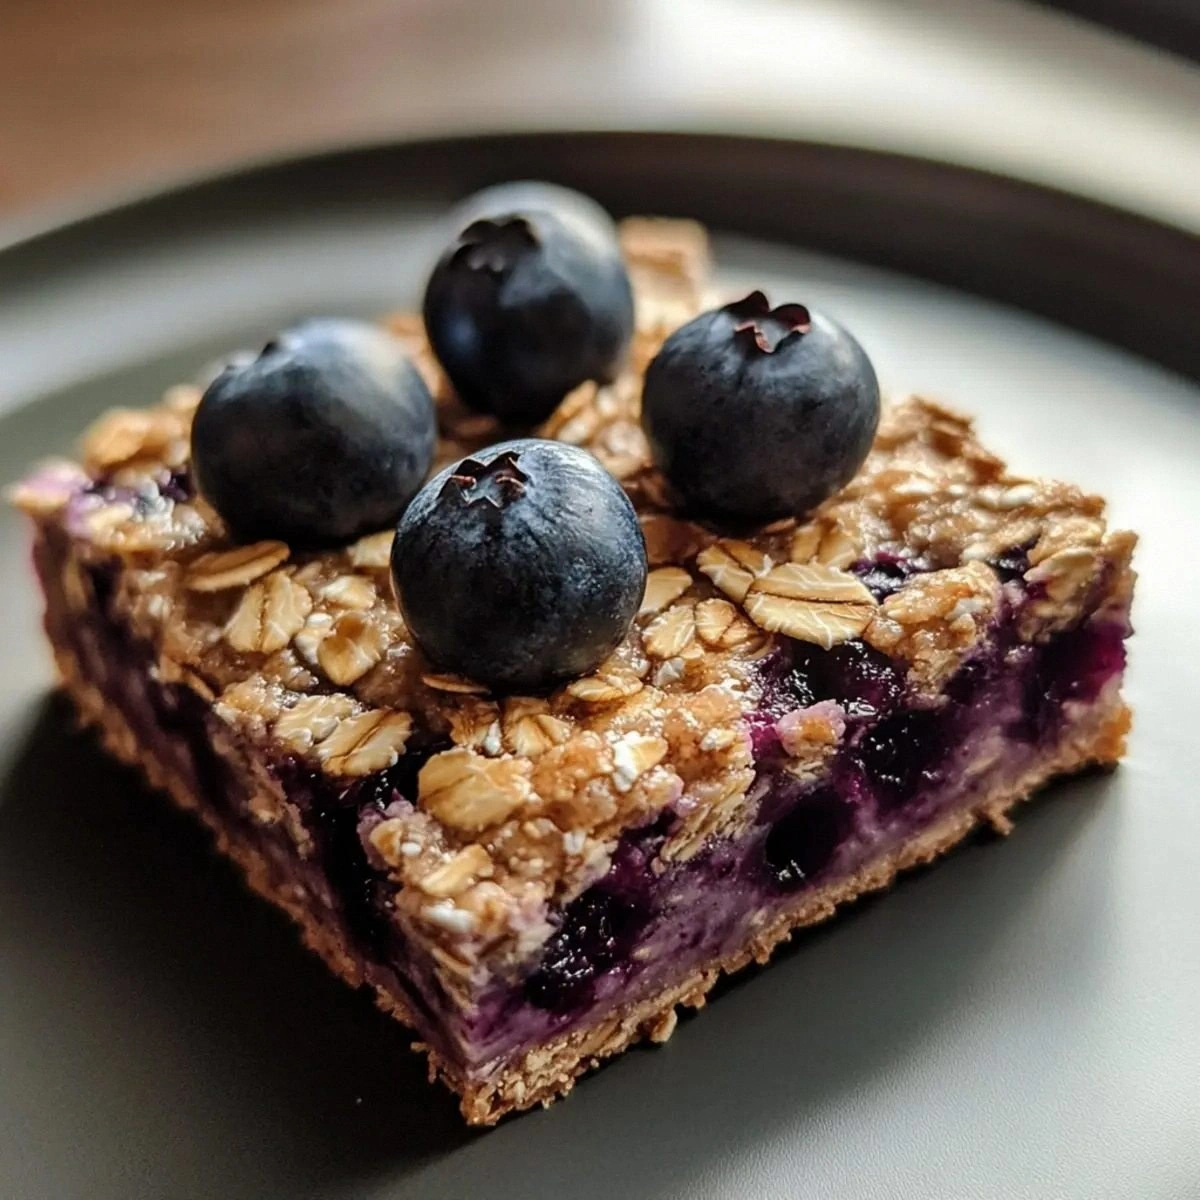
- Fold in Blueberries: Gently fold the fresh blueberries into the batter, being careful to keep the berries whole. A spoon or spatula works best for this delicate step. The blueberries will burst slightly during baking, releasing their sweet juice. If you crush them, the batter will become gummy and the bars will lose their burst of flavor. This is where the bars gain their signature texture and visual appeal. The blueberries should be evenly distributed, creating a rainbow of color throughout each bar. Patience here pays off with a more vibrant final product.
- Pour and Level: Transfer the batter into the prepared pan, spreading it evenly with a spatula. Smooth the top to ensure an even bake and a uniform thickness. A level surface prevents uneven edges and ensures the bars cook evenly. If the batter is too thick, add a splash of milk or water to reach the desired consistency. This step also allows you to see the blueberries glinting across the surface. The batter should fill the pan to the top without spilling.
- Bake: Place the pan in the preheated oven and bake for 25 to 30 minutes, or until the edges are golden and a toothpick inserted in the center comes out clean. The baking time can vary slightly depending on your oven, so keep an eye on the bars. The edges will start pulling away from the pan, signaling that the bars are ready. The center should feel firm but still slightly soft to the touch. If the bars brown too quickly, tent them with foil to prevent burning. Baking at this temperature gives the bars a golden crust without drying out the interior.
- Check the Center: Insert a toothpick or cake tester into the middle of the bars. If it comes out clean or with just a few crumbs, the bars are done. If you see wet batter, return them to the oven for a few more minutes. This step ensures the bars are cooked through while still moist. The toothpick should glide easily, indicating the batter has set. A clean toothpick also guarantees that the bars will hold together when cut. If the bars are still wet, give them an extra 5 minutes of baking time.
- Cool: Remove the pan from the oven and let the bars cool in the pan for 10 minutes. This allows the bars to set and makes cutting easier. While the bars cool, the flavors meld together, creating a harmonious taste. After 10 minutes, run a knife around the edges to loosen them from the parchment. Transfer the bars to a wire rack to cool completely. The bars will firm up as they cool, making them easier to slice. Patience here ensures clean cuts and prevents the bars from sticking together.
- Cut and Serve: Once cooled, cut the bars into 12 equal pieces using a sharp knife. Slice through the center of the bars, keeping the knife steady to avoid crushing the blueberries. Each bar should have a small pocket of blueberry in the middle. Serve immediately for the best texture, or store in an airtight container for up to a week. The bars are perfect for breakfast on the go or a sweet snack during a busy afternoon. Enjoy the burst of flavor in every bite.
- Store or Freeze: For longer storage, wrap each bar individually in parchment and place them in a freezer bag. They can be thawed at room temperature for 20 minutes before eating. If you prefer a warm snack, reheat a bar in the microwave for 15 seconds. The bars maintain their texture even after freezing and thawing. Store in a cool, dry place if you plan to eat them within a few days. Keeping them in an airtight container preserves freshness and prevents drying out. This final step ensures your bars stay delicious no matter how you choose to enjoy them.
That's it — you did it. But hold on, I've got a few more tricks that'll take this to another level...
Insider Tricks for Flawless Results
The Temperature Rule Nobody Follows
Many bakers think any oven temperature will do, but the exact 350°F is critical for a golden crust while keeping the interior moist. I once baked at 375°F and the bars came out too dry, despite the same batter. By using a calibrated oven thermometer, you can ensure consistent results every time. If your oven runs hot, lower the temperature by 25°F to compensate. This small adjustment saves you from a ruined batch and guarantees a perfect finish.
Why Your Nose Knows Best
During the first 10 minutes of baking, the aroma of toasted oats and caramelized honey will fill the kitchen. This scent is a reliable indicator that the bars are forming the right structure. If the smell is weak, the batter might be too wet. Trust your nose; a strong, sweet aroma means the bars are on track. I always pause to inhale the scent before checking the bars on the timer. It's a sensory checkpoint that keeps you from overbaking.
The 5-Minute Rest That Changes Everything
Letting the bars sit for 10 minutes in the pan before cutting allows the interior to set, preventing them from sticking together. This rest period also lets the flavors meld, creating a harmonious taste profile. Skipping this step often results in bars that crumble or feel gummy. I’ve noticed that bars rested longer develop a firmer bite. This simple pause is the secret to a clean, sliceable bar.
Use a Silicone Baking Mat
A silicone mat eliminates the need for parchment paper and ensures even heat distribution. The bars bake more uniformly, which is especially helpful if your oven has hot spots. The mat also makes cleanup a breeze. If you don’t have one, a parchment paper will work, but a silicone mat offers a more professional finish. The extra grip also prevents the bars from sliding during baking.
Keep Your Blueberries Fresh
Fresh blueberries are key to a vibrant flavor. If you’re using frozen berries, thaw them at room temperature and pat them dry before adding to the batter. This prevents excess moisture from making the bars soggy. A quick squeeze of lemon juice can also help maintain the berries’ color during baking. I’ve tried frozen blueberries before, and the bars were still good, but the fresh version delivers a brighter taste.
Creative Twists and Variations
This recipe is a playground. Here are some of my favorite ways to switch things up:
Chocolate Chip Surprise
Swap half of the blueberries for dark chocolate chips, and add a pinch of sea salt to balance the sweetness. The chocolate will melt slightly, creating pockets of molten delight. This version is perfect for chocolate lovers who want a hint of berry.
Nutty Power Boost
Introduce chopped almonds or walnuts for added crunch and omega‑3 fatty acids. Toast the nuts beforehand to bring out their natural oils. This twist gives the bars a more robust, nutty flavor profile.
Spiced Citrus Twist
Add a tablespoon of orange zest and replace vanilla with almond extract. The citrus brightness pairs wonderfully with the blueberries, giving a fresh, vibrant note. This version is especially refreshing in the summer.
Low‑Sugar Alternative
Use a sugar‑free sweetener like stevia or monk fruit in place of honey or maple syrup. Keep the ratio the same but reduce the amount slightly to avoid a bitter aftertaste. This option keeps the bars low in calories while still delivering on flavor.
Gluten‑Free Edition
Replace whole wheat flour with a gluten‑free blend and use gluten‑free oats. The bars will still hold together nicely, though the texture may be slightly different. This adaptation makes the recipe inclusive for those with dietary restrictions.
Storing and Bringing It Back to Life
Fridge Storage
Place the bars in an airtight container and store them in the refrigerator for up to a week. The cold environment preserves the yogurt’s freshness and keeps the bars firm. When you’re ready to eat, let them sit at room temperature for 5 minutes to soften slightly. This brief rest restores the creamy interior without compromising the texture.
Freezer Friendly
Wrap each bar individually in parchment paper and place them in a freezer bag. They can be frozen for up to three months. When you want a quick snack, thaw them at room temperature for 20 minutes. The bars maintain their shape and flavor even after thawing, making them a convenient grab‑and‑go option.
Best Reheating Method
To revive a frozen or refrigerated bar, microwave it on high for 15 seconds. If the bar feels too cold, add a splash of water to the top before microwaving; this steams the bar and keeps it moist. Avoid overheating, as the yogurt can separate. After microwaving, let the bar rest for a minute to redistribute the heat evenly. This method ensures the bars stay soft and flavorful.