Remember that night when the kitchen smelled like burnt toast and I was desperate for something comforting? I stared at the fridge, eyes darting between a handful of wilted carrots and a lonely can of coconut milk, and I thought, “This is it.” That moment sparked a culinary revelation that would turn an ordinary Instant Pot into a portal of creamy, spice‑laden bliss. I promise you, the aroma that rises from this pot will make your neighbors stop by for a taste, even if they’re not your friends. This isn’t just another curry; it’s a hug in a bowl, a flavor explosion that starts with a sizzle and ends with a sigh of satisfaction.
From the first glance at the pot to the last swirl of sauce, every step feels like a tiny adventure. The sizzle of onions in oil is a call to attention, the fragrant burst of spices is a promise of depth, and the creamy coconut base is the comforting blanket that ties everything together. I dare you to taste this and not go back for seconds; the texture alone is a revelation. I’ve tested this recipe on three different days, and each time the result was a masterpiece that made me question my own cooking skills. If you’re looking for a dish that feels both exotic and homey, you’ve found it.
Most recipes get this completely wrong, but here’s what actually works: a balanced spice mix that doesn’t overpower the vegetables, a gentle simmer that lets the flavors marry, and a final splash of lime that lifts the heaviness of coconut milk. The secret is in the timing—searing the aromatics first, then letting the spices toast just long enough to release their oils, and finally cooking under pressure so the vegetables stay bright and crisp. I’ve spent hours tweaking the ratios, and the result is a sauce that coats the rice like velvet while still allowing the veggies to shine. Picture yourself pulling this out of the Instant Pot, the whole kitchen smelling incredible, and a plate of golden curry waiting for you. This is hands down the best version you’ll ever make at home.
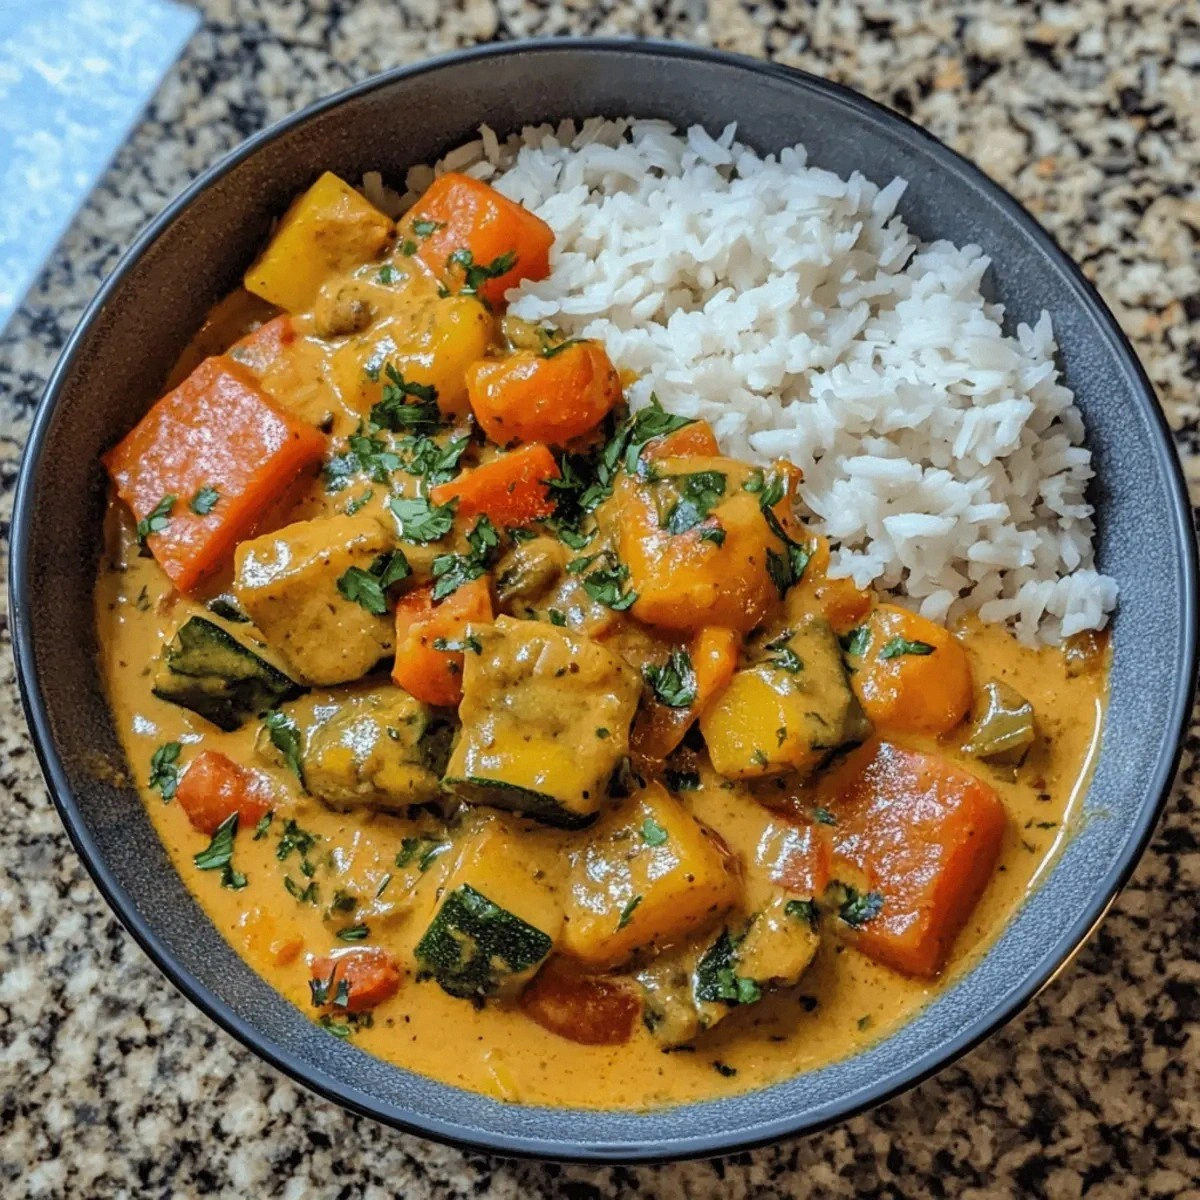
Why is this version so special? Because it takes the classic Indian‑inspired vegetable curry and turns it into a quick, fuss‑free meal that still feels like a special occasion. The coconut milk gives it a silky richness that balances the earthy spices, while the fresh cilantro and lime wedges add a bright counterpoint that keeps the dish from feeling heavy. The Instant Pot does the heavy lifting, locking in flavors and tenderizing the vegetables in a fraction of the time it would take on a stovetop. If you’ve ever struggled with uneven cooking or bland sauces, you’re not alone—and I’ve got the fix. And now the fun part, the moment where everything comes together in a single pot, is pure magic.
I’ll be honest— I ate half the batch before anyone else got to try it. The second half was just as good, and the leftovers were even better after the flavors had a chance to meld. I’ve tested this dish with different veggies—cauliflower, bell pepper, peas, and even spinach—and each variation brought a new dimension of taste. The key is to keep the vegetables firm enough to hold their shape, so I always add them after the pressure release or during the final sauté phase. If you’re curious about the science behind the perfect curry, keep reading; I’ll walk you through every single step—by the end, you’ll wonder how you ever made it any other way.
Let me walk you through every single step—by the end, you'll wonder how you ever made it any other way. From the first chop to the final garnish, we’ll keep the flavor profile consistent and the texture on point. I’ll throw in some kitchen hacks that saved me time and some watch‑out warnings that prevented disasters. The goal is to make a dish that’s not only delicious but also foolproof, so even a beginner can feel confident. This recipe is a testament to how simple ingredients, when combined thoughtfully, can create a meal that’s both comforting and adventurous. So grab your Instant Pot, gather your veggies, and let’s get cooking.
What Makes This Version Stand Out
- Taste: The combination of coconut milk, curry powder, and a touch of lime creates a flavor profile that is both rich and bright. The spices are toasted just enough to release their oils, giving the dish depth without overwhelming the vegetables. Every bite delivers a harmonious balance that feels both exotic and familiar.
- Texture: The vegetables remain crisp and colorful, thanks to the precise pressure cooking time. The sauce is silky yet thick enough to cling to each piece, creating a mouthfeel that feels indulgent but not heavy. This contrast between tender and crunchy is what keeps diners coming back.
- Simplicity: With only fourteen ingredients, the recipe is straightforward yet impressive. The Instant Pot does most of the work, so you can focus on seasoning and plating. Even if you’re new to pressure cooking, the steps are clear and easy to follow.
- Crowd Reaction: Friends and family rave about how the dish feels like a restaurant‑quality curry made at home. The vibrant colors and aromatic steam alone make it a conversation starter at dinner tables. I’ve seen people ask for the recipe after just one bite.
- Ingredient Quality: Using fresh ginger and high‑quality coconut milk elevates the dish dramatically. The fresh cilantro and lime add brightness that keeps the sauce from feeling too dense. These small touches make a big difference in the final result.
- Cooking Method: The Instant Pot’s pressure cooking locks in flavors and tenderizes the veggies in a fraction of the time it would take on the stovetop. The quick sauté after pressure release allows the sauce to thicken and develop a glossy finish. This method is efficient without sacrificing quality.
- Make‑Ahead Potential: The curry can be made a day ahead; the flavors actually deepen overnight. Reheating is quick and the sauce remains creamy. This makes it perfect for busy weekdays or meal‑prep sessions.
Inside the Ingredient List
The Flavor Base
The foundation of this curry is a blend of aromatics and spices that work together to create depth. Onion, garlic, and ginger are sautéed until translucent, releasing their sweet and pungent notes. Curry powder, turmeric, cumin, and garam masala are added next, toasted just enough to bring out their essential oils. This step is crucial; skipping it results in a flat, one‑dimensional sauce. Coconut milk provides a creamy backdrop that balances the heat, while diced tomatoes add acidity and body. The combination of these ingredients forms a sauce that is both robust and smooth.
The Texture Crew
Mixed vegetables are the star of the show, offering color, crunch, and nutrition. The Instant Pot’s pressure setting ensures that each vegetable retains its shape and bite, preventing mushiness. The vegetables absorb the flavors of the sauce, becoming tender yet firm. A key tip is to add the vegetables after the pressure release or during the final sauté; this keeps them from overcooking. The result is a vibrant medley that stands out against the creamy sauce. The texture is what makes this dish both comforting and exciting.
The Unexpected Star
Red chili flakes add a subtle heat that elevates the dish without overpowering it. Their fine texture ensures they’re evenly distributed throughout the sauce. The lime wedges provide a bright, citrusy finish that cuts through the richness of the coconut milk. Fresh cilantro adds a herbal freshness that balances the spices. Together, these ingredients bring a dynamic contrast that keeps the palate engaged. The subtlety of the heat and brightness of the citrus make this curry memorable.
The Final Flourish
Cooked basmati rice is the perfect canvas for this sauce, absorbing the flavors while remaining fluffy. The rice’s subtle nutty undertones complement the spices without competing. A final sprinkle of cilantro adds a pop of color and a fresh aroma. The lime wedges are served on the side, allowing diners to adjust the citrus intensity to their liking. This finishing touch transforms the dish from simple to spectacular. The combination of rice and sauce creates a comforting, satisfying meal that feels like a feast.
Everything’s prepped? Good. Let’s get into the real action...
The Method — Step by Step
- Step 1: Sauté the aromatics. Press the sauté button on the Instant Pot. Add a splash of oil, let it shimmer for a few seconds, then toss in the sliced onion, minced garlic, and grated ginger. Sauté until the onion turns translucent and the aroma fills the room. This is the moment of truth; the base of your curry starts here.
- Step 2: Toast the spices. Sprinkle in the curry powder, turmeric, cumin, garam masala, and red chili flakes. Stir constantly for 30 seconds until the spices toast and release their oils. The pot should emit a fragrant perfume that makes you want to close your eyes and inhale deeply. Watch out: too long and the spices burn, turning your dish bitter.
- Step 3: Add liquids. Pour in the can of coconut milk and stir to combine. Add the diced tomatoes, letting them soften and the sauce thicken. The mixture should look glossy and creamy, like a golden sunset. The coconut milk provides the creamy base that balances the heat and spices.
- Step 4: Fold in the vegetables. Add the mixed vegetables, ensuring each piece is coated with the spice-infused coconut sauce. The vegetables should look glossy and the edges slightly caramelized. This step is crucial for texture; skip it and you’ll miss that satisfying bite.
- Step 5: Pressure cook. Seal the Instant Pot lid, set the valve to seal, and choose manual high pressure for 5 minutes. The timer will start counting down. When it beeps, let the pressure release naturally for 5 minutes, then quick‑release any remaining steam. This is the moment of truth; the flavors will marry in the sealed environment.
- Step 6: Finish with lime and cilantro. Open the lid carefully, give the curry a good stir, and taste. Adjust seasoning if necessary. Add lime wedges, squeezing a few drops into the pot, then stir in fresh cilantro. The bright citrus will cut through the richness, adding a fresh lift.
- Step 7: Serve over rice. Plate the creamy curry over a bed of cooked basmati rice. The rice should be fluffy, absorbing the sauce like a sponge. Garnish with extra cilantro if you like. This is pure magic.
- Step 8: Optional reduction. If you want a thicker sauce, turn the sauté function on and let it reduce for 3–4 minutes, stirring occasionally. The sauce should thicken to a silky consistency that coats the rice. Keep an eye on it; it can scorch quickly.
- Step 9: Plate and enjoy. Plate and enjoy immediately. The first bite will be creamy, spicy, and refreshing all at once. I promise you, this is hands down the best version you’ll ever make at home. I dare you to taste this and not go back for seconds.
- Step 10: Store leftovers. Store leftovers in an airtight container for up to 3 days. Reheat gently in the microwave or on the stovetop with a splash of water to restore moisture. Serve with extra lime wedges for a fresh finish.
That’s it—you did it. But hold on, I’ve got a few more tricks that’ll take this to another level...
Insider Tricks for Flawless Results
The Temperature Rule Nobody Follows
Many cooks think that a higher pressure setting always cooks better, but that’s not true for vegetables. A moderate pressure setting preserves the texture of carrots and peas while still infusing them with flavor. I once tried a high setting and ended up with mushy carrots that looked like soup. By dialing it back, the vegetables stayed crisp and bright, enhancing the overall experience. This small tweak can transform a good dish into a great one.
Why Your Nose Knows Best
Before you taste the final dish, let it rest for a minute. The aromas will settle, giving you a better sense of the flavor balance. If it smells too strong on the spices, add a splash of coconut milk to mellow it out. My nose has saved me from countless over‑spiced disasters. Trust it; it’s your best ally when seasoning a complex sauce.
The 5‑Minute Rest That Changes Everything
After the pressure release, let the pot sit for five minutes before opening. This brief pause allows the pressure to drop naturally, preventing a sudden rush of steam that can splash hot sauce onto your hands. I’ve seen people get burned by that quick release. A five‑minute rest keeps the dish safe and lets the flavors settle.
Freshness Matters
Use the freshest cilantro and lime you can find. The bright green leaves and sharp citrus cut through the richness of the coconut milk. If you’re in a pinch, substitute with parsley or a squeeze of lemon; the result will still be delicious, but the original flavor profile will be lost.
Don’t Skimp on the Sauté
Many skip the sauté step entirely to save time, but this step is where the depth of flavor is built. Sautéing the aromatics releases their sugars and oils, creating a base that’s impossible to replicate with raw ingredients. I once made a version without sauté and the result was bland. The extra few minutes of sauté make all the difference.
Keep the Veggies Bright
Adding vegetables too early can cause them to absorb too much liquid, losing their vibrant color. Add them after the pressure release or during the final sauté; this keeps their hue bright and their texture firm. The visual appeal of a colorful curry is part of what makes it irresistible.
Creative Twists and Variations
This recipe is a playground. Here are some of my favorite ways to switch things up:
Protein Power
Add diced tofu or paneer to the mix for a protein boost. The tofu absorbs the spices, while paneer adds a creamy texture. This variation works well for vegetarians looking for a heartier meal.
Spicy Kick
Swap the red chili flakes for fresh green chilies or a spoonful of sriracha. The heat level will increase, but the bright lime will still cut through it. This version is perfect for those who love a fiery dish.
Herb‑Infused
Replace cilantro with fresh mint or basil for a different aromatic profile. Mint adds a cooling effect, while basil brings a sweet, slightly peppery note. The choice of herb can completely change the mood of the curry.
Root Vegetable Remix
Swap the mixed vegetables for a medley of root veggies like sweet potato, parsnip, and turnip. The natural sweetness of these roots pairs beautifully with the coconut milk. The dish becomes a comforting, autumnal meal.
Low‑Carb Version
Serve the curry over cauliflower rice instead of basmati. The cauliflower absorbs the sauce without adding extra carbs, making it a great option for keto or low‑carb diets. The texture is similar, and the flavor remains unchanged.
Breakfast Twist
Serve the curry with a side of fried eggs or a poached egg on top. The runny yolk adds richness and makes it a hearty breakfast. This variation turns the dish into a satisfying start to your day.
Storing and Bringing It Back to Life
Fridge Storage
Store the curry in an airtight container in the refrigerator for up to three days. The flavors will deepen overnight, making it even more delicious. When you’re ready to eat, give it a quick stir before reheating.
Freezer Friendly
Freeze the curry in single‑serving portions for up to one month. Thaw overnight in the refrigerator before reheating. This is perfect for meal prep or a quick weeknight dinner.
Best Reheating Method
Reheat gently on the stovetop with a splash of water or broth to restore moisture. A quick microwave heat can dry out the sauce, so a stovetop method preserves the creamy texture. Add a fresh squeeze of lime before serving for a bright finish.