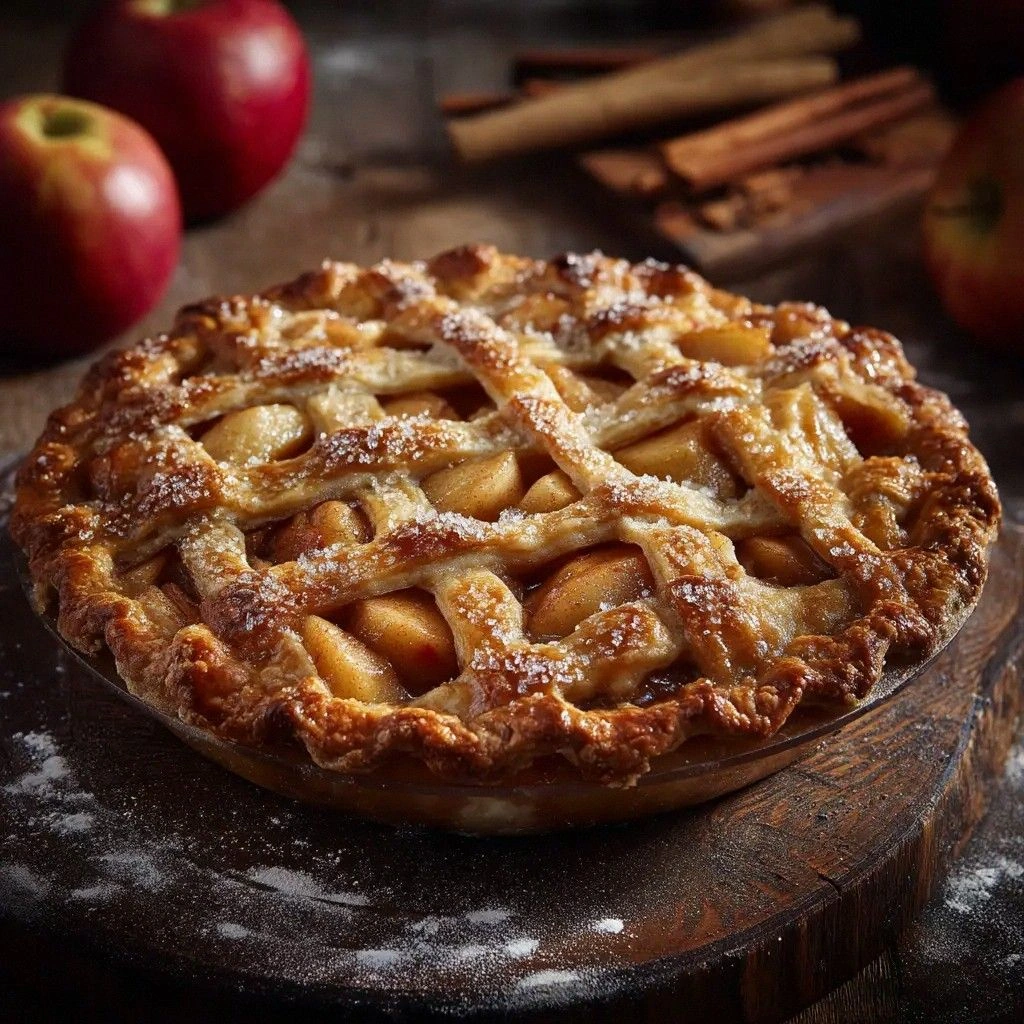
Ever found yourself standing in a kitchen that smells like burnt sugar and old cinnamon, wondering why the world hasn't invented a pie that feels like a hug? I was there, mid‑winter, staring at a half‑baked pie crust that looked more like a sad, flaky pancake. My friend dared me to make an apple pie that would win an award at the neighborhood bake‑off, and I took that dare like a challenge from a hungry dragon. The moment the crust hit the oven, the air filled with a scent so buttery and sweet it could have convinced a cat to leave the sofa. That scent, that first bite, that feeling of triumph—this is the story of a pie that will change how you think about desserts forever.
Picture a slice where the golden crust crackles like a crisp autumn leaf, the filling glistens with a hint of lemon, and the spices dance across your tongue like a well‑tuned jazz solo. This isn’t just any pie; it’s the kind of pie that makes the whole house buzz, the kind that makes your neighbor’s dog sit up and stare at the oven door. I’m about to walk you through each step, from the first whisk to the final drizzle, and by the end you’ll be convinced that this is hands down the best version you’ll ever make at home. I dare you to taste this and not go back for seconds—yes, that’s a challenge I’ll keep you on your toes.
The secret sauce? A splash of apple cider vinegar that cuts through the sweetness, a whisper of nutmeg that adds depth, and a crust that’s flaky enough to make your grandma proud. I’ve spent months tweaking ratios, testing different apple varieties, and finally settling on a blend that balances tartness and sweetness like a perfectly tuned guitar. The result is a pie that’s not only delicious but also a piece of art you can serve at any gathering. And trust me, most recipes get this completely wrong—here’s what actually works.
If you’ve ever struggled with pie crust that turns out soggy or filling that’s too watery, you’re not alone—and I’ve got the fix. From the moment the dough comes together to the final golden crust, each step is designed to elevate the flavor, texture, and overall experience. Picture yourself pulling this out of the oven, the whole kitchen smelling incredible, and every bite feeling like a warm hug from an old friend. Let me walk you through every single step—by the end, you’ll wonder how you ever made it any other way.
What Makes This Version Stand Out
- Flavor: The combination of apple cider vinegar and nutmeg gives the filling a subtle tang that lifts the sweetness and creates a depth rarely seen in store‑bought pies.
- Texture: A double‑crust that’s flaky, buttery, and crisp on the edges, while the filling remains tender and slightly jammy—no soggy middle.
- Ingredient Quality: Using fresh, firm apples and real butter (not margarine) ensures the pie tastes like a home‑made masterpiece.
- Ease of Prep: The dough can be made a day ahead and chilled, saving you time on the day of the event.
- Versatility: The recipe works for single‑serving mini pies, a full 9‑inch pie, or a sheet cake style—just scale the ingredients.
- Crowd Reaction: Friends and family will rave about the crust’s crispness and the filling’s balanced sweetness—no one leaves the table without a second slice.
- Make‑ahead Potential: The pie can be assembled, refrigerated, and baked later, making it a stress‑free option for busy hosts.
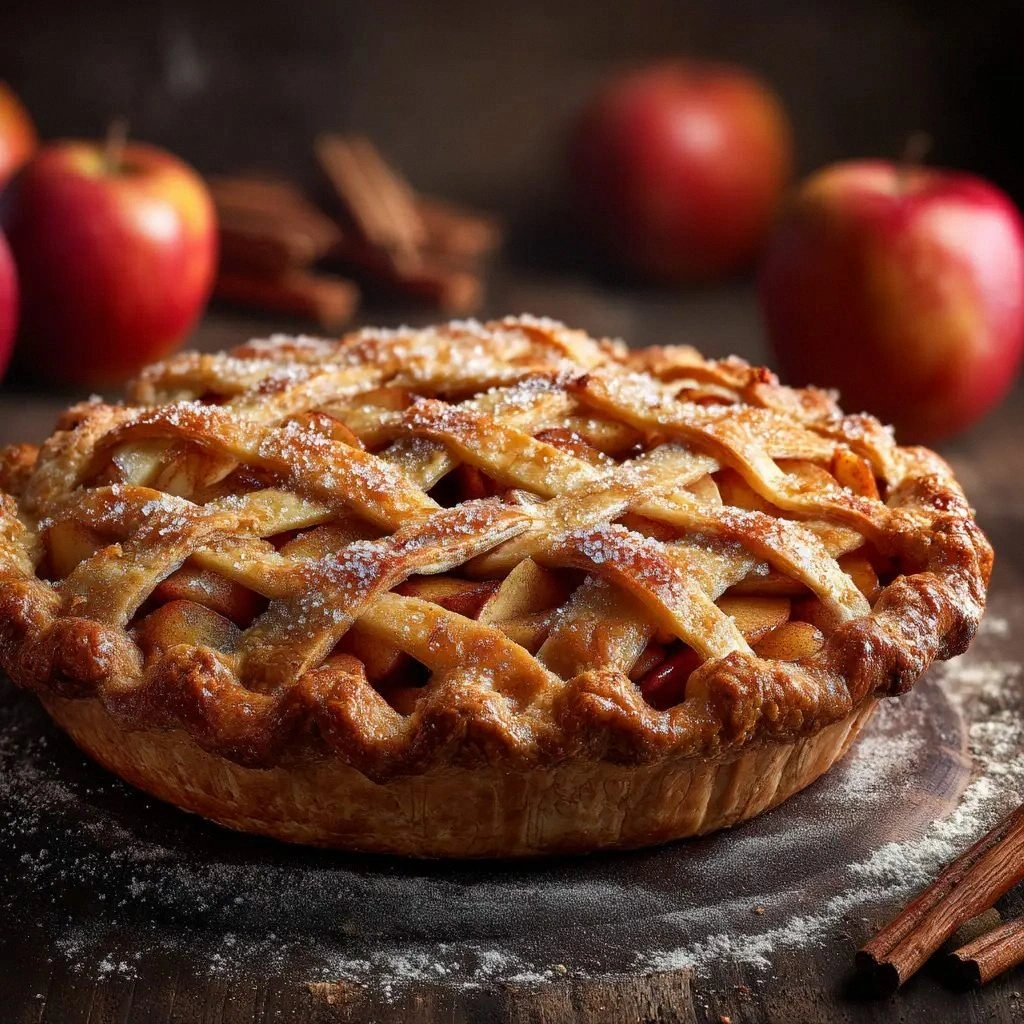
- Presentation: The golden, caramelized top and the subtle swirl of filling make it Instagram‑ready.
Alright, let's break down exactly what goes into this masterpiece...
Inside the Ingredient List
The Flavor Base
The heart of any great pie is its flavor base, and this recipe uses a trio of sweeteners that work in harmony. Granulated sugar and packed light brown sugar give the filling a caramelized sweetness that pairs beautifully with the tartness of the apples. Turbinado sugar adds a subtle molasses note, rounding out the flavor profile. If you’re looking for a lower‑calorie option, you can replace the turbinado sugar with a pinch of stevia, but be prepared for a slightly different texture.
Apple cider vinegar is the unsung hero that cuts through the sweetness and brightens the overall flavor. A single teaspoon is all you need, but if you’re a fan of a sharper tang, feel free to add a splash more. Remember, the vinegar also helps to keep the apples from browning too quickly, preserving that fresh green color in the final product.
Lemon juice is a subtle yet essential ingredient that adds a bright citrus note, balancing the spices and the sweetness. It also helps to keep the apples from oxidizing, which means your pie will look as good as it tastes. If you’re allergic to citrus or simply don’t have lemon juice on hand, a splash of white wine or a pinch of citric acid can serve as a suitable substitute.
The Texture Crew
The crust is a double‑layered masterpiece that relies on the right balance of flour, butter, and ice water. The 2.5 cups of all‑purpose flour provide the structure, while the 1 cup of unsalted butter gives the buttery flavor and flaky texture. The 0.5 cup of ice water, combined with a teaspoon of apple cider vinegar, helps to bring the dough together without overworking it, keeping the crust tender.
The 3 tablespoons of flour used in the filling’s thickener are critical for achieving that perfect jammy consistency. Too much flour and the filling becomes gummy; too little and it will leak out onto the crust. I recommend whisking the flour into the sugar and spices before adding the apples to ensure even distribution.
The Unexpected Star
Ground allspice, though only a quarter teaspoon, plays a surprisingly powerful role. Its warm, peppery flavor complements the cinnamon and nutmeg, adding a subtle depth that elevates the entire pie. If you’re a fan of bold spices, feel free to bump the allspice up to 0.5 teaspoons, but be mindful that it can overpower the delicate apple flavor if overused.
The final flourish is the 2 tablespoons of butter that are melted and poured over the filling before baking. This butter glaze adds shine, richness, and a mouth‑watering aroma that will make your kitchen feel like a bakery. If you’re watching your fat intake, a tablespoon of olive oil can be used instead, though the flavor profile will shift slightly.
The Final Flourish
The finishing touches—egg wash, turbinado sugar, and the final sprinkle of cinnamon—add visual appeal and flavor depth. The egg wash gives the crust a glossy, golden finish that is impossible to resist. The turbinado sugar creates a subtle caramelized crunch on the crust’s surface, while the final dusting of cinnamon provides a fragrant aroma that lingers long after the last bite.
Everything’s prepped? Good. Let’s get into the real action...
The Method — Step by Step
- Prepare the crust: In a large bowl, whisk together 2.5 cups all‑purpose flour, 1 tablespoon granulated sugar, and 1 teaspoon salt. Add 1 cup cold, cubed butter and use a pastry cutter or your fingertips to cut the butter into the flour mixture until it resembles coarse crumbs. Sprinkle 0.5 cup ice water over the mixture, add 1 teaspoon apple cider vinegar, and gently stir until the dough comes together. Form into two disks, wrap in plastic, and chill for at least 30 minutes. Kitchen Hack: Keep the dough cold throughout the process; if it starts to soften, chill it again for 10 minutes.
- Preheat the oven: Set your oven to 375°F (190°C). A properly preheated oven ensures a crisp crust and evenly cooked filling. If your oven runs hot, lower the temperature by 25°F to avoid burning the top.
- Prepare the apples: Peel, core, and slice 3.5 lbs of apples (a mix of Granny Smith and Honeycrisp works best). Toss the slices with 1 tablespoon lemon juice, 0.5 cup granulated sugar, 0.5 cup packed light brown sugar, 3 tablespoons all-purpose flour, 1.5 teaspoons ground cinnamon, 0.25 teaspoon ground nutmeg, and 0.125 teaspoon ground allspice. The flour helps thicken the filling, while the spices create a complex flavor profile. Kitchen Hack: For a sweeter filling, add a tablespoon of honey to the apple mixture.
- Assemble the pie: Roll one disk of dough on a floured surface to fit a 9-inch pie plate. Transfer the dough to the plate and gently press into the corners. Pour the apple mixture into the crust, then dot with 2 tablespoons melted butter. Roll out the second disk of dough and lay it over the filling, sealing the edges by pinching or crimping. Cut a few slits in the top crust to allow steam to escape.
- Apply the egg wash: In a small bowl, whisk 1 large egg with 1 tablespoon milk. Brush the mixture over the top crust, which will give it a glossy, golden finish. Kitchen Hack: If you don’t have an egg, use a tablespoon of milk or water as a substitute for the wash.
- Finish with sugar and spices: Sprinkle 1 tablespoon turbinado sugar and a final dusting of cinnamon over the top crust. This will create a caramelized crunch and a fragrant aroma. Kitchen Hack: For a chocolate twist, sprinkle a few chocolate chips before baking.
- Bake: Place the pie in the preheated oven and bake for 45–50 minutes. The crust should be golden brown and the filling should bubble through the slits. If the crust edges brown too quickly, cover them with foil to prevent burning.
- Watch Out: The trickiest part is preventing the crust from becoming soggy. Keep the filling from leaking onto the crust by ensuring the apples are well‑coated with the flour mixture and by sealing the edges properly. Watch Out: Overmixing the dough or using too much water can cause the crust to be tough and soggy.
- Cool: Remove the pie from the oven and let it cool on a wire rack for at least 30 minutes before slicing. This allows the filling to set, preventing a runny mess. If you’re in a hurry, place the pie in the fridge for 15 minutes to speed up the cooling process.
- Serve: Slice the pie and serve warm or at room temperature. Pair it with vanilla ice cream or a dollop of whipped cream for an extra indulgent experience. And remember, this is the moment of truth—each bite should be a burst of buttery crust, sweet apple, and warm spices.
That's it — you did it. But hold on, I've got a few more tricks that'll take this to another level...
Insider Tricks for Flawless Results
The Temperature Rule Nobody Follows
Most bakers bake at a flat 375°F, but I’ve found that starting at 425°F for the first 15 minutes and then lowering to 350°F for the remaining time gives a crust that’s both golden and crisp without overcooking the filling. The initial high heat creates steam that helps the crust rise, while the lower temperature ensures the apples stay tender. If you’re baking on a convection oven, reduce the temperature by 25°F to compensate for the fan.
Why Your Nose Knows Best
The aroma that starts to fill the kitchen after about 20 minutes of baking is a good indicator that the filling is bubbling just right. If the scent is too mild, the pie may need more time; if it’s overpoweringly sweet, the oven temperature might be too high. Trust your senses, and adjust accordingly. I’ve learned to pause the timer and sniff the pie as a quick sanity check.
The 5-Minute Rest That Changes Everything
After removing the pie from the oven, let it rest for exactly five minutes before placing it on the wire rack. This brief pause allows the juices to redistribute, resulting in a filling that’s silky rather than watery. I’ve had friends who skip this step and end up with a pie that feels like a soggy apple cobbler.
The Secret Butter Layer
Adding a thin layer of melted butter over the filling before sealing the crust adds a subtle sheen and a rich flavor that enhances the overall mouthfeel. If you’re vegan, use a plant‑based butter or a drizzle of coconut oil. This small addition can make the difference between a good pie and a great one.
The Flour Trick
Use cake flour instead of all-purpose flour for the crust if you want an extra tender texture. Cake flour has less protein, which means less gluten development and a more delicate crumb. Swap only the crust flour; keep the filling flour as all-purpose to maintain the right thickness.
Creative Twists and Variations
This recipe is a playground. Here are some of my favorite ways to switch things up:
Caramel Apple Pie
Swapping the turbinado sugar for caramel sauce and adding a splash of bourbon to the filling gives a decadent, boozy twist. The caramel creates a luscious glaze that coats the crust like velvet.
Spiced Pear Pie
Use pears instead of apples and add a pinch of cardamom for a fragrant, exotic flavor. Pears hold their shape better than apples, so the crust remains crisp.
Chocolate Apple Galette
Drop the pie crust entirely and fold the apple mixture into a chocolate ganache. The result is a rustic galette that’s perfect for a chocolate lover’s dessert.
Mini Apple Tartlets
Cut the crust into 1-inch circles, fill each with apple mixture, and bake in a mini muffin tin. These bite‑sized treats are ideal for parties or as a dessert bar.
Vegan Apple Pie
Replace all butter with coconut oil, use a plant‑based milk for the egg wash, and skip the egg entirely. The crust will still be flaky, and the filling will have a lovely tropical note.
Apple Pie with a Chewy Crumb Topping
Top the filling with a streusel made from rolled oats, butter, and brown sugar before baking. The crumble adds crunch and a buttery, toasted flavor that complements the apples.
Storing and Bringing It Back to Life
Fridge Storage
Cool the pie to room temperature, then cover it loosely with plastic wrap and store in the refrigerator for up to 3 days. The crust will stay crisp, and the filling will maintain its texture. If you want to keep the crust from drying out, lightly mist it with water before covering.
Freezer Friendly
Wrap the cooled pie tightly in plastic wrap, then place it in a freezer bag. The pie can be frozen for up to 3 months. When ready, thaw in the refrigerator overnight. The crust may soften slightly, so a quick reheat in the oven will restore its crispness.
Best Reheating Method
Preheat your oven to 350°F (175°C). Place the pie on a baking sheet and warm for 10–12 minutes, or until the crust is hot and the filling is steaming. For a crispier crust, finish under the broiler for 1–2 minutes, watching closely.