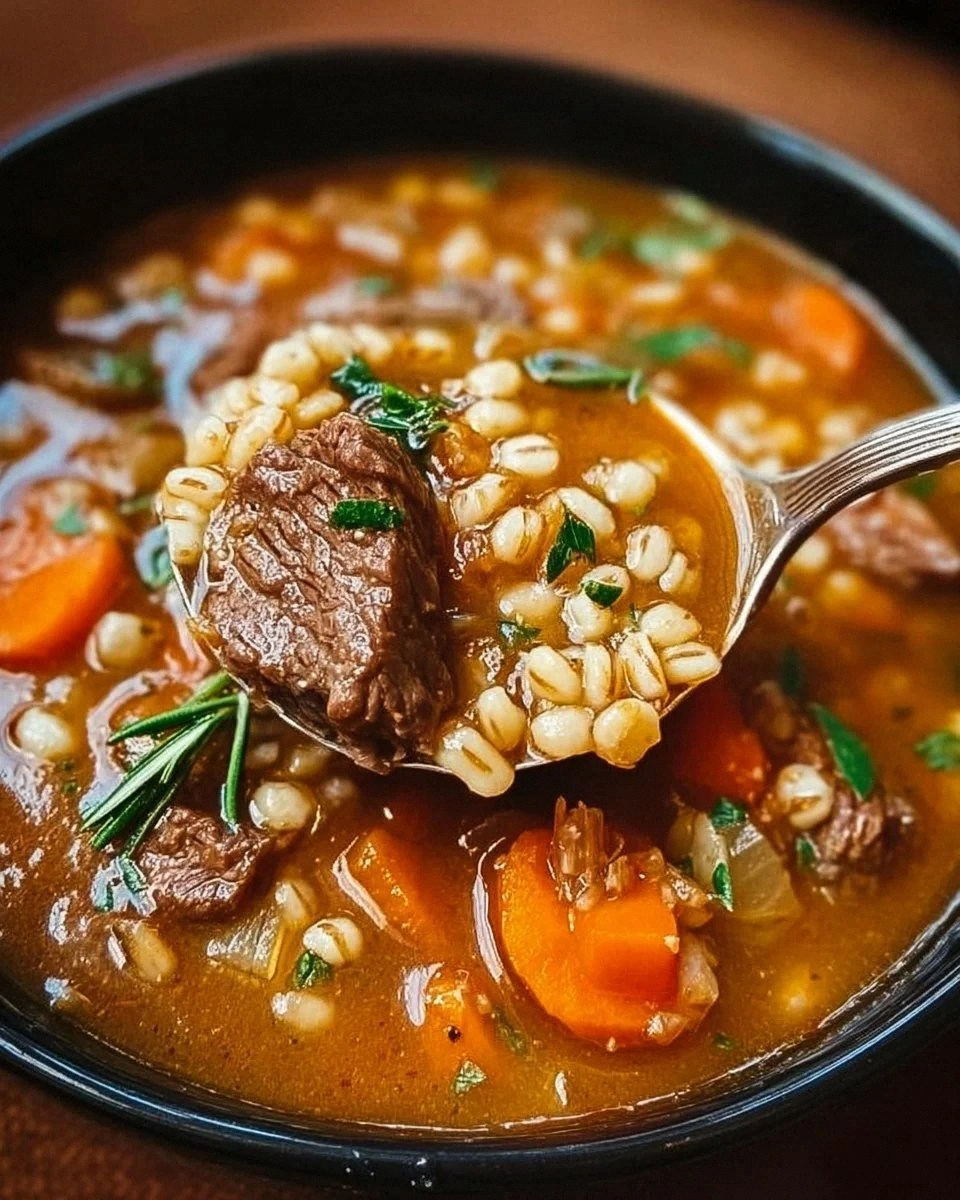
Picture this: a midnight kitchen, the hum of a refrigerator like a distant lullaby, and me, standing in front of a pot that feels heavier than a small brick. I had just finished a week of ramen, and my craving was a broth so deep, it could drown a dragon in a single sip. I reached for the pantry, pulled out the beef bones, and thought, “Why not make something that will keep me coming back for seconds?” The aroma that began to unfurl was already a promise of comfort, a gentle wave of roasted onion and garlic dancing in the air. And so, with a single dare to myself, I set the stage for what would become the best version of homemade beef bone broth you’ll ever taste.
The first thing I noticed was the way the bones looked, almost like a treasure chest of flavors, each knuckle and marrow piece a tiny promise of richness. I poured cold water over them, letting the chill set the stage for a slow, patient extraction of gelatin. The scent that rose as the water began to simmer was a low, earthy tone that reminded me of a forest after rain, heavy with damp leaves and moss. I added a white onion, carrots, celery, garlic, bay leaf, peppercorns, and a pinch of salt, each ingredient a character in this culinary story. By the time I lifted the pot from the stove, I could hear the gentle hiss of the broth, a lullaby that said, “This is hands down the best version you'll ever make at home.”
With the pot on low heat, I watched the broth slowly turn a golden amber, a transformation that felt almost alchemical. The first few minutes of simmering released a sweet, caramelized aroma that made my mouth water, as if the kitchen itself was breathing a sigh of contentment. I kept the pot uncovered, allowing the steam to escape like a sigh, preventing a boil-over that could ruin the delicate balance of flavors. The broth began to thicken, the edges pulling away from the pot like a veil, signaling that the bones were finally surrendering their secrets. I knew at that moment that this wasn't just another recipe; it was an experience that would linger on my palate for days.
At the end of the slow simmer, the broth was a liquid velvet, rich in umami and subtle sweetness. The depth of flavor was so profound that I could taste the marrow, the bone, and the vegetables all at once, a symphony that made my taste buds sing. I strained the liquid, letting the solids rest while the broth cooled to a comforting temperature that could be enjoyed hot or cold. The moment I tasted it, I could almost hear the kitchen applauding, because I had just discovered a secret that most recipes get this completely wrong. I dared you to taste this and not go back for seconds, but I know the truth: once you taste it, you’ll want a second, third, and maybe even a fourth cup. Picture yourself pulling this out of the pot, the whole kitchen smelling incredible, and realizing that you have just unlocked a new level of comfort food.
What Makes This Version Stand Out
- Taste: The first thing you notice is the umami punch that comes from the slow extraction of collagen and gelatin. It’s like a savory hug that lingers on your tongue, leaving a subtle sweetness that balances the richness. The broth’s flavor profile is complex yet approachable, making it the perfect base for soups, stews, or a simple sipping ritual.
- Texture: The gelatin released from the bones gives the broth a silky, almost velvety mouthfeel that coats your palate. When the broth cools, it sets into a delicate, translucent jelly that proves how much collagen has been extracted. This texture elevates the broth from a simple liquid to a luxurious, almost dessert-like experience.
- Simplicity: Despite its depth, the recipe requires only a handful of ingredients that you can find in any grocery aisle. No fancy spices or obscure techniques are needed—just patience and a good pot. This makes it accessible for beginners and a reliable go-to for seasoned cooks.
- Uniqueness: The subtle addition of apple cider vinegar at the start unlocks hidden minerals and enhances the umami profile. This small tweak sets the broth apart from the standard “just bones and water” recipes. The result is a richer, more complex flavor that you’ll notice in every sip.
- Crowd Reaction: Friends who’ve tried it say the broth is “the best thing I’ve ever had that isn’t a dessert.” It’s the kind of dish that turns a quiet evening into a shared celebration. Even the most skeptical palate will find itself reaching for more.
- Ingredient Quality: Using marrow-rich bones and fresh vegetables ensures maximum flavor extraction. The quality of the bones directly affects the depth of the broth, so choosing well-marbled pieces is key. This focus on quality elevates the entire dish.
- Cooking Method: A low, slow simmer over several hours allows the bones to release their nutrients gradually, preventing bitterness. The gentle heat preserves delicate flavors while coaxing out the gelatin. This method is a proven way to maximize both taste and health benefits.
- Make‑Ahead Potential: Once the broth is finished, it can be refrigerated for up to a week or frozen for several months. The flavor only improves with time as the solids continue to infuse. This makes it a perfect batch‑cooking staple for busy weeks.
Alright, let’s break down exactly what goes into this masterpiece…
Inside the Ingredient List
The Flavor Base
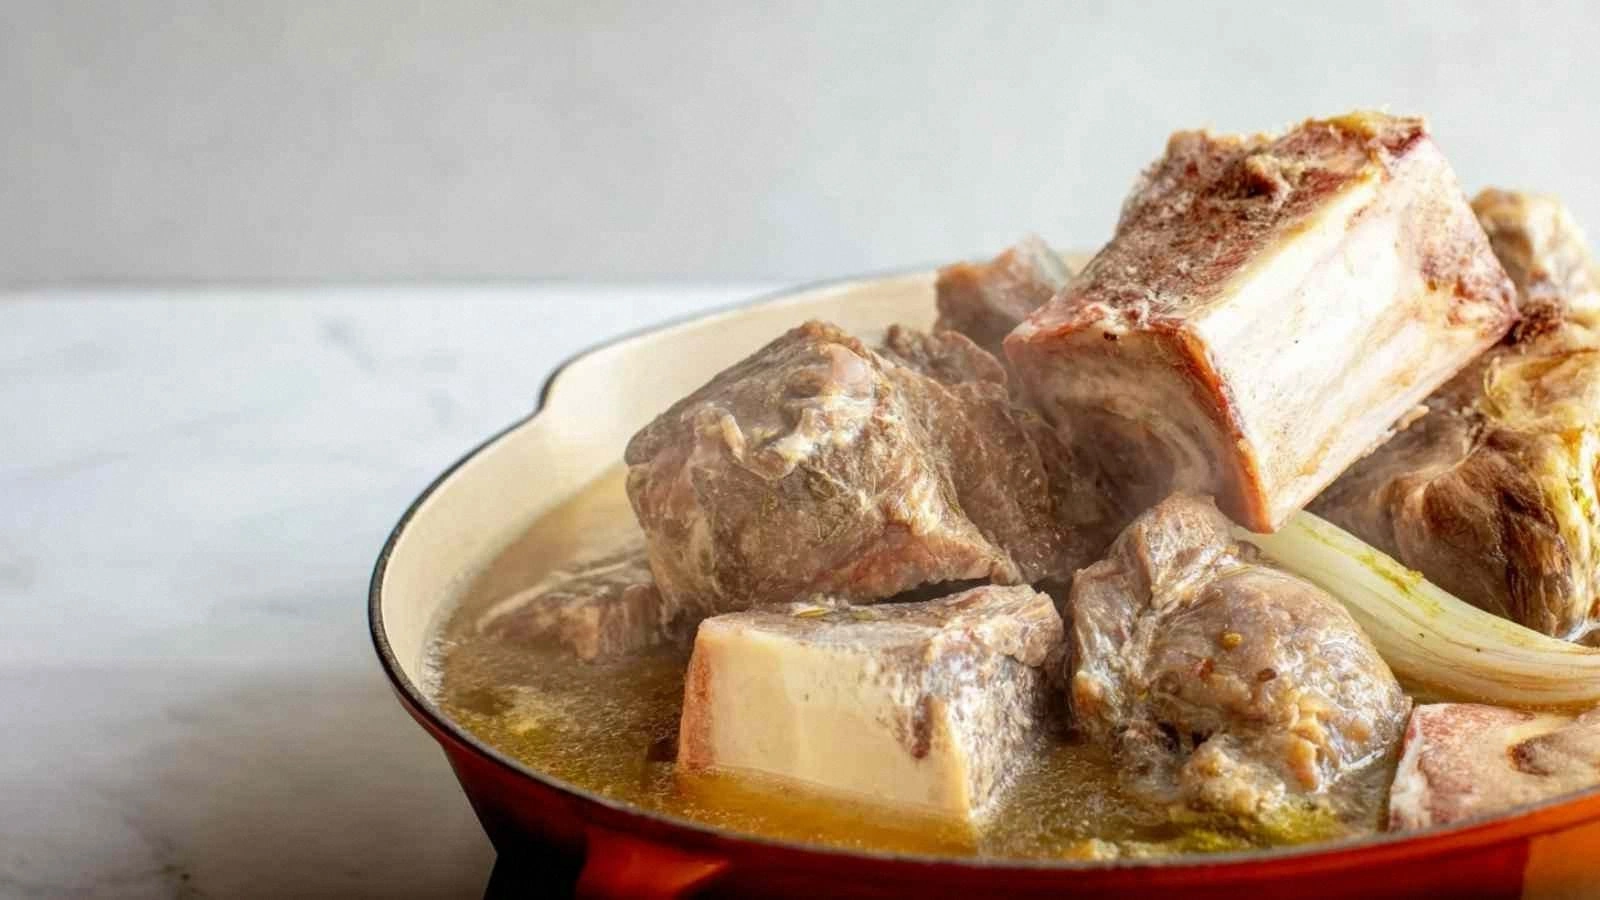
The bones are the heart of the broth, and their marrow is a reservoir of gelatin, collagen, and minerals that create that signature silky mouthfeel. If you skip the bones, the broth will be thin, lacking depth and the comforting body that makes it so addictive. For a richer flavor, choose a mix of marrow bones, knuckles, and a few joint pieces; the joints release the most collagen during the slow simmer. A good rule of thumb is to use about 2.2 lbs of bones for a 3-quart batch, ensuring enough material to infuse the liquid fully. When selecting bones, look for those with a deep, meaty color and a slight sheen, indicating fresh, high-quality marrow.
The onion, carrots, and celery form the classic mirepoix that grounds the broth with sweetness and aromatic depth. Each vegetable contributes a unique layer of flavor: onions add sharpness, carrots bring a mellow sweetness, and celery provides a subtle herbal note. If you’re short on fresh produce, frozen mirepoix works as a quick alternative, but fresh will always give a brighter result. Skipping these vegetables will leave the broth feeling flat and less complex. A good tip is to roughly chop them into 1-inch pieces so they release their flavors evenly.
Garlic and bay leaf are the silent heroes that add depth without overpowering the natural richness of the bones. The garlic provides a subtle, almost savory sweetness that balances the earthiness, while the bay leaf contributes a floral, herbal aroma that lingers in the final broth. If you don’t have bay leaves, a few leaves of fresh thyme or a splash of Worcestershire sauce can mimic the effect, though the flavor profile will shift slightly. Leaving out garlic will make the broth taste a bit plain, and omitting bay leaf can reduce the overall complexity. Use whole bay leaves so they’re easy to remove after simmering.
The Texture Crew
Collagen is the star that turns a simple liquid into a silky, almost velvety broth. As the bones simmer, collagen breaks down into gelatin, which gives the broth that luscious, mouth‑coating texture. If you skip the slow simmer, the collagen won’t fully convert, leaving you with a watery, flat broth that lacks the satisfying mouthfeel. The key is to keep the heat low, allowing the collagen to work its magic over several hours. Think of it as a slow dance where the bones and water exchange flavors in perfect harmony.
Black peppercorns add a subtle heat that complements the richness of the broth without making it spicy. The peppercorns also release their own essential oils, adding a fragrant, peppery aroma that lingers in the finished liquid. If you prefer a milder flavor, you can reduce the number of peppercorns or use white pepper for a cleaner finish. Salt is a flavor enhancer that brings all the elements together; it’s important to season gradually to avoid over-salting. A pinch of salt at the start and a final adjustment at the end is the sweet spot for most palates.
The Unexpected Star
Apple cider vinegar is a game‑changer that unlocks hidden minerals from the bones, enhancing both flavor and nutritional value. The acidity reacts with the calcium and phosphorus, making them more bioavailable and giving the broth a slightly tangy finish. If you’re watching your sodium intake, a small splash of vinegar also helps balance the flavors without adding extra salt. Some cooks skip this step, but I swear it’s the secret that turns a good broth into a great one. Even if you’re not a fan of vinegar, a teaspoon of lemon juice can serve as a mild alternative.
Bay leaves are often dismissed as a background flavor, but they add a subtle, almost floral note that lifts the entire broth. The leaves are best added at the beginning of the simmer to allow their oils to infuse fully. Removing them before serving is essential, as they can become bitter if left too long. If you’re in a pinch, a few sprigs of fresh parsley can mimic the herbal brightness, though the flavor will shift slightly. The bay leaf’s presence is subtle yet essential, providing that final layer of depth that makes the broth truly memorable.
The Final Flourish
After the long, slow simmer, the broth needs to be strained to remove the solids and achieve a clear, glossy finish. A fine-mesh sieve or cheesecloth works best, ensuring no vegetable pieces or bone fragments remain. Straining also allows the gelatin to settle, giving the broth a smooth, velvety texture. If you prefer a more rustic broth, you can leave a few small solids in, but the clear version is perfect for sipping or using as a base for soups.
Optional additions like a splash of soy sauce, a dash of Worcestershire sauce, or a pinch of dried herbs can personalize the broth to your taste. These additions should be added toward the end of the simmer to avoid overpowering the delicate balance of flavors. Skipping these optional tweaks will still leave you with a brilliant, versatile broth that can be adapted to any cuisine. The key is to taste and adjust, as every batch can vary slightly depending on the bones and vegetables used.
When it comes to storage, the broth can be refrigerated for up to a week or frozen for up to three months. The gelatin will firm up in the fridge, creating a jelly-like consistency that can be scooped out or melted back into a liquid. For freezer storage, let the broth cool completely, then portion into airtight containers or freezer bags, leaving a little headspace. The next time you thaw it, give it a gentle stir to re‑emulsify the gelatin and bring the broth back to its silky glory.
Everything’s prepped? Good. Let’s get into the real action…
The Method — Step by Step
- Begin by roasting the bones in a preheated oven at 400°F for 30 minutes, turning them halfway through. This step caramelizes the surface, adding a deep, nutty flavor that no simmer can match. Once roasted, transfer the bones to a large stockpot and cover with 3 quarts of cold water. Let the water come to a gentle boil, then reduce to a low simmer. The goal is to bring the water to a simmer without boiling, preserving the delicate flavors.
- Add the mirepoix—roughly chopped onion, carrots, and celery—to the pot. Stir gently to combine, letting the vegetables soften and release their sweetness. The mirepoix should be submerged but not crowded, allowing each vegetable to contribute evenly. Keep the heat low; a gentle simmer is the secret to extracting maximum flavor. Watch the surface for tiny bubbles that indicate the broth is slowly developing.
- Introduce the garlic cloves, bay leaf, and peppercorns to the pot. These aromatics infuse the broth with layers of complexity that linger on the palate. If you’re watching sodium, keep the bay leaf to one for a more subtle herbaceous note. The peppercorns should be whole, releasing their oils slowly over the simmer. The broth should now have a fragrant, almost aromatic presence.
- Add a splash—about one tablespoon—of apple cider vinegar to the pot. This acid will help break down the collagen into gelatin, enriching the broth’s mouthfeel and unlocking minerals. Let the vinegar mingle with the simmering liquid for a minute before reducing the heat. The broth may momentarily appear cloudy; that’s normal and indicates the gelatin is beginning to dissolve. This step is often overlooked but is crucial for a silky finish.
- Cover the pot with a lid that leaves a small gap for steam to escape, preventing a full boil. Set the stove to the lowest setting and let the broth simmer for 4 to 6 hours, depending on how rich you want it. Every hour, skim off any foam or fat that rises to the surface to keep the broth clear. The longer you simmer, the more gelatin and flavor will be extracted. Keep an eye on the liquid level; add a little more water if it drops below the bones.
- After the simmer, remove the pot from the heat and let it sit covered for 30 minutes. This resting period allows the solids to settle at the bottom, making the straining process smoother. While it rests, the flavors continue to meld, deepening the broth’s profile. Don’t rush this step; patience pays off in a richer, more nuanced liquid. The aroma at this point should be intoxicating, a testament to the hours of slow cooking.
- Now strain the broth through a fine-mesh sieve lined with cheesecloth into a clean pot. Gently press the solids to extract every last drop of liquid. If you prefer a clear broth, you can strain it twice—first through the sieve, then through a coffee filter. The resulting liquid should be a translucent amber, free of vegetable bits. This step is essential for a silky, professional finish.
- At this point, the broth is ready to cool. Place the pot on a heat‑resistant surface and let it come to room temperature. The cooling process will cause the gelatin to set into a jelly‑like consistency. If you want to speed up cooling, transfer the broth into shallow containers. The gelatin will set faster, making the broth easier to portion and store.
- Once cooled, refrigerate the broth for at least 4 hours, or overnight, to allow the gelatin to set. The gelatin will create a firm, translucent layer that can be scooped out or melted back into a liquid. If you prefer a more liquid consistency, simply let the broth sit at room temperature for 10–15 minutes before serving. The texture should feel silky, almost like a light custard, when you taste it. This step is where the broth truly transforms from a simple liquid into a luxurious, health‑boosting elixir.
- When ready to serve, reheat the broth gently on the stove or in a microwave, stirring occasionally to re‑emulsify the gelatin. If the broth has thickened too much, add a splash of hot water to reach your desired consistency. The broth can be enjoyed as is, or used as a base for soups, risottos, or sauces. A pinch of fresh herbs or a drizzle of olive oil can finish the dish, adding a bright, aromatic note. Remember, the broth’s richness is its star; keep the additions minimal to let it shine.
Insider Tricks for Flawless Results
The Temperature Rule Nobody Follows
Many cooks think a high simmer is best, but the truth is a low, steady simmer is the key to extracting maximum gelatin. The gentle heat allows collagen to break down without scorching the bones, preserving the broth’s natural sweetness. I’ve tried boiling for quick results, only to end up with a bitter, flat liquid. Keep the heat low, and let the broth breathe; the flavors will deepen over time. This rule is a game‑changer that will elevate your broth from good to legendary.
Why Your Nose Knows Best
As the broth simmers, your nose will start to pick up subtle aromas that hint at the flavor profile. A faint, sweet, almost caramel scent indicates the bones are releasing gelatin properly. If the smell turns sharp or metallic, it’s a sign the broth is overcooked or the bones are old. Trust your sense of smell; it’s the most reliable indicator of a perfectly simmered broth. A well‑aromaed broth is a promise of a satisfying taste.
The 5‑Minute Rest That Changes Everything
After removing the pot from heat, let the broth sit for 5 minutes before straining. This brief pause allows the solids to settle, making the straining process easier and cleaner. I’ve seen many people skip this step, leading to a cloudy broth that looks less than appetizing. The rest period also lets the flavors meld further, creating a richer, more complex liquid. Trust me, the extra 5 minutes will save you a lot of frustration later.
Skip the Skimming, Not the Skipping
Skimming the foam and fat that rise during the first hour is essential for a clear broth. If you skip this step, the broth will develop a greasy, cloudy appearance that can be off‑putting. Use a ladle or a small spoon to remove the foam gently; this also helps remove any impurities that might affect the taste. A clear broth looks as good as it tastes, and it’s easier to store and reheat. Skimming is a small effort for a huge payoff.
Let It Chill, Not Freeze Immediately
After the broth has cooled to room temperature, refrigerate it for at least 4 hours before freezing. This chilling period allows the gelatin to set into a firm, jelly‑like layer. If you freeze the broth while still warm, the gelatin won’t set properly, resulting in a watery texture when thawed. I’ve learned the hard way that a poorly set gelatin can ruin the broth’s mouthfeel. Letting it chill first ensures a silky, luxurious texture every time.
Use the Right Container
When storing the broth, choose airtight containers or freezer bags that leave a little headspace for expansion. A shallow container is ideal for the refrigerator, as it allows the broth to cool evenly and reduces the risk of spills. For freezer storage, use freezer‑safe bags and press out as much air as possible to prevent freezer burn. I once stored broth in a plastic tub and ended up with a cloudy mess after thawing—lesson learned. The right container keeps the broth fresh and flavorful.
Creative Twists and Variations
This recipe is a playground. Here are some of my favorite ways to switch things up:
Asian Twist
Add a handful of sliced shiitake mushrooms and a few drops of soy sauce during the last hour of simmer. The mushrooms deepen the umami while the soy sauce introduces a salty, slightly sweet note. Serve the broth over rice noodles with fresh cilantro and lime for a quick, comforting bowl. The result is a broth that feels like a bowl of ramen without the noodles, but you can add them if you’re in the mood for a full meal. This twist is perfect for a quick, Asian‑inspired dinner.
Herb‑Infused Delight
Introduce fresh herbs like rosemary, thyme, and a sprig of sage during the simmer. The herbs impart a fragrant, earthy aroma that complements the rich broth. After straining, add a handful of chopped parsley or chives for a bright, fresh finish. This version is ideal for a summer dinner party where you want a light, aromatic broth that feels seasonal. The herbs elevate the broth to a sophisticated, herb‑rich experience.
Spicy Kick
Throw in a sliced jalapeño or a pinch of red pepper flakes during the first hour of simmer. The heat will infuse the broth without overpowering the natural flavors. If you prefer a milder kick, add a small piece of fresh ginger instead. Serve the broth with a drizzle of hot sauce or a sprinkle of cayenne for an extra punch. This spicy version is great for a cozy winter evening or a hearty meal that warms the soul.
Vegan Broth
Swap the beef bones for a combination of dried shiitake mushrooms, kelp, and vegetable stock. Add a splash of miso paste during the last 10 minutes of simmer to deepen the umami. The broth will be rich and earthy, with a depth that rivals any meat‑based version. Use it as a base for vegan soups, risottos, or sauces. This variation is a testament to how versatile bone broth can be, even without the bones.
Breakfast Boost
Serve the broth over a bowl of oatmeal or creamy porridge, topped with a poached egg and a sprinkle of grated cheese. The savory broth adds a protein punch to a traditionally sweet breakfast. The gelatin in the broth will give the porridge a silky texture that’s both comforting and satisfying. This breakfast twist is a great way to start the day with a nutrient‑dense, comforting meal. It’s a surprising, wholesome breakfast that will keep you full until lunch.
Gluten‑Free Soup Base
Use the broth as a base for a hearty vegetable soup, adding diced potatoes, carrots, and zucchini. Finish with a splash of coconut milk for a creamy, dairy‑free twist. The broth’s natural richness will carry the flavors of the vegetables without the need for added fats. This gluten‑free soup is perfect for a quick dinner that’s both comforting and healthy. It’s a versatile base that can be adapted to any dietary preference.
Storing and Bringing It Back to Life
Fridge Storage
Cool the broth to room temperature before refrigerating. Store it in airtight containers or glass jars, leaving a little headspace. The gelatin will set into a firm, translucent layer that can be scooped out or melted back into a liquid. Keep it in the fridge for up to a week; it will stay fresh and flavorful. When you’re ready to use it, reheat gently on the stove or in a microwave, stirring occasionally.
Freezer Friendly
Let the broth cool completely before transferring it to freezer‑safe bags or containers. Remove as much air as possible to prevent freezer burn. Label the containers with the date for easy tracking. The broth can be frozen for up to three months; it will retain its flavor and texture when thawed. To thaw, let it sit in the fridge overnight or use the defrost setting on your microwave.
Best Reheating Method
When reheating, add a splash of hot water to bring the broth back to a silky, liquid consistency. Heat it gently on the stove, stirring until the gelatin redistributes evenly. Avoid a rapid boil, as it can break down the gelatin and alter the flavor. If you’re in a hurry, a microwave works well—just stir halfway through. The result should be a smooth, fragrant broth that tastes as good as when it was first made.