I still remember the night I almost burned my kitchen to a crisp while chasing the perfect crème brûlée. The stove was humming, the sugar was caramelizing, and I was chasing a golden crust that would make my friends swoon. My oven was a temperamental beast, and I was the one who had to tame it, but I did it. The moment the sugar melted into a glossy, amber glaze and the first crack echoed like a tiny applause, I knew I had stumbled upon something extraordinary. That single crack, that fleeting moment of triumph, is what this recipe captures.
Picture the aroma of vanilla and butter swirling through the air, the sound of sugar crackling as it transforms, the sight of a buttery, creamy center that promises a silky mouthfeel. The texture is a dance between a molten custard and a crisp, caramelized top that snaps with each bite. The flavor profile is a layered experience: sweet, buttery, with a hint of smoky caramel and the deep, comforting undertone of vanilla bean. It feels like a hug wrapped in sugar, a dessert that feels indulgent yet surprisingly restrained. And the best part? The process is simpler than most people think, with only a handful of ingredients that you can find in any pantry.
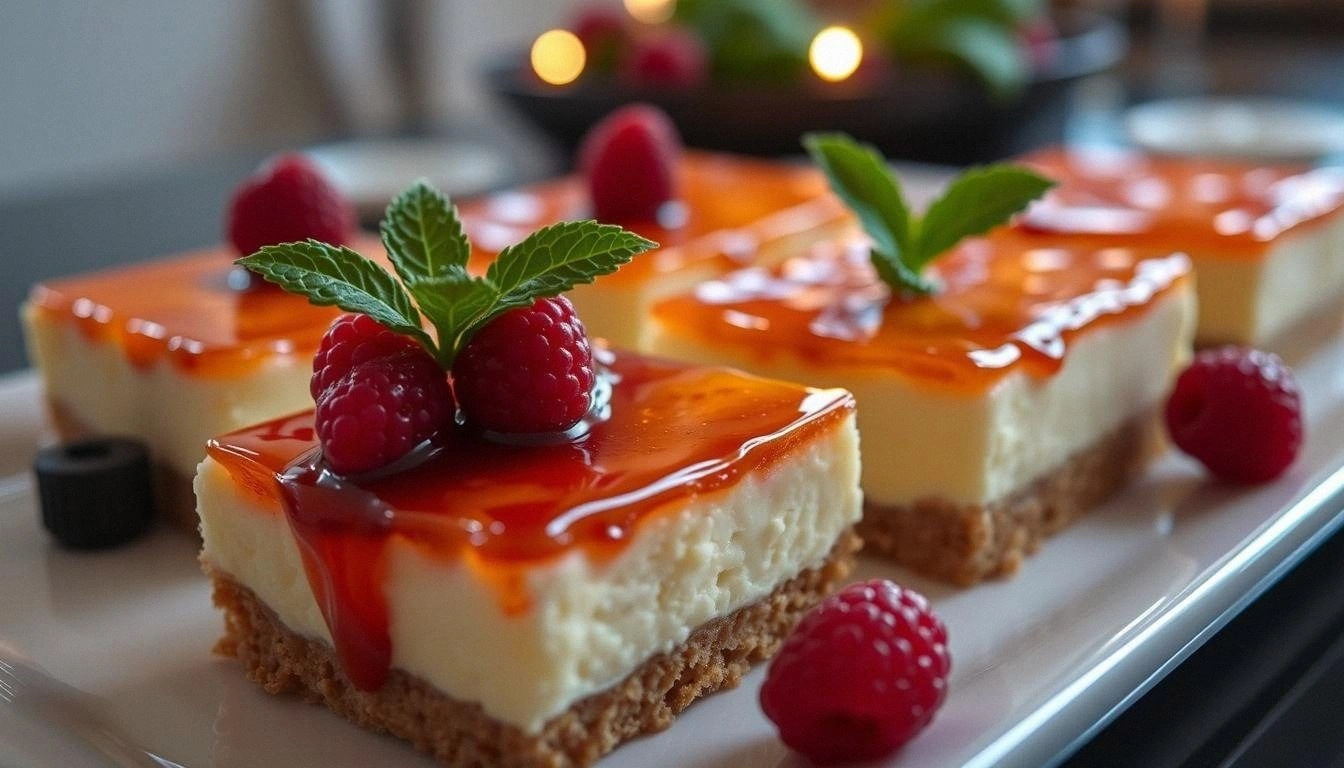
What sets this version apart from the countless others swirling around the internet is that it takes the classic French dessert and reimagines it as a modern, crowd-pleasing bar. It marries the richness of cream cheese with the delicate sweetness of Graham crackers, creating a base that supports a luscious, silky custard. It incorporates vanilla bean paste for depth, and the heavy cream adds a luxurious mouthfeel that feels both decadent and approachable. And, the finishing touch— the brûlée topping— is achieved with a simple sugar layer that caramelizes to perfection, giving that satisfying crack with each forkful. I dare you to taste this and not go back for seconds.
By the end of this guide, you’ll have a dessert that’s hands down the best version you'll ever make at home. I’ll be honest — I ate half the batch before anyone else got a chance. But that’s because the flavor is so addictive and the texture so perfect. If you've ever struggled with caramelizing sugar or achieving the right custard consistency, you're not alone — and I've got the fix. Let me walk you through every single step — by the end, you'll wonder how you ever made it any other way.
What Makes This Version Stand Out
- Flavor: The combination of cream cheese and vanilla bean paste creates a depth of flavor that feels both familiar and novel, elevating the classic custard to something truly memorable.
- Texture: The buttery, crumbly Graham cracker crust provides a satisfying contrast to the silky custard, while the caramelized sugar topping delivers a satisfying snap that breaks the creamy smoothness.
- Simplicity: With only five core ingredients, this recipe is approachable for novice bakers and seasoned chefs alike, making it a go-to dessert for any occasion.
- Versatility: The base can be adapted to accommodate dietary preferences, such as using dairy-free cream cheese or low-sugar alternatives, without compromising flavor.
- Crowd Appeal: The bars are easy to portion, making them perfect for parties, potlucks, or a quiet evening with a loved one.
- Make-Ahead: The bars hold up beautifully for up to 48 hours in the refrigerator, allowing you to prepare them in advance and still deliver a fresh, caramelized finish.
- Visual Impact: The golden, crackling top is a showstopper that invites conversation and compliments alike.
Inside the Ingredient List
The Flavor Base
Cream cheese is the star of this dessert, offering a tangy richness that balances the sweetness of sugar and the buttery notes of the crust. Its creamy texture provides a luxurious mouthfeel that feels indulgent without being heavy. Skipping cream cheese would result in a flatter, less complex custard that lacks depth. If you prefer a lighter version, consider substituting a portion of the cream cheese with Greek yogurt, but be prepared for a slightly tangier profile. When selecting cream cheese, choose a full-fat variety for maximum richness; the higher the fat content, the silkier the custard.
The Texture Crew
Graham crackers form the foundation, offering a subtle sweetness and a crumbly texture that holds the custard together. They also contribute a comforting, nostalgic flavor reminiscent of childhood snack time. If you’re looking to tweak the texture, crush the crackers finely to create a smoother crust, or leave them slightly chunky for a more pronounced bite. For a gluten-free alternative, opt for certified gluten-free Graham crackers, but be mindful that the crumb may be slightly different. The cracker crumbs should be evenly distributed to avoid any unevenness in the bars.
The Unexpected Star
Vanilla bean paste is the secret weapon that elevates this dessert from ordinary to extraordinary. It delivers a pure, aromatic vanilla flavor that complements the cream cheese without overpowering it. Unlike vanilla extract, the paste provides a richer, more complex taste profile, thanks to the presence of the whole bean. If you cannot find vanilla bean paste, a high-quality vanilla extract can substitute, but use 1½ teaspoons to match the intensity. This ingredient is crucial for achieving that deep, comforting vanilla undertone that lingers on the palate.
The Final Flourish
Heavy cream is the final touch that enriches the custard, giving it a silky, velvety finish that melts in your mouth. It also helps balance the acidity of the cream cheese, creating a smooth, cohesive texture. If you’re aiming for a lower-fat option, replace the heavy cream with half-and-half or a plant-based cream, but note that the custard may be slightly thinner. Adding a pinch of salt to the cream mixture enhances the overall flavor by cutting through the sweetness. The heavy cream should be cold before mixing to ensure a stable custard that sets beautifully.
Everything's prepped? Good. Let's get into the real action...
The Method — Step by Step
- Preheat and Prep: Set your oven to 325°F (163°C). Line a 9x13-inch pan with parchment paper, leaving an overhang on two sides for easy lifting. This step ensures a smooth release and a clean surface for the crust. The parchment also prevents the crust from sticking and burning at the edges. If you’re feeling adventurous, sprinkle a pinch of sea salt on the parchment for a subtle contrast.
- Crush the Cracker Base: Place Graham crackers in a zip-top bag and crush them with a rolling pin until fine crumbs form. Transfer the crumbs to a bowl and mix with melted butter (¼ cup) until the mixture resembles wet sand. This butter incorporation gives the crust a buttery, golden hue when baked. Spread the crumb mixture evenly in the prepared pan, pressing down firmly with a flat spatula. Bake for 10 minutes, then remove and set aside to cool slightly.
- Blend the Cream Cheese Mixture: In a medium bowl, beat cream cheese (8 oz) until smooth and creamy. Add sugar (½ cup) and vanilla bean paste (1 tsp) and continue beating until the mixture is silky. The key is to eliminate any lumps; a smooth custard sets better and tastes richer. Fold in heavy cream (1 cup) slowly, ensuring it integrates without curdling. Let the mixture sit for 5 minutes; this allows the flavors to meld.
- Pour Over the Crust: Carefully pour the custard over the cooled Graham cracker crust, smoothing the top with a spatula. The custard should settle evenly, filling the gaps in the crumb base. This layer is the heart of the dessert; its texture should be silky and slightly thickened. Place the pan on a baking sheet to catch any drips and ensure even heat distribution.
- Bake to Perfection: Slide the pan into the oven and bake for 30 minutes, or until the custard edges are set but the center still has a slight wobble. The custard should not be completely firm; it needs that creamy center that melts in your mouth. The golden edges will indicate proper caramelization without scorching. After baking, let the bars cool in the pan for 15 minutes before transferring to a wire rack to cool completely.
- Caramelize the Sugar: Once the custard has cooled, sprinkle an even layer of granulated sugar (½ cup) over the top. Use a kitchen torch to melt the sugar into a crisp, amber crust. Hold the torch about 2 inches away and move it in a circular motion to avoid burning. Watch the sugar melt into a glossy, caramelized surface that crackles when it cools. This is the moment of truth.
- Let It Set: Allow the sugar crust to harden completely before cutting. This step is crucial for achieving that satisfying crack when you bite into the dessert. If you’re impatient, place the bars in the fridge for 10 minutes to speed up the setting. The result is a smooth, caramelized top that contrasts beautifully with the creamy interior.
- Serve and Enjoy: Cut the bars into squares or rectangles with a sharp knife. Serve at room temperature for the best flavor. If you prefer a chilled dessert, refrigerate for 30 minutes before serving. The bars can also be stored in the refrigerator for up to 48 hours; reheat briefly under a broiler to revive the caramelized top.
That's it — you did it. But hold on, I've got a few more tricks that'll take this to another level...
Insider Tricks for Flawless Results
The Temperature Rule Nobody Follows
Many bakers overlook the importance of oven temperature accuracy. Even a 10°F variance can affect the custard’s set time and the crust’s crispness. Use an oven thermometer to confirm the heat before baking. If your oven runs hot, reduce the temperature by 25°F and adjust the baking time accordingly. This small tweak ensures a perfectly set custard and a golden crust.
Why Your Nose Knows Best
Smell is a powerful indicator of readiness. When the custard is done, it emits a warm, buttery aroma that’s unmistakable. If you’re unsure, gently touch the center; it should feel firm yet give slightly under pressure. Relying on your nose and touch can save you from overbaking or undercooking.
The 5-Minute Rest That Changes Everything
After baking, let the bars rest for exactly five minutes before adding sugar. This pause allows the custard to set fully, preventing it from sliding when you sprinkle sugar. It also gives the crust a chance to firm up, ensuring a clean cut. Skipping this rest can lead to a mushy center and a crumbly top.
The Right Tool for the Job
A high-quality kitchen torch is essential for a flawless caramelized top. If you don’t own one, a broiler works as a last resort, but it requires close monitoring to avoid burning. Keep the torch’s flame steady and move it evenly to ensure uniform caramelization. A well‑caramelized top adds a satisfying crunch and visual appeal.
The Power of Chill
Refrigerating the bars before caramelizing can make the sugar layer easier to manage. The cold custard resists melting, allowing the sugar to adhere cleanly. It also helps the bars hold their shape when cutting. Just remember to let them sit at room temperature for 10 minutes before cutting to avoid a brittle crust.
Creative Twists and Variations
This recipe is a playground. Here are some of my favorite ways to switch things up:
Almond Crust Variation
Swap Graham crackers for finely ground almonds. The nutty flavor adds a subtle depth that pairs beautifully with the vanilla custard. Use an almond flour base for a gluten-free option. The crust becomes slightly denser, offering a new textural contrast. This variation is perfect for those who love a hint of nuttiness.
Chocolate Drizzle Finish
After caramelizing the sugar, drizzle melted dark chocolate over the top. The chocolate’s bittersweet notes balance the sweetness of the sugar. Allow the chocolate to set before cutting. The result is a decadent, multi-layered dessert that’s Instagram-worthy. This twist is ideal for chocolate lovers.
Citrus Zest Infusion
Add a tablespoon of lemon or orange zest to the custard mixture. The citrus brightens the flavor profile, cutting through the richness. It also adds a subtle aroma that’s refreshing. Pair this variation with a light dusting of powdered sugar for a balanced finish. Great for spring or summer gatherings.
Boozy Delight
Stir in a tablespoon of Grand Marnier or Amaretto into the custard before baking. The alcohol adds a warm, aromatic depth that complements the vanilla. Let the alcohol evaporate during baking, leaving behind a subtle flavor. This version is perfect for adult parties or holiday celebrations. Just remember to label it for guests who avoid alcohol.
Vegan Edition
Use a dairy-free cream cheese alternative and coconut cream in place of heavy cream. Replace the vanilla bean paste with plant-based vanilla extract. Ensure the sugar used for caramelization is refined, not raw, to avoid color changes. This version maintains the same texture and flavor while being vegan-friendly. A wonderful option for guests with dietary restrictions.
Storing and Bringing It Back to Life
Fridge Storage
Store the bars in an airtight container in the refrigerator for up to 48 hours. The custard stays fresh and the crust remains firm. When ready to serve, allow the bars to sit at room temperature for 10 minutes to soften the custard slightly. If the sugar crust feels too hard, gently warm the bars under a broiler for a few seconds. This quick fix restores the original texture.
Freezer Friendly
Wrap each bar tightly in plastic wrap and place in a freezer bag. Freeze for up to one month. Thaw overnight in the refrigerator before serving. Reheat under a broiler for 30 seconds to revive the caramelized top. The custard may be slightly denser after freezing, but the flavor remains intact. This method is ideal for meal prep or large gatherings.
Best Reheating Method
Reheating the bars in a microwave can cause uneven heating and a loss of texture. Instead, use a conventional oven set to 300°F (149°C) for 5 minutes, or a broiler for a quick crisp. Add a splash of water to the baking dish before reheating; the steam will help the custard rehydrate. This technique ensures the bars taste as fresh as the first bite. Always check the interior temperature; it should reach 140°F (60°C) for safety.