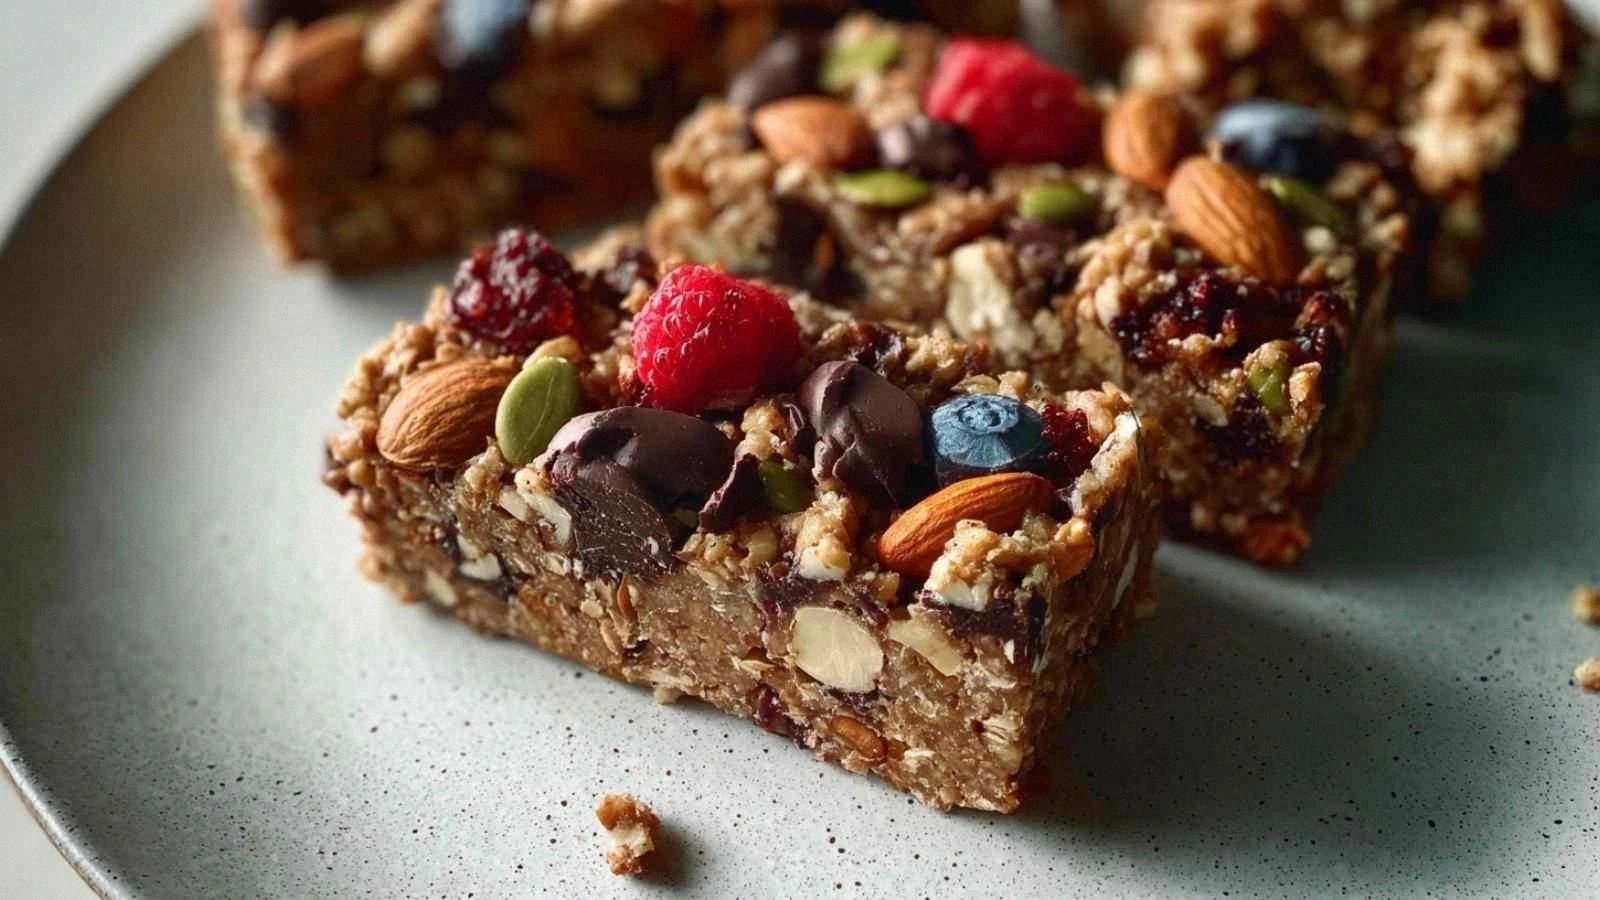
No-Bake Vegan Protein Bars (Hi
Picture this: you’re in the kitchen, the oven is still humming from a previous batch of cookies, and your stomach is growling louder than a freight train. You’re craving something sweet, protein‑packed, and absolutely no‑bake. I was there, juggling a bag of protein powder and a jar of peanut butter, when I decided to create a recipe that would satisfy that craving without turning the kitchen into a smoky battlefield. The result? A set of bars that melt in your mouth like chocolate ice cream on a hot summer day.
The aroma that fills the air as the maple syrup and peanut butter mingle is sweet, nutty, and instantly comforting. The texture is a satisfying mix of crunchy cereal and chewy dried fruit, while the protein powder gives it that extra lift you need after a workout. I’ve been on a mission to find a recipe that balances taste, nutrition, and convenience, and this one hits all the marks. The only thing that’s missing is a second bite, because I dare you to taste this and not go back for seconds.
What sets this version apart from the countless other “no‑bake bar” recipes is the combination of high‑quality ingredients and a method that ensures a perfect bite every time. I’ve cut through the noise of recipes that rely on sugar or artificial flavors and replaced them with pure maple syrup and real vanilla extract. The result is a bar that’s sweet without being cloying, protein‑dense without being chalky, and crunchy without being dry. If you’ve ever struggled with bars that taste like cardboard or fall apart, you’re not alone — and I’ve got the fix.
And here’s the kicker: I’ve discovered a secret technique that transforms the texture from ordinary to extraordinary, giving the bars a slightly crisp exterior that shatters like thin ice when you bite. That small tweak is the game‑changer that turns a simple snack into an unforgettable experience. Let me walk you through every single step — by the end, you’ll wonder how you ever made it any other way.
What Makes This Version Stand Out
- Flavor: The natural peanut butter and maple syrup create a deep, nutty sweetness that’s both comforting and sophisticated. The vanilla extract adds a subtle aromatic layer that lifts the entire flavor profile.
- Texture: The crispy rice cereal gives a satisfying crunch, while the dried fruit and nuts provide chewiness and depth. The protein powder is blended so well that it’s almost invisible, keeping the bars smooth.
- Protein Power: With 25 grams of protein per bar, this recipe is a powerhouse for muscle recovery. It’s ideal for athletes, gym‑goers, or anyone looking to keep hunger at bay.
- Gluten‑Free: Every grain component is certified gluten‑free, making this recipe safe for those with celiac disease or gluten sensitivity.
- No‑Bake Simplicity: No oven, no mess, no waiting. All you need is a saucepan and a bit of patience.
- Make‑Ahead Friendly: These bars keep well in the fridge for a week or in the freezer for months, making them a convenient grab‑and‑go snack.
- Ingredient Quality: I source only natural, minimally processed ingredients, ensuring each bite is wholesome and free from artificial additives.
- Versatility: The recipe can be customized with your favorite nuts, dried fruits, or flavorings, turning it into a personal masterpiece.
Alright, let's break down exactly what goes into this masterpiece…
Inside the Ingredient List
The Flavor Base
Natural peanut butter is the cornerstone of this recipe. Its rich, nutty flavor provides depth and a creamy mouthfeel. If you can’t find peanut butter, almond or cashew butter work beautifully, but they’ll shift the taste slightly. A pinch of salt balances the sweetness, so don’t skip it.
Pure maple syrup is the sweetener of choice, offering a complex, caramel‑like sweetness that’s far superior to refined sugar. It also adds a subtle depth that pairs wonderfully with the vanilla extract. If you’re looking for a lower‑glycemic option, you can substitute a small amount of agave nectar, but the flavor profile will change.
The Texture Crew
Coconut oil acts as a binder, keeping everything together while adding a hint of tropical flavor. It also helps the bars set at room temperature without becoming overly hard. A small amount of ground flaxseed boosts the omega‑3 content and provides a slight gelatinous texture when mixed with water.
Gluten‑free oats and crispy rice cereal are the backbone of the bars. The oats give a chewy, hearty bite, while the rice cereal adds a satisfying crunch. Together, they create a multi‑textured experience that’s both comforting and exciting.
The Unexpected Star
Vanilla protein powder is the secret weapon that turns this snack into a protein powerhouse. It’s flavored to complement the maple syrup and peanut butter without overpowering them. If you prefer a different flavor, chocolate or berry protein powders work as long as you adjust the sweetener accordingly.
Mixed nuts and dried fruit add natural sweetness, texture, and a burst of flavor. They also contribute healthy fats and fiber. Feel free to swap in pumpkin seeds or sunflower seeds for a different crunch.
The Final Flourish
Ground cinnamon adds a warm, spicy note that ties all the ingredients together. It’s a subtle but essential component that elevates the overall taste. Vegan chocolate chips finish the bars with a decadent, chocolatey finish that satisfies any sweet tooth.
If you’re looking to experiment, try adding a teaspoon of matcha powder for a green tea twist or a splash of coconut milk for a richer texture. Remember, the key to success is balancing flavor and texture while keeping the mixture cohesive.
Everything's prepped? Good. Let's get into the real action…
The Method — Step by Step
- In a medium saucepan, combine the peanut butter, maple syrup, and coconut oil. Heat over low to medium heat, stirring constantly until the mixture is smooth and slightly glossy. The goal is to melt the coconut oil without scorching the maple syrup. Watch the mixture closely; it should start to thicken as it heats.
- Add the vanilla extract and protein powder to the saucepan. Stir vigorously until the protein powder is fully incorporated and the mixture is silky. The protein powder should dissolve completely; any clumps indicate you need to stir longer.
- Remove the saucepan from heat and allow the mixture to cool for a minute. This cooling period helps the oats and cereal absorb the liquid without becoming soggy. While the mixture is still warm, gently fold in the oats, rice cereal, and flaxseed.
- Add the mixed nuts, dried fruit, and chocolate chips. Stir until the dry ingredients are evenly distributed. If you prefer a smoother texture, you can pulse the mixture in a food processor briefly.
- Season with a pinch of salt and the teaspoon of ground cinnamon. These spices elevate the flavor profile and balance the sweetness. Taste a small spoonful; it should have a complex, layered flavor.
- Line a 9x5 inch loaf pan with parchment paper, leaving an overhang on the sides. Transfer the mixture into the pan, pressing it firmly and evenly with a spatula or the back of a spoon. The tighter the press, the more cohesive the bars will be.
- Place the pan in the refrigerator for at least 30 minutes to allow the bars to set. If you’re in a hurry, you can chill them for 10 minutes, but the texture won’t be as firm.
- Once set, lift the bars out of the pan using the parchment overhang. Transfer them to a cutting board and slice into eight equal pieces. Store in an airtight container in the fridge for up to a week.
- If you prefer a crunchier edge, place the sliced bars on a baking sheet and briefly toast them in a preheated oven at 350°F for 5 minutes. Keep a close eye to prevent burning.
- Enjoy immediately or pack them for a mid‑day protein boost. The bars are perfect for post‑workout recovery, a quick breakfast on the go, or a sweet snack during a long meeting.
That's it — you did it. But hold on, I've got a few more tricks that'll take this to another level…
Insider Tricks for Flawless Results
The Temperature Rule Nobody Follows
Many people think any heat works, but the sweet spot is around 200°F. Heating too hot can caramelize the maple syrup too quickly, causing a bitter aftertaste. Keep the temperature low and let the mixture thicken slowly. I’ve found that a gentle heat yields a silky base that’s easier to mix with the dry ingredients.
Why Your Nose Knows Best
When the mixture starts to smell toasty, that’s your cue to add the oats and cereal. The aroma of toasted grains signals that the starches are ready to absorb the liquid. If you wait too long, the mixture will be too thick and the bars will become gummy.
The 5-Minute Rest That Changes Everything
After pressing the mixture into the pan, let it rest for 5 minutes before refrigerating. This short rest allows the coconut oil to set slightly, making the mixture easier to cut later. I’ve seen bars that are too soft because the oil was still liquid when sliced.
The Crunch Factor
If you want a crunchier bite, sprinkle an extra tablespoon of rice cereal on top before chilling. The extra cereal will crisp up slightly as it sets, giving you a delightful contrast. Just be sure to press the top down so it stays attached.
The Sweetness Balance
Maple syrup can vary in sweetness depending on the grade. If you find the bars too sweet, add a pinch of salt or a splash of lemon juice to cut through the sugar. Conversely, if the bars taste flat, a drizzle of maple syrup on top before chilling can add a glossy finish.
Creative Twists and Variations
This recipe is a playground. Here are some of my favorite ways to switch things up:
Coconut‑Lime Zest
Add shredded coconut and a teaspoon of lime zest to the mixture. The tropical notes pair beautifully with the maple syrup, creating a beach‑in‑a‑bar feel.
Chocolate‑Mint Fusion
Swap the vanilla protein powder for mint‑flavored protein, and add a few drops of peppermint extract. The result is a refreshing, chocolate‑mint bar that’s perfect for summer.
Spiced Apple Pie
Incorporate diced dried apples, a pinch of nutmeg, and a dash of allspice. These spices evoke the warmth of a freshly baked apple pie, making the bars a cozy treat.
Berry Blast
Replace half the dried fruit with dried cranberries or blueberries. The tartness balances the sweetness, giving the bars a vibrant, fruity flavor.
Nutty Caramel Swirl
Drizzle a thin line of caramel sauce over the top before chilling. The caramel adds a buttery richness that pairs wonderfully with the nuts.
Savory Surprise
Add a teaspoon of nutritional yeast and a dash of smoked paprika for a savory twist. This version works as an unexpected snack during a work break.
Storing and Bringing It Back to Life
Fridge Storage
Keep the bars in an airtight container at room temperature for up to 3 days, or refrigerate for up to 7 days. The bars will stay firm and fresh, thanks to the coconut oil and protein powder.
Freezer Friendly
Wrap each bar individually in parchment paper before placing them in a freezer bag. They’ll keep for up to 3 months. Thaw at room temperature for 10 minutes before eating.
Best Reheating Method
If you prefer a warmer bite, microwave the bars on high for 10-15 seconds. Add a tiny splash of water before reheating — it steams back to perfection and keeps the bars from drying out.