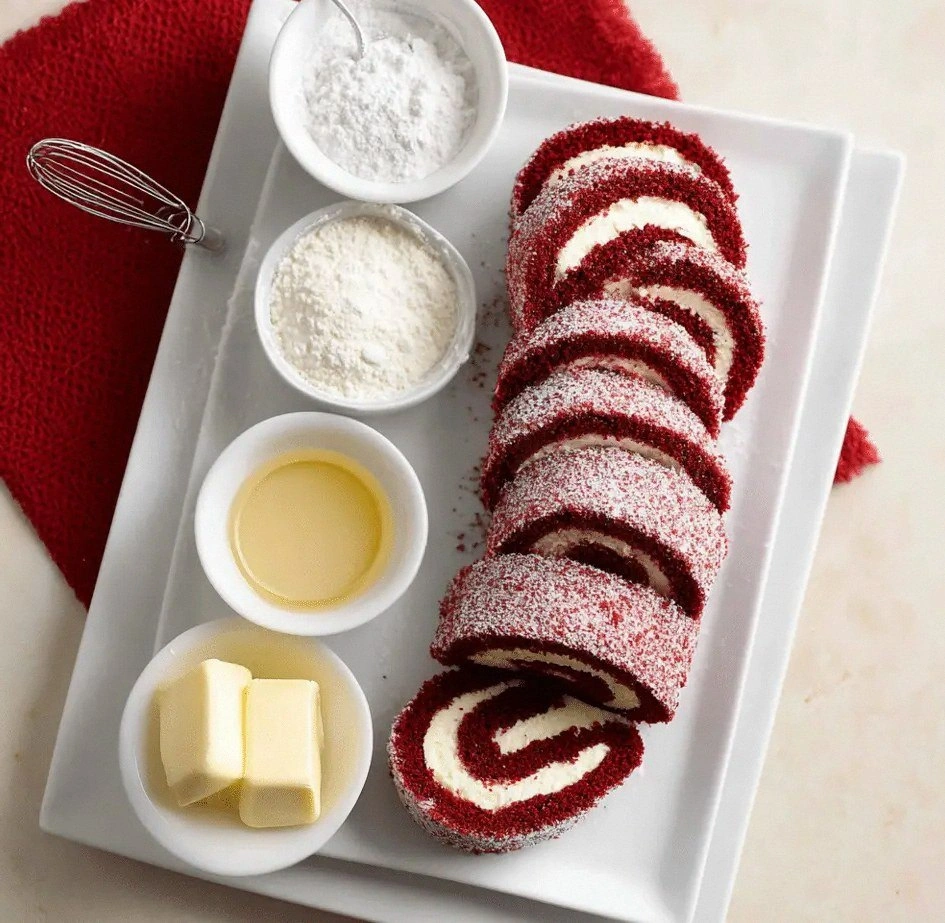
Red Velvet Cake Roll
Picture this: a frantic kitchen, a midnight craving, and a friend who dared me to bake a cake that would make everyone stop in their tracks. I had a half‑sized cake pan, a handful of flour, and a dream that turned into a disaster when the batter turned into a sticky, crimson sludge. The smell of cocoa and vanilla mingled with the faint hint of red food coloring, and I was left staring at a wall of batter that looked like it could have been a crime scene. But then I remembered that a good cake is not just about the ingredients; it’s about the technique, the patience, and the willingness to experiment. This is the moment where the ordinary transforms into the extraordinary.
From the first whisking motion to the final roll, every step in this recipe is a chance to create a masterpiece that feels both indulgent and surprisingly light. The batter should be silky, almost like a smooth river of velvet, and the finished roll should crackle with a faint, buttery snap when sliced. The aroma that fills your kitchen as the cake bakes is a warm, sweet invitation that makes the whole house feel like a bakery. I swear the scent alone can bring back childhood memories of holiday treats and Sunday mornings. And if you’re wondering what makes this version stand out, let me tell you: it’s the blend of classic ingredients and a few secret twists that elevate the cake from good to unforgettable.
What I discovered after countless attempts was that the key to a perfect red velvet roll lies in the balance of acidity, color, and the delicate handling of the batter. A splash of buttermilk gives the cake a tender crumb that practically melts in your mouth, while a touch of vinegar or lemon juice boosts the cocoa flavor and enhances the red hue. The filling, a luscious cream cheese frosting, is the secret weapon that turns each bite into a creamy, tangy explosion. I dare you to taste this and not go back for seconds – that’s the power of a well‑crafted roll. And if you’re ready, let me walk you through every single step – by the end, you’ll wonder how you ever made it any other way.
What Makes This Version Stand Out
- Color: The deep crimson is achieved with natural food coloring and a hint of vinegar, giving the cake a vibrant, photo‑ready look that’s hard to beat.
- Taste: The subtle cocoa undertone and a whisper of citrus create a complex flavor profile that feels both familiar and exciting.
- Texture: The batter is whipped to a silky consistency, resulting in a cake that is moist yet not gummy, with a crumb that’s light as a feather.
- Filling: A decadent cream cheese frosting that balances sweetness with a slight tang, making every slice a layered experience.
- Make‑ahead: The roll can be prepared a day in advance, wrapped tightly, and kept chilled, allowing the flavors to meld beautifully.
- Presentation: The roll can be sliced into neat, elegant portions that look as good on a plate as they do in the oven.
- Versatility: The recipe can be adapted for dietary needs, from gluten‑free to low‑fat variations, without compromising flavor.
- Audience: Whether you’re a seasoned baker or a novice, the method is straightforward, yet the results are impressively professional.
Alright, let’s break down exactly what goes into this masterpiece…
Inside the Ingredient List
The Flavor Base
At the heart of any cake lies its flavor base, and for a red velvet roll, this is a harmonious blend of flour, cocoa, sugar, and a pinch of baking soda that reacts with the acidic buttermilk. The cocoa powder is the soul of the cake, giving it that deep, chocolatey undertone that pairs beautifully with the sweet vanilla. If you’re worried about the bitterness that sometimes comes with cocoa, a small amount of brown sugar can round out the flavor profile without overpowering the delicate balance. When you whisk this dry mix, you’re not just preparing for the batter; you’re setting the stage for a cake that will rise, crackle, and ultimately roll into perfection.
The Texture Crew
Texture is everything in baking, and the texture crew includes the eggs, buttermilk, oil, and the critical but often overlooked buttermilk. Eggs provide structure and lift, while the buttermilk’s acidity tenderizes the gluten, giving the cake a tender crumb. Vegetable oil keeps the cake moist and adds a subtle richness that balances the acidity. If you’re vegan, a flaxseed‑egg substitute or a commercial egg replacer will work, but the moisture level may differ slightly. Skipping the oil will make the cake drier and less forgiving when rolling.
The Unexpected Star
Red food coloring is the unexpected star that transforms the batter into a vivid, Instagram‑ready hue. Natural beet juice or pomegranate powder can be used for a healthier alternative, but the color intensity will vary. A splash of vinegar or lemon juice is essential; it reacts with the baking soda to create the lift and also enhances the color. Some bakers add a teaspoon of coffee to deepen the chocolate flavor, but it’s optional. If you prefer a more subdued color, reduce the amount of food coloring and let the natural red of the cocoa shine through.
The Final Flourish
The final flourish is the cream cheese frosting that envelopes the cake roll. Cream cheese provides a tangy counterpoint to the sweet batter, while butter adds a silky texture. Powdered sugar gives the frosting its sweetness and thickness, and vanilla extracts its aroma. A pinch of salt balances the sweetness and brings out the flavors. For a lighter frosting, you can substitute part of the powdered sugar with icing sugar or use a low‑fat cream cheese. If you’re looking for a dairy‑free option, a coconut cream cheese works beautifully, though the texture will be slightly denser.
Everything's prepped? Good. Let's get into the real action…
The Method — Step by Step
- Preheat and Prep: Heat your oven to 350°F (175°C) and line a 15x10-inch jelly roll pan with parchment paper. The paper should extend a few inches beyond the pan to make rolling easier later. Let me tell you, the trick is to ensure the paper is snug but not overly tight; otherwise, you’ll have to cut the roll into uneven slices. This step might feel mundane, but it’s the foundation for a flawless roll.
- Whisk Dry: In a large bowl, sift together 2 cups all‑purpose flour, 0.75 cups cocoa powder, 2 cups granulated sugar, 2 tsp baking powder, 1 tsp baking soda, and 0.5 tsp salt. Sifting eliminates lumps and ensures even distribution of leavening agents. As you whisk, you’ll hear a faint crackle that signals the batter will rise beautifully. If you’re feeling adventurous, you can add a teaspoon of instant coffee to deepen the chocolate flavor.
- Combine Wet: In a separate bowl, beat 4 large eggs with 1 cup buttermilk, 0.5 cup vegetable oil, 2 tsp vanilla extract, and 2 tbsp red food coloring. The mixture should look smooth and slightly glossy. The red food coloring is the secret to that vibrant hue; if you add it too early, it may bleed into the dry mix and create uneven spots. Pour the wet mixture over the dry ingredients and fold gently until just combined; over‑mixing can cause the cake to be tough.
- Add Acid: Stir in 2 tbsp vinegar (white or apple cider) or 1 tsp lemon juice. The acid reacts with the baking soda, creating tiny bubbles that lift the batter and intensify the color. This is a critical step; skipping it will result in a denser cake that won’t roll as smoothly. The batter will look a bit thicker, but that’s normal. Let it rest for 5 minutes before proceeding to let the reaction settle.
- Pour and Level: Pour the batter into the prepared pan, spreading it evenly with a spatula. Tap the pan gently on the counter to release any air pockets. The batter should be level; if it’s too thick, the cake may not roll properly. This is the moment where patience pays off; a well‑level batter means a smoother roll later.
- Bake: Bake for 25–30 minutes, or until a toothpick inserted near the center comes out clean. The edges should start pulling away from the parchment. The aroma that fills the kitchen is a warm, sweet invitation that makes the whole house feel like a bakery. Watch out: if you open the oven too early, the cake may collapse or dry out. Keep the oven door closed and let the batter bake to perfection.
- Cool on a Wire Rack: Remove the cake from the oven and let it cool in the pan for 5 minutes. Then, while it's still warm, carefully lift the parchment paper and roll the cake onto a clean towel, starting from the short end. The towel should be lightly dusted with powdered sugar to prevent sticking. This step is where the magic happens: the warm cake is pliable, and the towel helps guide it into a tight roll. Don’t rush; let the cake cool just enough that it’s pliable but not hard.
- Apply Frosting: While the cake is still slightly warm, spread a generous layer of cream cheese frosting over the entire surface. The warmth of the cake helps the frosting spread smoothly, creating a uniform coating. If you’re using a lighter frosting, apply a thin first layer and then a thicker second layer for balance. This is the moment of truth; the frosting should look glossy and even.
- Wrap and Chill: Wrap the rolled cake tightly in plastic wrap and chill for at least 2 hours, or overnight if possible. The chilling process allows the frosting to set and the flavors to meld. When you’re ready to serve, unwrap and slice into even portions. Each slice should reveal a beautiful spiral of crimson and ivory, with a hint of frosting on the outside. This final step turns the cake into a showstopper that’s ready to impress.
That's it — you did it. But hold on, I've got a few more tricks that'll take this to another level…
Insider Tricks for Flawless Results
The Temperature Rule Nobody Follows
Many bakers keep their oven at a fixed temperature, but the secret to a perfect roll is to let the oven temperature rise gradually. Preheat for 10 minutes and then lower the temperature to 330°F (165°C) before placing the batter. This slow rise prevents the batter from cracking and ensures a uniform rise. If you’re using a convection oven, reduce the temperature by 25°F to avoid over‑browning.
Why Your Nose Knows Best
Trust your nose. When the cake is done, it should smell like warm vanilla and cocoa, not like raw flour. If the scent is too sweet, the cake might be overbaked; if it’s too bland, it needs a few more minutes. A quick sniff test can save you from a dry cake.
The 5‑Minute Rest That Changes Everything
After removing the cake from the oven, let it rest in the pan for exactly five minutes before rolling. This brief rest allows the batter to set enough to hold its shape but still remain pliable. Skipping this step often results in a cake that cracks when you try to roll it.
Rolling on a Towel, Not a Plate
Using a clean, dry towel to roll the cake gives you better control and prevents sticking. Lightly dust the towel with powdered sugar, and as you roll, gently press the cake into a tight spiral. If you use a plate, the frosting may stick, causing uneven layers.
Keep It Moist: The Water Trick
When you’re ready to serve, lightly mist the cake with water before slicing. This creates a subtle steam that keeps the cake moist and the frosting from drying out. A quick spray of water is all it takes to revive a day‑old roll.
Creative Twists and Variations
This recipe is a playground. Here are some of my favorite ways to switch things up:
Chocolate Swirl
Swirl a tablespoon of melted dark chocolate into the batter before baking for a dramatic chocolate ribbon effect. The chocolate adds depth and pairs nicely with the cream cheese frosting.
Minty Surprise
Add a teaspoon of peppermint extract to the batter for a cool, refreshing twist. The mint pairs beautifully with the rich cake and gives a subtle aftertaste that lingers.
Almond Crunch
Fold in 1/4 cup toasted almond slivers into the frosting for a nutty crunch that contrasts the silky texture. The almonds also add a savory note that balances the sweetness.
Berry Burst
Layer fresh raspberries or blueberries on top of the frosting before rolling. The fruit’s tartness cuts through the richness and adds a burst of color.
Spiced Velvet
Add a pinch of cinnamon or nutmeg to the batter for a warm, spiced undertone. The spices deepen the flavor profile and make the cake perfect for fall gatherings.
Low‑Fat Lightness
Replace half the butter in the frosting with Greek yogurt and reduce the powdered sugar by 25%. The result is a lighter, tangier frosting that still delivers on flavor.
Storing and Bringing It Back to Life
Fridge Storage
Wrap the cooled roll tightly in plastic wrap and store it in the refrigerator for up to 3 days. The cold environment keeps the frosting firm and the cake from drying out. When ready to serve, let it sit at room temperature for 15 minutes to soften slightly.
Freezer Friendly
For longer storage, place the wrapped roll in a freezer‑safe zip‑lock bag and freeze for up to 2 weeks. Thaw overnight in the refrigerator, then bring to room temperature before slicing. The texture may be slightly denser, but the flavor remains intact.
Best Reheating Method
To revive a chilled or frozen roll, wrap it in foil and warm it in a 300°F (150°C) oven for 10 minutes. Alternatively, let it sit on a warm plate for 5 minutes. A tiny splash of water before reheating steams the cake back to a moist, airy texture.