
Lemon Bars
I still remember the first time I made lemon bars. It was a sunny Saturday afternoon, and I was determined to create a dessert that would impress my family and friends. After some trial and error, I finally perfected the recipe, and it has been a favorite ever since. These lemon bars are not only delicious, but they are also gluten-free, making them accessible to everyone.
The key to making great lemon bars is to use high-quality ingredients and to not be afraid to experiment with different flavors. In this recipe, I will guide you through the process of making the perfect lemon bars, from the crust to the filling. Whether you are a seasoned baker or a beginner, this recipe is easy to follow and requires minimal ingredients.
One of the things I love about lemon bars is their versatility. They are perfect for any occasion, whether it's a birthday party, a holiday gathering, or just a simple dessert to enjoy with your family. They are also great for potlucks and picnics, as they are easy to transport and can be served at room temperature.
In addition to their delicious taste, lemon bars are also relatively easy to make. The crust is made with a simple mixture of gluten-free flours, and the filling is made with freshly squeezed lemon juice, sugar, and eggs. The hardest part of the recipe is probably the waiting time, as the bars need to cool completely before they can be served.
Despite the waiting time, the end result is well worth it. The lemon bars are tangy and sweet, with a perfect balance of flavors. They are also very moist, thanks to the addition of lemon juice and eggs. Whether you are a fan of lemon desserts or just looking for a new recipe to try, these lemon bars are sure to become a favorite.
Why You’ll Love This Recipe
- These lemon bars are easy to make and require minimal ingredients.
- They are perfect for any occasion, whether it's a birthday party, a holiday gathering, or just a simple dessert to enjoy with your family.
- The lemon bars are gluten-free, making them accessible to everyone.
- They are tangy and sweet, with a perfect balance of flavors.
- The bars are very moist, thanks to the addition of lemon juice and eggs.
- They are great for potlucks and picnics, as they are easy to transport and can be served at room temperature.
Why This Recipe Works
The reason why these lemon bars work so well is because of the combination of ingredients and the technique used to make them. The gluten-free flours used in the crust provide a delicate and tender texture, while the lemon juice and sugar in the filling add a nice balance of flavors. The eggs help to bind the filling together and add moisture to the bars.
Another important aspect of this recipe is the resting time. After the bars are baked, they need to cool completely before they can be served. This allows the filling to set and the crust to firm up, making the bars easier to cut and serve. It also helps to prevent the bars from becoming too soggy or falling apart.
The technique used to make the lemon bars is also important. The crust is made by mixing together the gluten-free flours, sugar, and butter, and then pressing the mixture into a baking dish. The filling is made by whisking together the lemon juice, sugar, eggs, and flour, and then pouring the mixture over the crust. The bars are then baked until the filling is set and the crust is golden brown.
Overall, the combination of ingredients and technique used in this recipe makes it a successful and delicious dessert. The lemon bars are perfect for anyone looking for a gluten-free dessert option that is easy to make and tastes great.
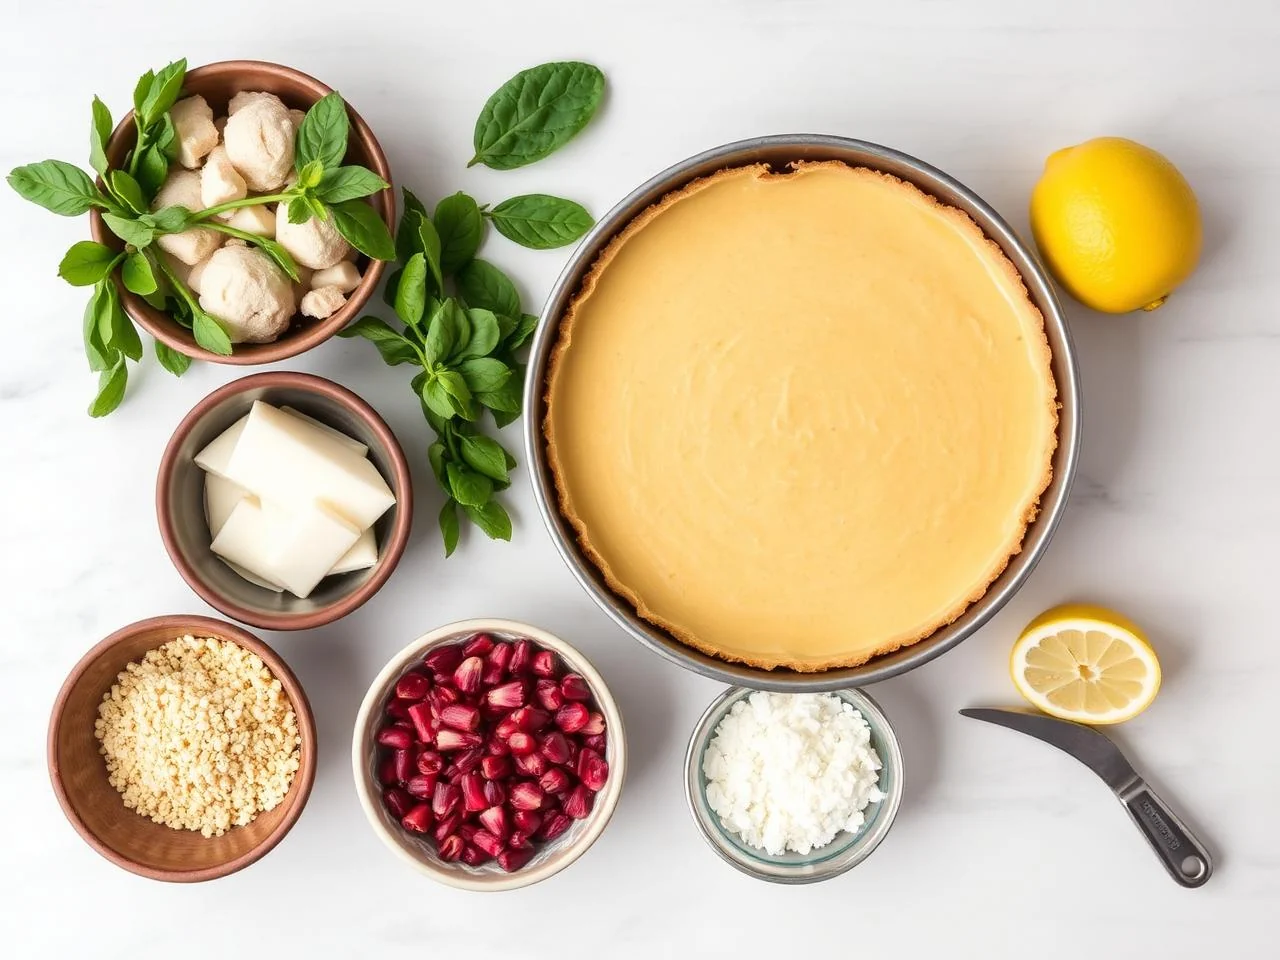
Ingredients You’ll Need
To make these delicious lemon bars, you will need a few simple ingredients. The crust is made with a mixture of gluten-free flours, sugar, and butter, while the filling is made with freshly squeezed lemon juice, sugar, eggs, and flour. You will also need some salt and vanilla extract to add flavor to the bars.
When shopping for ingredients, make sure to choose high-quality gluten-free flours that are fresh and have not been contaminated with gluten. You can find these flours at most health food stores or online. Also, be sure to use fresh lemons and real butter for the best flavor.
- 1 1/2 cups gluten-free all-purpose flourMake sure to choose a high-quality gluten-free flour that is fresh and has not been contaminated with gluten. You can find these flours at most health food stores or online.
- 1/2 cup granulated sugarUse real sugar for the best flavor. You can also use other types of sugar, such as brown sugar or turbinado sugar, but granulated sugar works best for this recipe.
- 1/4 cup unsalted butter, meltedUse real butter for the best flavor. You can also use other types of fat, such as coconut oil or avocado oil, but butter works best for this recipe.
- 2 large eggsUse fresh eggs for the best flavor and texture. Make sure to whisk the eggs well before adding them to the filling.
- 2 tablespoons freshly squeezed lemon juiceUse fresh lemons for the best flavor. Make sure to squeeze the lemons just before using them, as the juice can lose its flavor and aroma if it sits for too long.
- 1 teaspoon vanilla extractUse real vanilla extract for the best flavor. You can also use other types of extract, such as almond extract or coconut extract, but vanilla works best for this recipe.
- 1/4 teaspoon saltUse a high-quality salt, such as sea salt or kosher salt, for the best flavor. You can also use other types of salt, such as table salt or Himalayan pink salt, but sea salt works best for this recipe.
- 1 cup confectioners' sugarUse real confectioners' sugar for the best flavor and texture. You can also use other types of sugar, such as granulated sugar or brown sugar, but confectioners' sugar works best for this recipe.
- 1/2 cup chopped fresh lemon zestUse fresh lemons for the best flavor and texture. Make sure to chop the zest finely before adding it to the filling.
- 1/4 cup chopped pecans or walnutsUse chopped nuts for added texture and flavor. You can also use other types of nuts, such as almonds or hazelnuts, but pecans and walnuts work best for this recipe.
Equipment You’ll Need
How to Make Lemon Bars
- 1Preheat the oven to 350°F (180°C). Make sure to use an oven thermometer to ensure the oven is at the correct temperature.
- 2In a large mixing bowl, whisk together the gluten-free flour, granulated sugar, and salt. Make sure to whisk well to combine.
- 3Add the melted butter to the bowl and mix until the crust is evenly moistened. Make sure to mix well to combine.
- 4Press the crust mixture into a 9x9 inch baking dish. Make sure to press the crust evenly and firmly into the dish.
- 5Bake the crust for 20-25 minutes, or until it is lightly golden brown. Make sure to check the crust after 20 minutes and every 5 minutes thereafter to prevent overcooking.
- 6While the crust is baking, prepare the filling. In a large mixing bowl, whisk together the eggs, lemon juice, and vanilla extract. Make sure to whisk well to combine.
- 7Add the confectioners' sugar to the bowl and mix until the filling is smooth and creamy. Make sure to mix well to combine.
- 8Stir in the chopped lemon zest and nuts. Make sure to stir well to combine.
- 9When the crust is ready, remove it from the oven and let it cool for 5 minutes. Make sure to let the crust cool slightly before adding the filling.
- 10Pour the filling over the crust and smooth the top. Make sure to smooth the filling evenly and firmly into the dish.
- 11Bake the bars for 25-30 minutes, or until the filling is set and the top is lightly golden brown. Make sure to check the bars after 25 minutes and every 5 minutes thereafter to prevent overcooking.
- 12Remove the bars from the oven and let them cool completely in the dish. Make sure to let the bars cool completely before cutting and serving.
- 13Once the bars are cool, cut them into squares and serve. Make sure to cut the bars evenly and firmly into the dish.
Expert Tips
- Make sure to use high-quality gluten-free flours that are fresh and have not been contaminated with gluten.
- Use real butter and sugar for the best flavor.
- Don't overmix the crust or filling, as this can cause the bars to become tough or dense.
- Make sure to let the bars cool completely before cutting and serving, as this will help them to set and become easier to cut.
- If you want a more intense lemon flavor, you can add more lemon juice or zest to the filling.
- You can also add other ingredients to the filling, such as chopped nuts or chocolate chips, to give the bars more flavor and texture.
- To make the bars more stable and easier to cut, you can refrigerate them for 30 minutes before serving.
- You can also freeze the bars for up to 2 months and thaw them at room temperature when you're ready to serve them.
Common Mistakes to Avoid
- Using low-quality gluten-free flours that are stale or contaminated with gluten.
- Overmixing the crust or filling, which can cause the bars to become tough or dense.
- Not letting the bars cool completely before cutting and serving, which can cause them to fall apart or become difficult to cut.
- Not using enough lemon juice or zest, which can result in a bland or uninspiring flavor.
- Adding too many ingredients to the filling, which can cause the bars to become overly sweet or dense.
- Not refrigerating the bars before serving, which can cause them to become unstable or difficult to cut.
Variations and Substitutions
- Add chopped nuts or chocolate chips to the filling for added texture and flavor.
- Use different types of citrus juice, such as lime or orange, for a unique flavor.
- Add a sprinkle of powdered sugar on top of the bars for a decorative touch.
- Use a different type of flour, such as almond or coconut flour, for a unique texture and flavor.
- Add a layer of jam or preserves on top of the bars for a sweet and tangy flavor.
- Use a different type of sugar, such as honey or maple syrup, for a unique flavor and texture.
- Add a sprinkle of sea salt on top of the bars for a salty and sweet flavor.
What to Serve With Lemon Bars
These lemon bars are perfect for serving at any occasion, whether it's a birthday party, a holiday gathering, or just a simple dessert to enjoy with your family. They are also great for potlucks and picnics, as they are easy to transport and can be served at room temperature.
You can serve the bars on their own, or with a scoop of vanilla ice cream or a dollop of whipped cream. You can also serve them with a side of fresh fruit, such as strawberries or blueberries, for a light and refreshing dessert.
Make-Ahead, Storage, Freezing and Reheating
These lemon bars can be stored at room temperature for up to 3 days, or in the refrigerator for up to 5 days. You can also freeze them for up to 2 months and thaw them at room temperature when you're ready to serve them.
To freeze the bars, simply place them in a single layer in a freezer-safe bag or container and store them in the freezer. When you're ready to serve them, simply thaw them at room temperature or in the refrigerator.
To make the bars more stable and easier to cut, you can refrigerate them for 30 minutes before serving. You can also freeze them for a few hours to make them more firm and easier to cut.
When serving the bars, make sure to let them come to room temperature before serving. This will help them to soften and become easier to cut. You can also serve them chilled, straight from the refrigerator, for a firmer and more refreshing texture.
Frequently Asked Questions
What type of gluten-free flour should I use for this recipe?
You can use any type of gluten-free flour that you prefer, but a blend of rice flour, tapioca starch, and xanthan gum works well. Make sure to choose a high-quality flour that is fresh and has not been contaminated with gluten.
Can I use other types of sugar instead of granulated sugar?
Yes, you can use other types of sugar, such as brown sugar or turbinado sugar, but granulated sugar works best for this recipe.
How do I know when the crust is ready?
The crust is ready when it is lightly golden brown and firm to the touch. Make sure to check the crust after 20 minutes and every 5 minutes thereafter to prevent overcooking.
Can I add other ingredients to the filling?
Yes, you can add other ingredients to the filling, such as chopped nuts or chocolate chips, to give the bars more flavor and texture. Just be sure not to add too many ingredients, as this can cause the bars to become overly sweet or dense.
How do I store the bars?
You can store the bars at room temperature for up to 3 days, or in the refrigerator for up to 5 days. You can also freeze them for up to 2 months and thaw them at room temperature when you're ready to serve them.
Can I make the bars ahead of time?
Yes, you can make the bars ahead of time and store them in the refrigerator or freezer until you're ready to serve them. Just be sure to let them come to room temperature before serving.
Can I use a different type of citrus juice instead of lemon juice?
Yes, you can use other types of citrus juice, such as lime or orange, for a unique flavor. Just be sure to adjust the amount of juice to your taste.
How do I know when the bars are done?
The bars are done when the filling is set and the top is lightly golden brown. Make sure to check the bars after 25 minutes and every 5 minutes thereafter to prevent overcooking.
Ingredients
- 1 1/2 cups gluten-free all-purpose flour
- 1/2 cup granulated sugar
- 1/4 cup unsalted butter, melted
- 2 large eggs
- 2 tablespoons freshly squeezed lemon juice
- 1 teaspoon vanilla extract
- 1/4 teaspoon salt
- 1 cup confectioners' sugar
- 1/2 cup chopped fresh lemon zest
- 1/4 cup chopped pecans or walnuts
Instructions
- Preheat the oven to 350°F (180°C). Make sure to use an oven thermometer to ensure the oven is at the correct temperature.
- In a large mixing bowl, whisk together the gluten-free flour, granulated sugar, and salt. Make sure to whisk well to combine.
- Add the melted butter to the bowl and mix until the crust is evenly moistened. Make sure to mix well to combine.
- Press the crust mixture into a 9x9 inch baking dish. Make sure to press the crust evenly and firmly into the dish.
- Bake the crust for 20-25 minutes, or until it is lightly golden brown. Make sure to check the crust after 20 minutes and every 5 minutes thereafter to prevent overcooking.
- While the crust is baking, prepare the filling. In a large mixing bowl, whisk together the eggs, lemon juice, and vanilla extract. Make sure to whisk well to combine.
- Add the confectioners' sugar to the bowl and mix until the filling is smooth and creamy. Make sure to mix well to combine.
- Stir in the chopped lemon zest and nuts. Make sure to stir well to combine.
- When the crust is ready, remove it from the oven and let it cool for 5 minutes. Make sure to let the crust cool slightly before adding the filling.
- Pour the filling over the crust and smooth the top. Make sure to smooth the filling evenly and firmly into the dish.
- Bake the bars for 25-30 minutes, or until the filling is set and the top is lightly golden brown. Make sure to check the bars after 25 minutes and every 5 minutes thereafter to prevent overcooking.
- Remove the bars from the oven and let them cool completely in the dish. Make sure to let the bars cool completely before cutting and serving.
- Once the bars are cool, cut them into squares and serve. Make sure to cut the bars evenly and firmly into the dish.